Arduino - Sensor de Temperatura y Humedad - Pantalla OLED
En este tutorial, vamos a aprender:
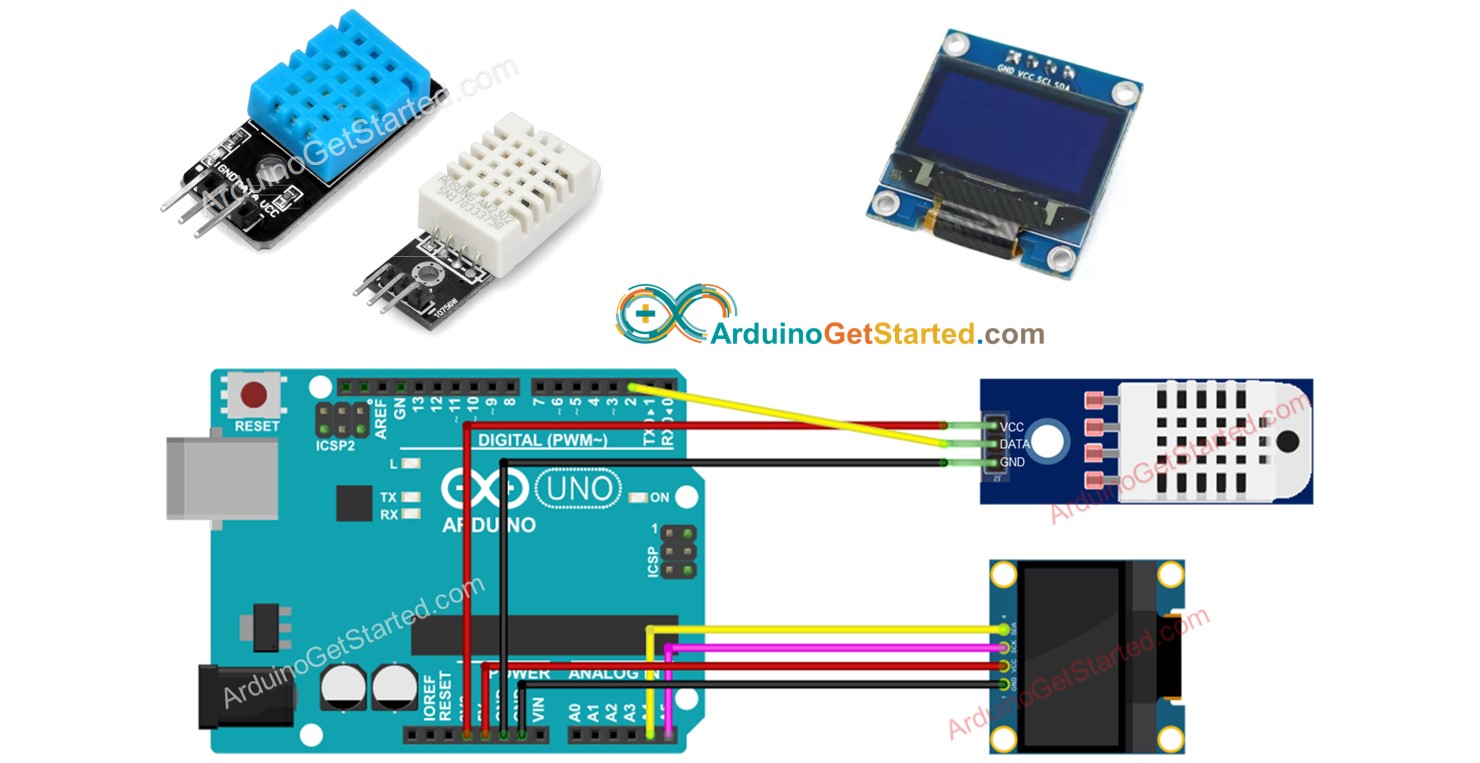
You can use DHT22 sensor instead of DHT11 sensor.
Or you can buy the following kits:
Divulgación: Algunos de los enlaces proporcionados en esta sección son enlaces de afiliado de Amazon. Podemos recibir una comisión por las compras realizadas a través de estos enlaces sin costo adicional para usted. Apreciamos su apoyo.
Si no conoces la pantalla OLED, el sensor de temperatura y humedad DHT11 y DHT22 (disposición de pines, cómo funciona, cómo programarlo ...), aprende sobre ellos en los siguientes tutoriales:
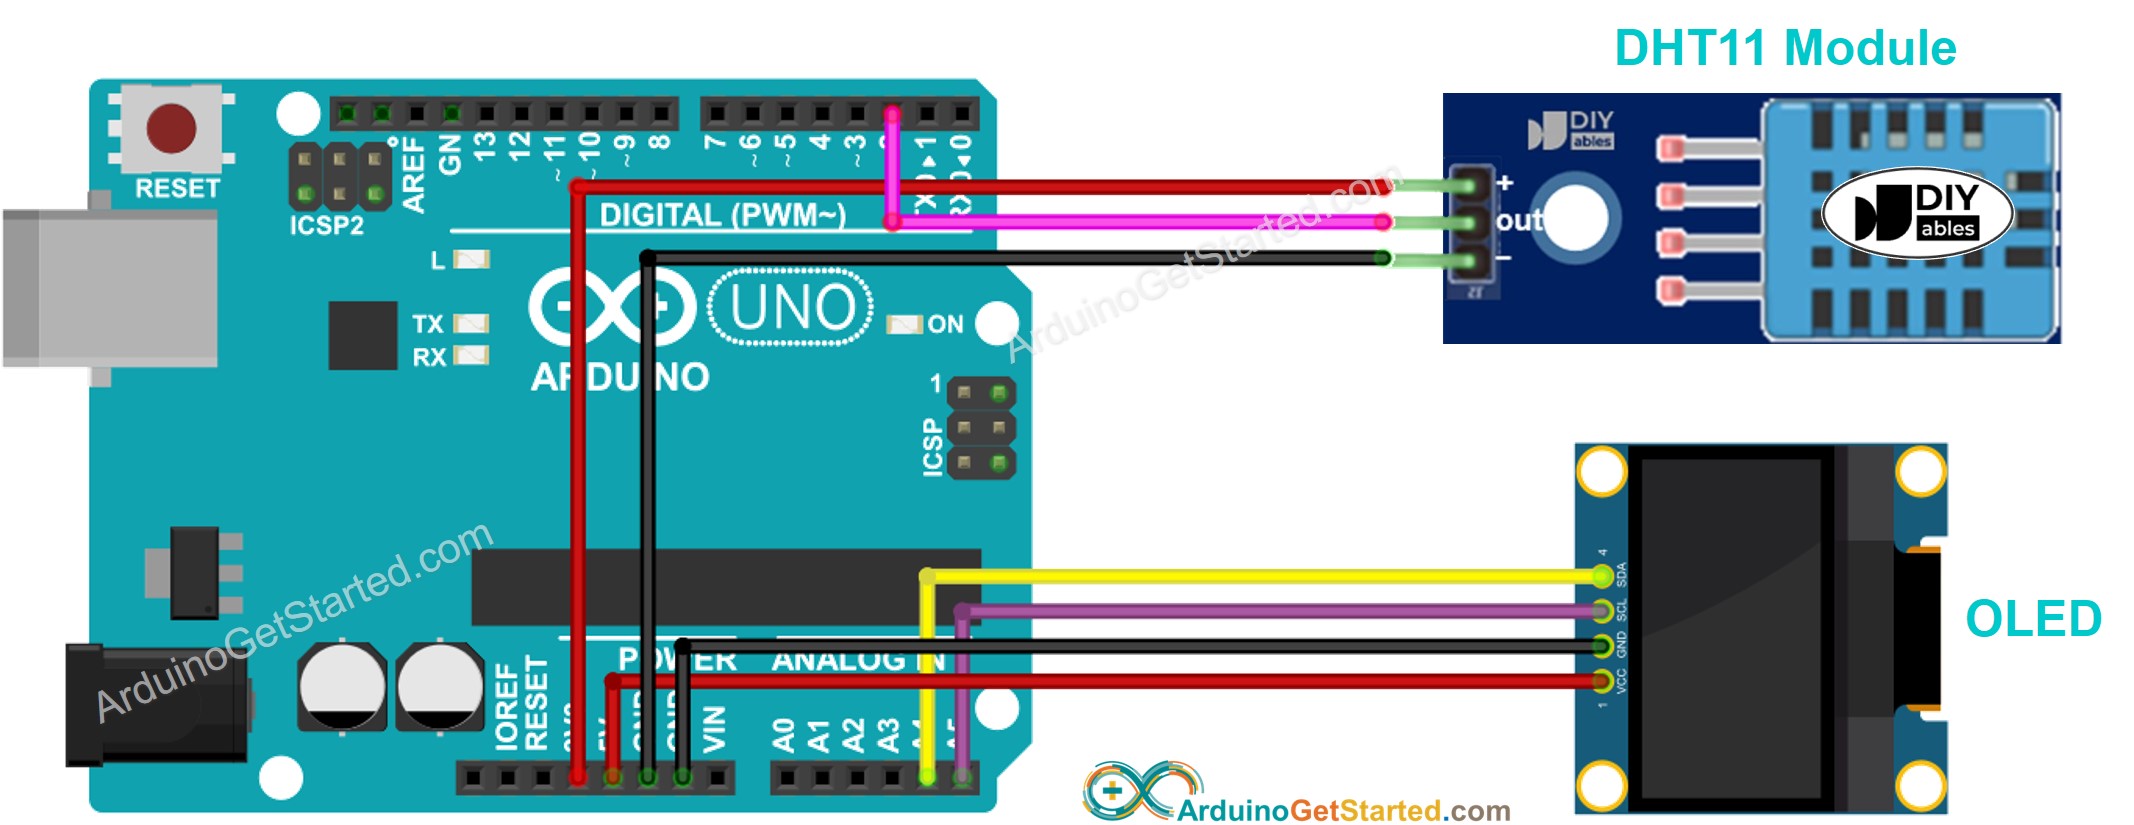
This image is created using Fritzing. Click to enlarge image
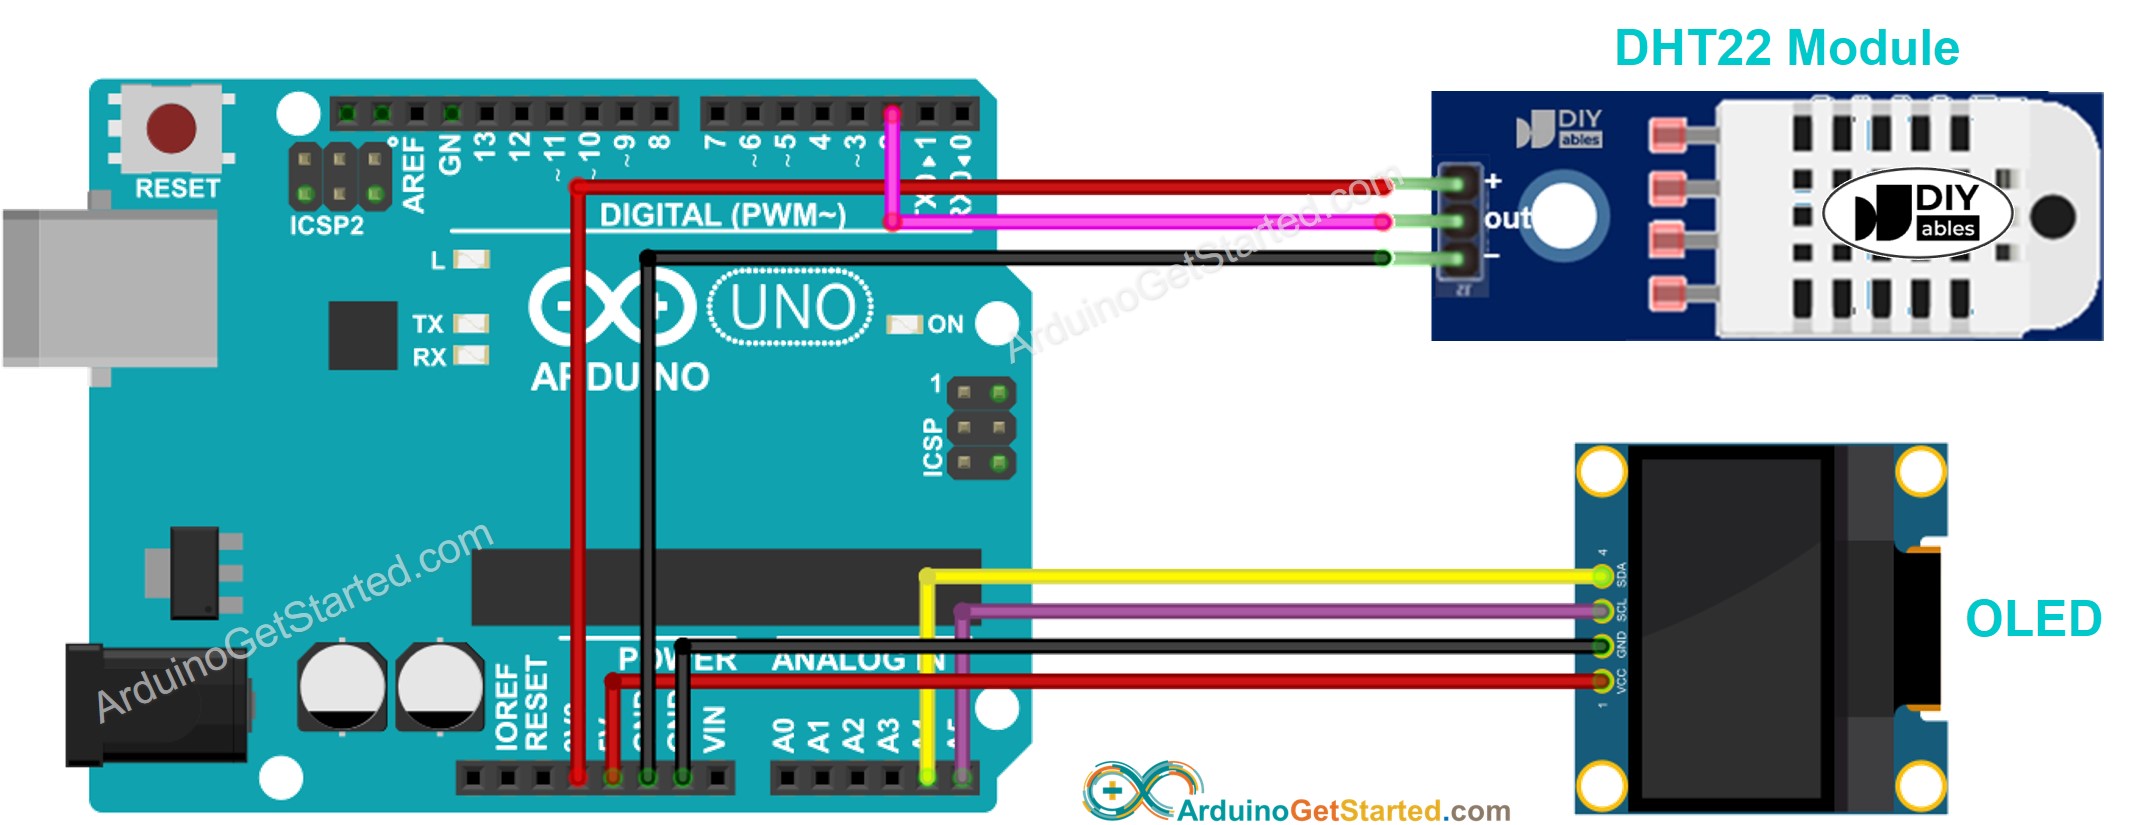
This image is created using Fritzing. Click to enlarge image
#include <Wire.h>
#include <Adafruit_GFX.h>
#include <Adafruit_SSD1306.h>
#include <DHT.h>
#define SCREEN_WIDTH 128
#define SCREEN_HEIGHT 64
#define DHTPIN 2
#define DHTTYPE DHT11
Adafruit_SSD1306 oled(SCREEN_WIDTH, SCREEN_HEIGHT, &Wire, -1);
DHT dht(DHTPIN, DHTTYPE);
String temperature;
String humidity;
void setup() {
Serial.begin(9600);
if (!oled.begin(SSD1306_SWITCHCAPVCC, 0x3C)) {
Serial.println(F("SSD1306 allocation failed"));
while (true)
;
}
delay(2000);
oled.clearDisplay();
oled.setTextSize(3);
oled.setTextColor(WHITE);
oled.setCursor(0, 10);
dht.begin();
temperature.reserve(10);
humidity.reserve(10);
}
void loop() {
float humi = dht.readHumidity();
float tempC = dht.readTemperature();
if (isnan(humi) || isnan(tempC)) {
temperature = "Failed";
humidity = "Failed";
} else {
temperature = String(tempC, 1);
temperature += char(247);
temperature += "C";
humidity = String(humi, 1);
humidity += "%";
}
Serial.print(tempC);
Serial.print("°C | " );
Serial.print(humi);
Serial.println("%");
oledDisplayCenter(temperature, humidity);
}
void oledDisplayCenter(String temperature, String humidity) {
int16_t x1;
int16_t y1;
uint16_t width_T;
uint16_t height_T;
uint16_t width_H;
uint16_t height_H;
oled.getTextBounds(temperature, 0, 0, &x1, &y1, &width_T, &height_T);
oled.getTextBounds(temperature, 0, 0, &x1, &y1, &width_H, &height_H);
oled.clearDisplay();
oled.setCursor((SCREEN_WIDTH - width_T) / 2, SCREEN_HEIGHT / 2 - height_T - 5);
oled.println(temperature);
oled.setCursor((SCREEN_WIDTH - width_H) / 2, SCREEN_HEIGHT / 2 + 5);
oled.println(humidity);
oled.display();
}
Abre el IDE de Arduino en tu PC.
Navega al icono Bibliotecas en la barra izquierda del IDE de Arduino.
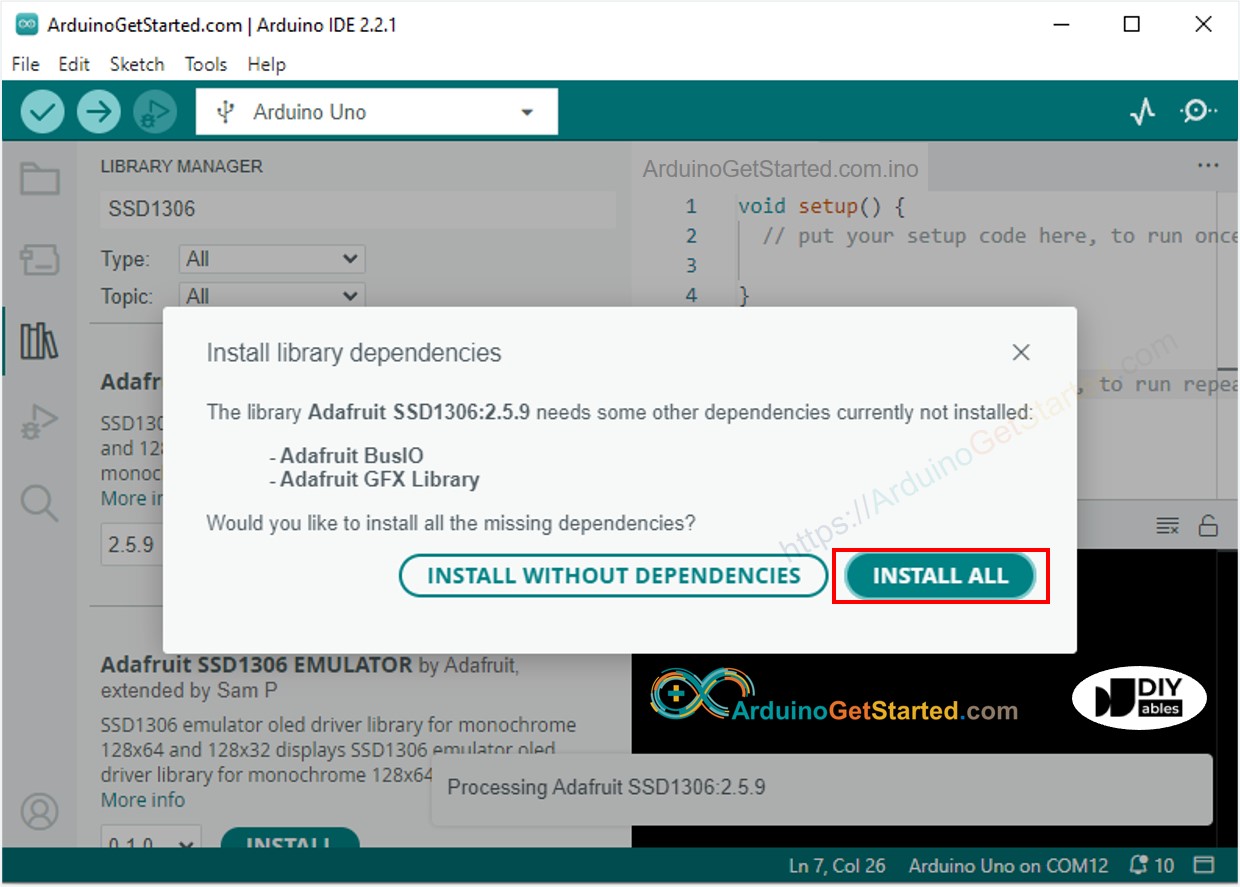
Busca “SSD1306”, luego encuentra la biblioteca SSD1306 de Adafruit
Haz clic en el botón Instalar para instalar la biblioteca.
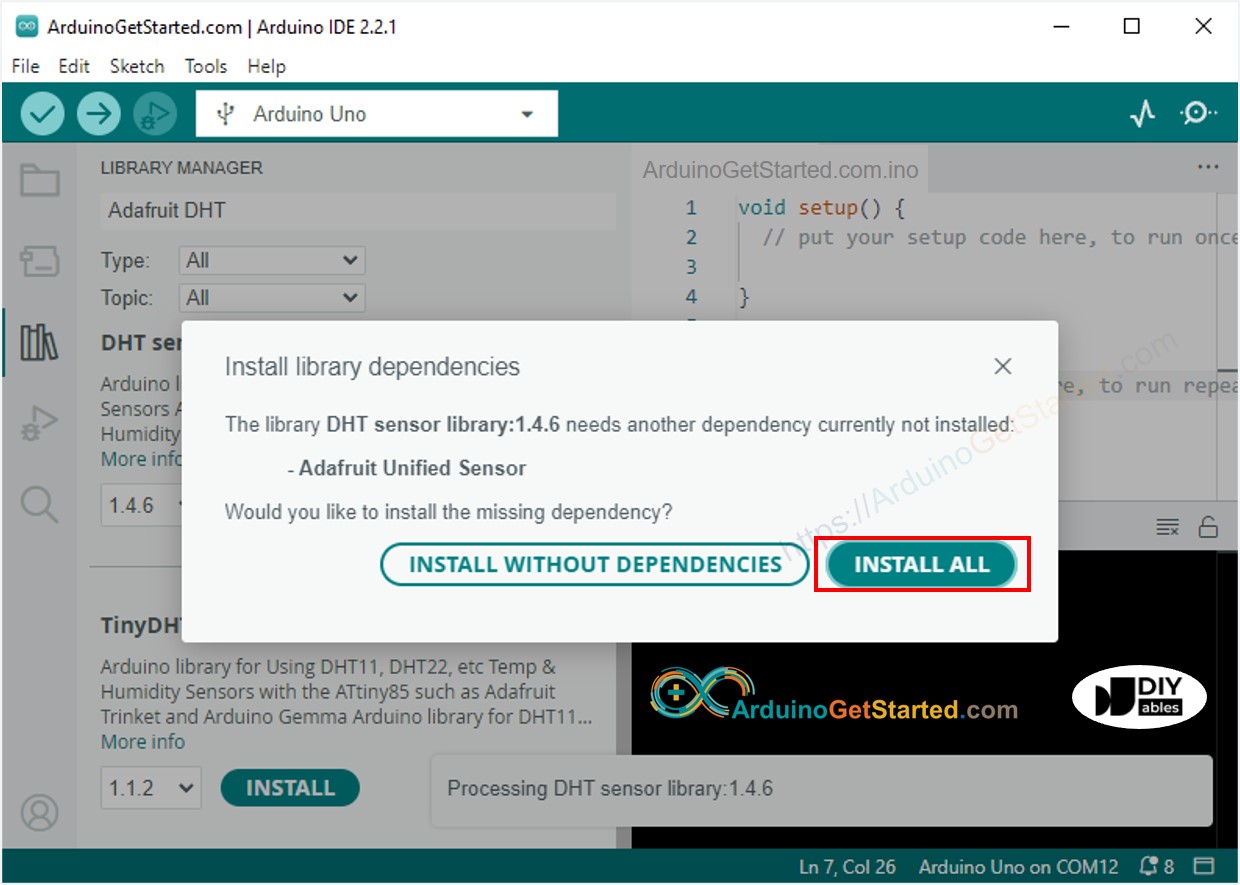
Busca “DHT”, luego encuentra la biblioteca de sensores DHT de Adafruit
Haz clic en el botón Instalar para instalar la biblioteca.
Copia el código anterior y ábrelo con el IDE de Arduino
Haz clic en el botón Upload en el IDE de Arduino para subir el código al Arduino
Coloca el sensor en agua caliente y fría, o sujétalo con la mano
Ver el resultado en el OLED y en el Monitor Serial
※ Nota:
El código de la sección Acerca de alinea automáticamente el texto horizontal y verticalmente en la pantalla OLED.
#include <Wire.h>
#include <Adafruit_GFX.h>
#include <Adafruit_SSD1306.h>
#include <DHT.h>
#define SCREEN_WIDTH 128
#define SCREEN_HEIGHT 64
#define DHTPIN 2
#define DHTTYPE DHT22
Adafruit_SSD1306 oled(SCREEN_WIDTH, SCREEN_HEIGHT, &Wire, -1);
DHT dht(DHTPIN, DHTTYPE);
String temperature;
String humidity;
void setup() {
Serial.begin(9600);
if (!oled.begin(SSD1306_SWITCHCAPVCC, 0x3C)) {
Serial.println(F("SSD1306 allocation failed"));
while (true)
;
}
delay(2000);
oled.clearDisplay();
oled.setTextSize(3);
oled.setTextColor(WHITE);
oled.setCursor(0, 10);
dht.begin();
temperature.reserve(10);
humidity.reserve(10);
}
void loop() {
float humi = dht.readHumidity();
float tempC = dht.readTemperature();
if (isnan(humi) || isnan(tempC)) {
temperature = "Failed";
humidity = "Failed";
} else {
temperature = String(tempC, 1);
temperature += char(247);
temperature += "C";
humidity = String(humi, 1);
humidity += "%";
Serial.print(tempC);
Serial.print("°C | " );
Serial.print(humi);
Serial.println("%");
}
oledDisplayCenter(temperature, humidity);
}
void oledDisplayCenter(String temperature, String humidity) {
int16_t x1;
int16_t y1;
uint16_t width_T;
uint16_t height_T;
uint16_t width_H;
uint16_t height_H;
oled.getTextBounds(temperature, 0, 0, &x1, &y1, &width_T, &height_T);
oled.getTextBounds(temperature, 0, 0, &x1, &y1, &width_H, &height_H);
oled.clearDisplay();
oled.setCursor((SCREEN_WIDTH - width_T) / 2, SCREEN_HEIGHT / 2 - height_T - 5);
oled.println(temperature);
oled.setCursor((SCREEN_WIDTH - width_H) / 2, SCREEN_HEIGHT / 2 + 5);
oled.println(humidity);
oled.display();
}
※ Nota:
El código para DHT11 y DHT22 es idéntico, excepto por una línea de código. La biblioteca para DHT11 y DHT22 es la misma.
Estamos considerando crear tutoriales en video. Si considera que los tutoriales en video son importantes, suscríbase a nuestro canal de YouTube para motivarnos a crear los videos.
※ NUESTROS MENSAJES
No dude en compartir el enlace de este tutorial. Sin embargo, por favor no use nuestro contenido en otros sitios web. Hemos invertido mucho esfuerzo y tiempo en crear el contenido, ¡por favor respete nuestro trabajo!