Arduino - Botón - Antirrebote
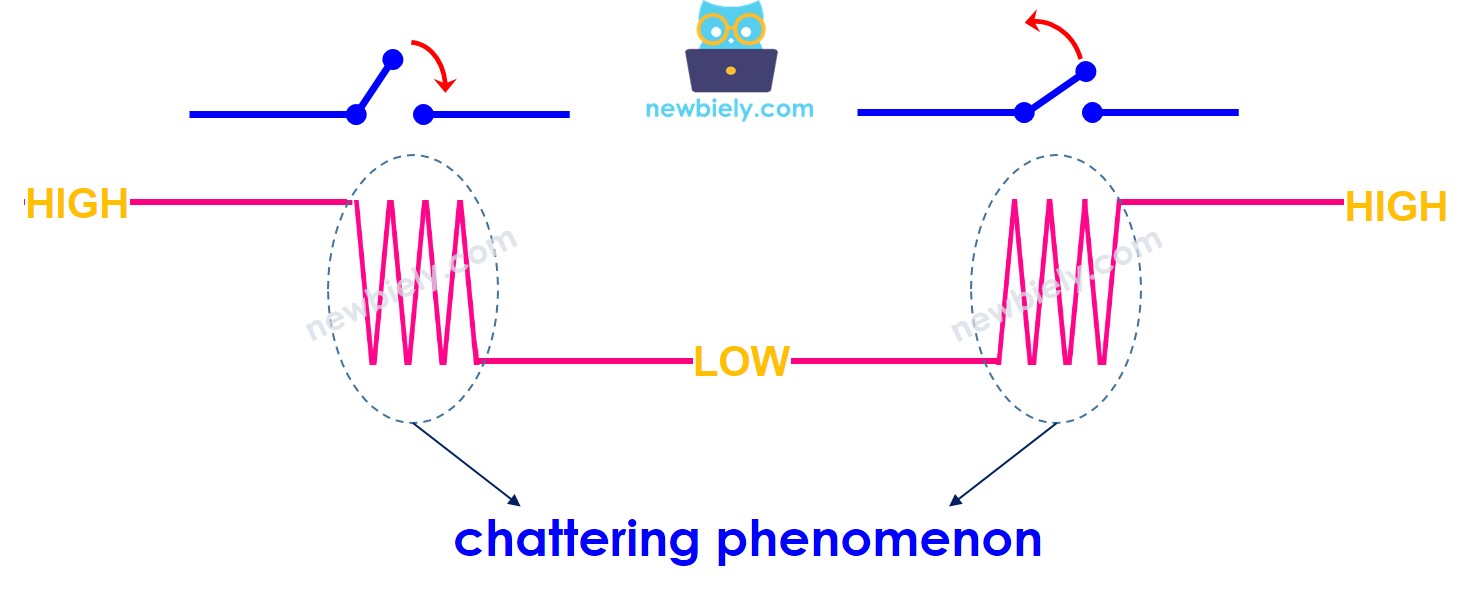
Cuando se pulsa o se suelta un botón o cuando se cambia un interruptor, los novatos suelen pensar simplemente que su estado cambia de bajo a alto o de alto a bajo. En la práctica, no es exactamente así. Debido a las características mecánicas y físicas, el estado del botón (o interruptor) puede cambiar entre bajo y alto varias veces. Este fenómeno se llama rebote. El fenómeno de rebote hace que una pulsación única pueda leerse como varias pulsaciones, lo que provoca un mal funcionamiento en algunos tipos de aplicaciones. Este tutorial muestra cómo eliminar este fenómeno (llamado anti-rebote de la entrada).
Hardware Requerido
Or you can buy the following kits:
| 1 | × | DIYables STEM V3 Starter Kit (Arduino included) | |
| 1 | × | DIYables Sensor Kit (30 sensors/displays) | |
| 1 | × | DIYables Sensor Kit (18 sensors/displays) |
Acerca de Botón
Si no sabes sobre los botones (disposición de pines, cómo funcionan, cómo programarlos...), aprende sobre ellos en los siguientes tutoriales:
Diagrama de Cableado
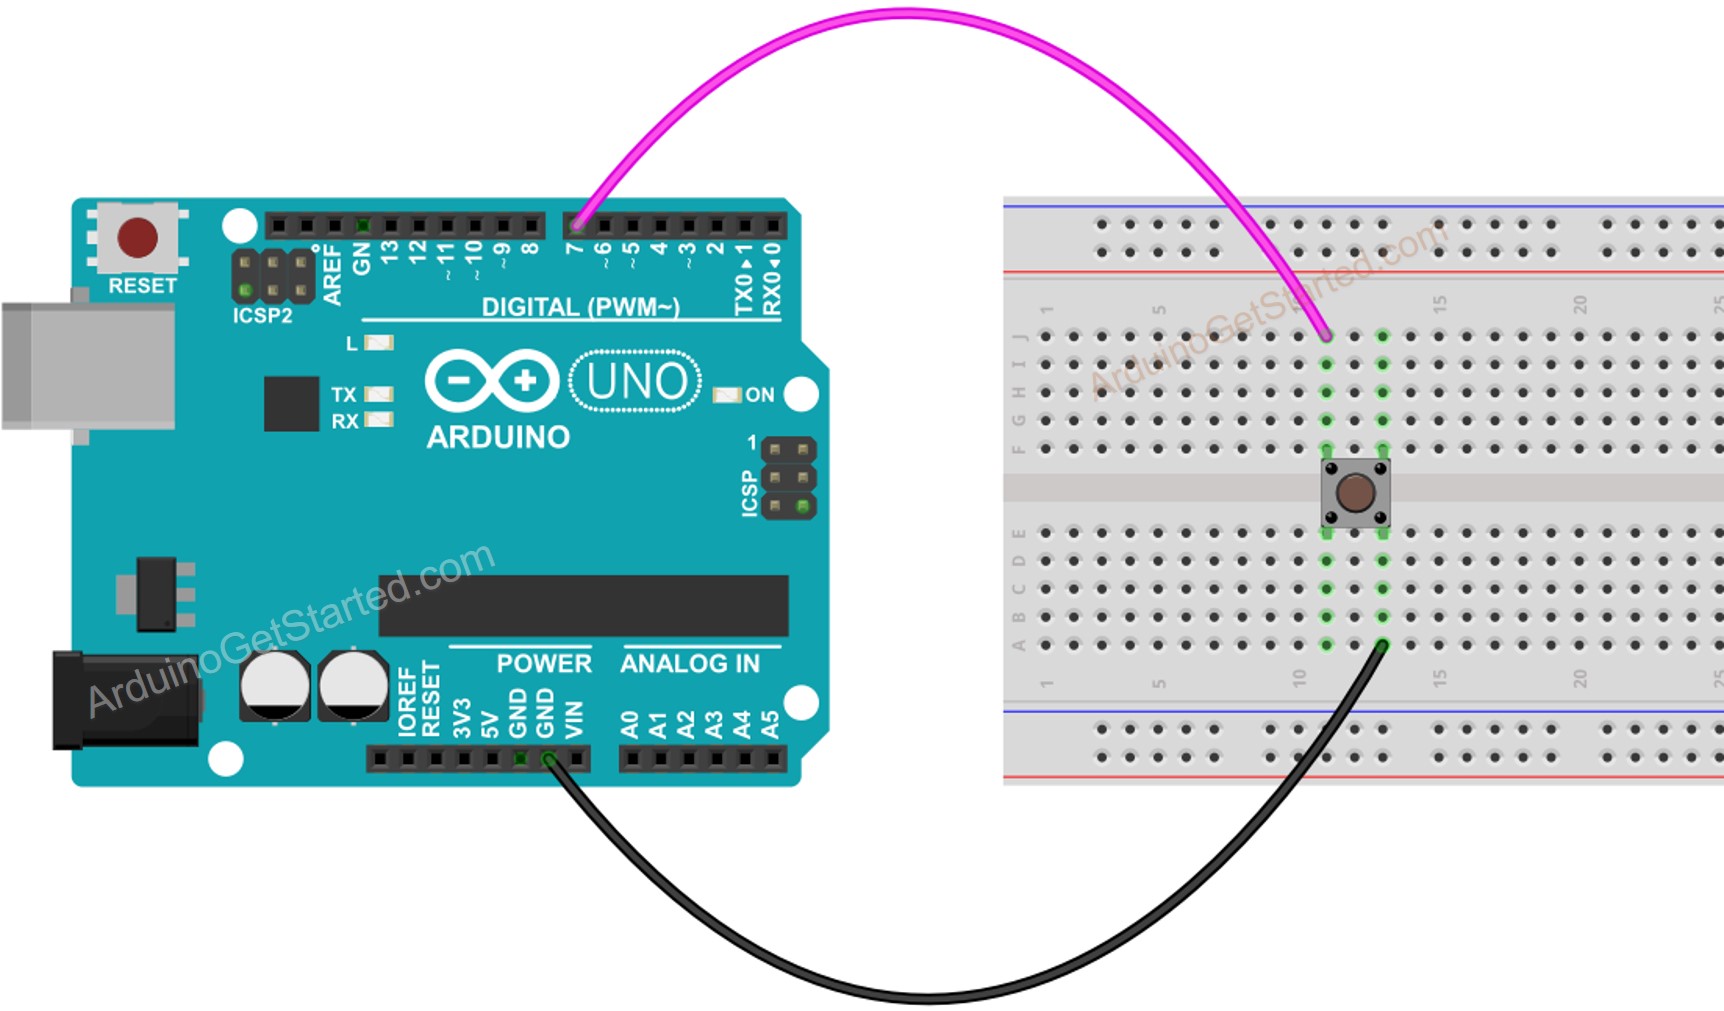
This image is created using Fritzing. Click to enlarge image
Veamos y comparemos el código de Arduino entre las versiones sin anti-rebote y con anti-rebote, y sus comportamientos.
Lectura de botón sin antirrebote
Antes de aprender sobre el debouncing, solo mira el código sin debouncing y su comportamiento.
Pasos R\u00e1pidos
- Conecta Arduino al PC mediante un cable USB
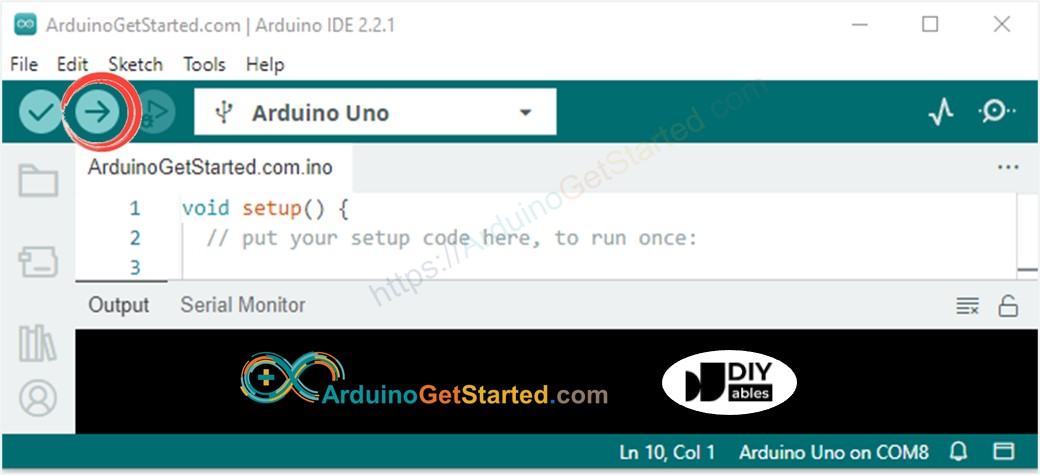
- Abre Arduino IDE, selecciona la placa y el puerto correctos
- Copia el código de abajo y ábrelo con Arduino IDE
- Haz clic en el botón Subir en el IDE de Arduino para subir el código al Arduino
- Abre el Monitor Serial
- Mantén pulsado el botón durante varios segundos y luego suéltalo.
- Ver el resultado en el Monitor Serial
⇒ Como puedes ver, presionaste y soltaste el botón solo una vez. Sin embargo, Arduino lo reconoce como múltiples pulsaciones y liberaciones.
Lectura de un botón con antirrebote
Pasos R\u00e1pidos
- Copie el código a continuación y ábralo con Arduino IDE
- Haz clic en el botón Subir en el IDE de Arduino para subir el código al Arduino
- Abre el Monitor Serial
- Mantén pulsado el botón durante varios segundos y luego suéltalo.
- Ver el resultado en el Monitor Serial
⇒ Como puedes ver, presionaste y soltaste el botón solo una vez. Arduino lo reconoce como la única pulsación y liberación. El rebote se elimina.
Lo Hicimos Fácil - Código de Antirrebote de Botón en Arduino con Biblioteca
Para facilitarlo a los principiantes, especialmente cuando se usan varios botones, creamos una biblioteca llamada ezButton. Puedes informarte sobre la biblioteca ezButton aquí.
Código de antirrebote de Arduino para un único botón
Código de antirrebote de Arduino para múltiples botones
El diagrama de cableado para el código anterior:
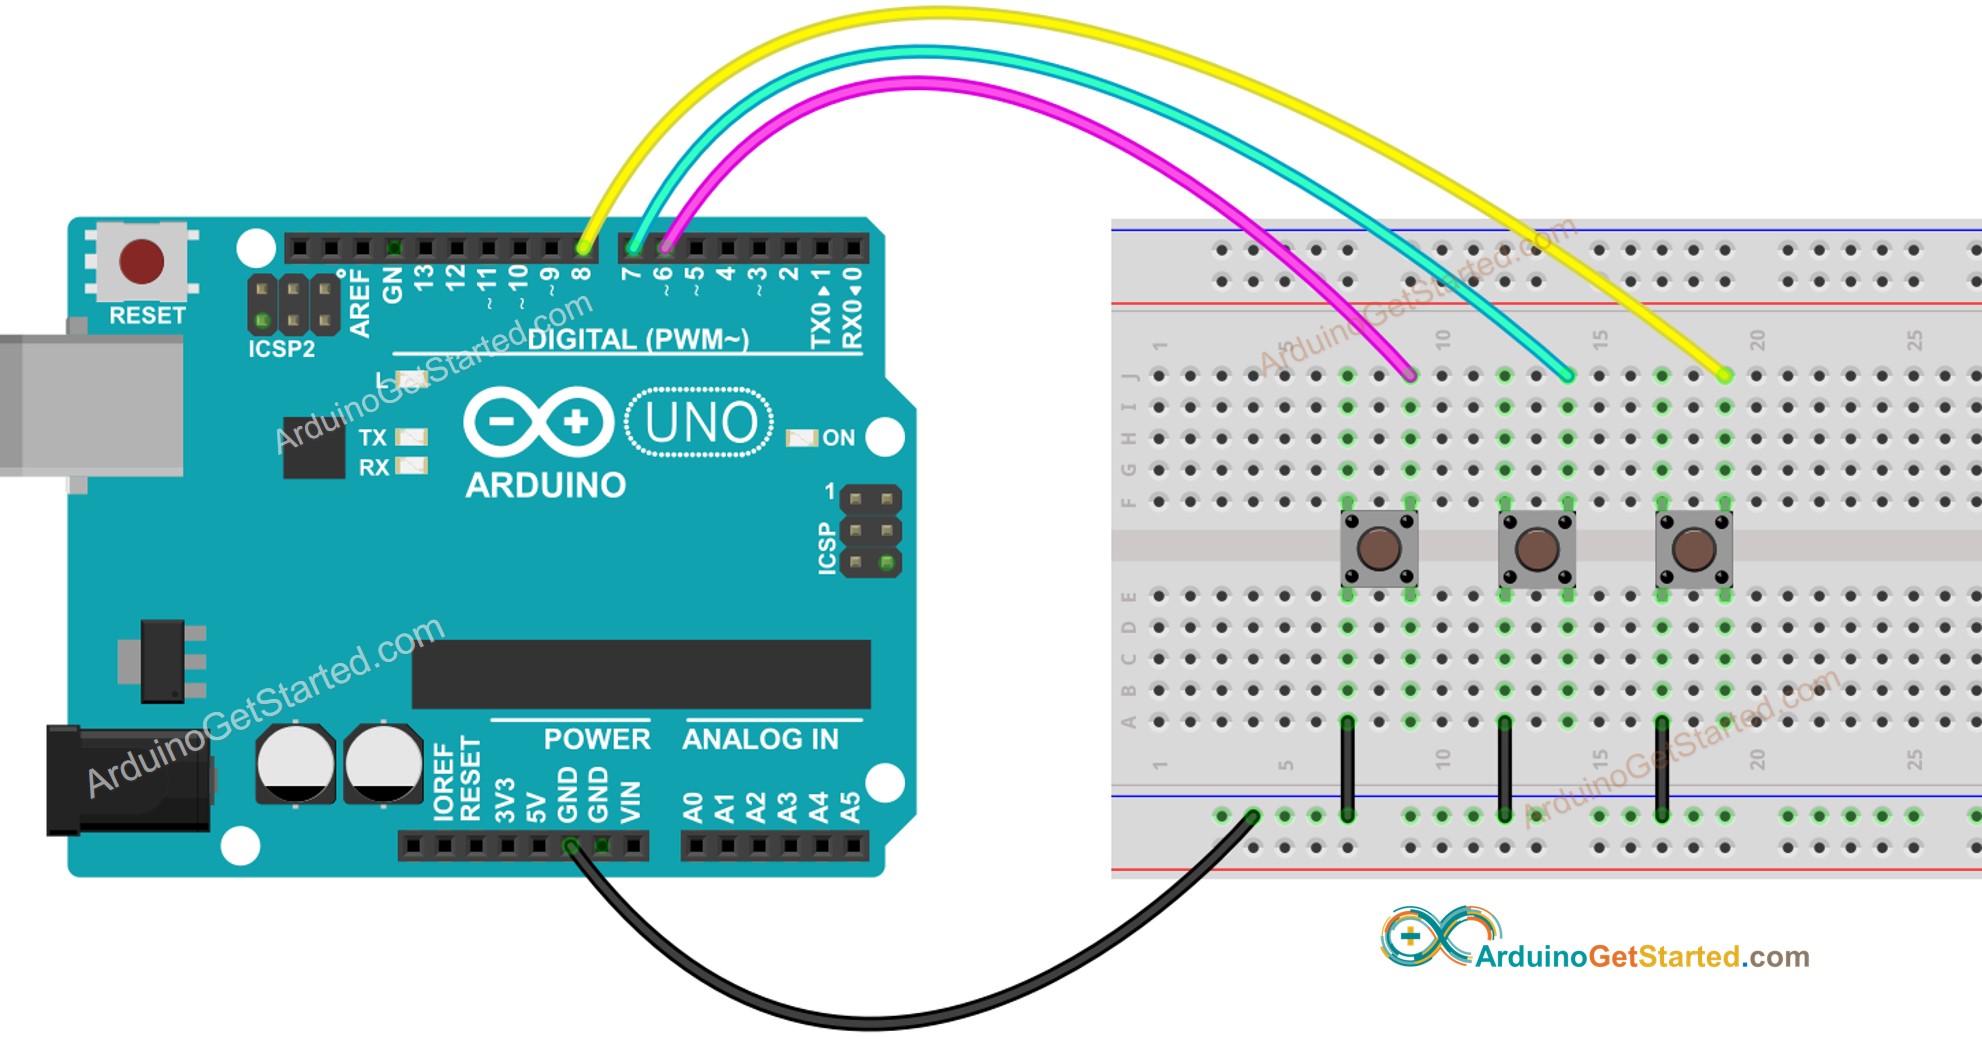
This image is created using Fritzing. Click to enlarge image
Video Tutorial
Estamos considerando crear tutoriales en video. Si considera que los tutoriales en video son importantes, suscríbase a nuestro canal de YouTube para motivarnos a crear los videos.
Conocimiento adicional
- DEBOUNCE_DELAY El valor depende de las aplicaciones. Diferentes aplicaciones pueden usar diferentes valores.
Extensibilidad
El método de anti-rebote puede aplicarse a interruptores, sensores táctiles ...