Arduino - DHT11 - OLED
En este tutorial, vamos a aprender cómo leer la temperatura y la humedad del módulo DHT11 y mostrarlas en un OLED.
Hardware Requerido
Or you can buy the following kits:
| 1 | × | DIYables STEM V3 Starter Kit (Arduino included) | |
| 1 | × | DIYables Sensor Kit (30 sensors/displays) | |
| 1 | × | DIYables Sensor Kit (18 sensors/displays) |
Divulgación: Algunos de los enlaces proporcionados en esta sección son enlaces de afiliado de Amazon. Podemos recibir una comisión por las compras realizadas a través de estos enlaces sin costo adicional para usted. Apreciamos su apoyo.
Acerca de la pantalla OLED, sensor de temperatura y humedad DHT11
Si no conoces la pantalla OLED y el sensor de temperatura y humedad DHT11 (disposición de pines, cómo funciona, cómo programarlo ...), aprende sobre ellos en los siguientes tutoriales:
- Arduino - OLED tutorial
- Arduino - DHT11 tutorial
Diagrama de Cableado
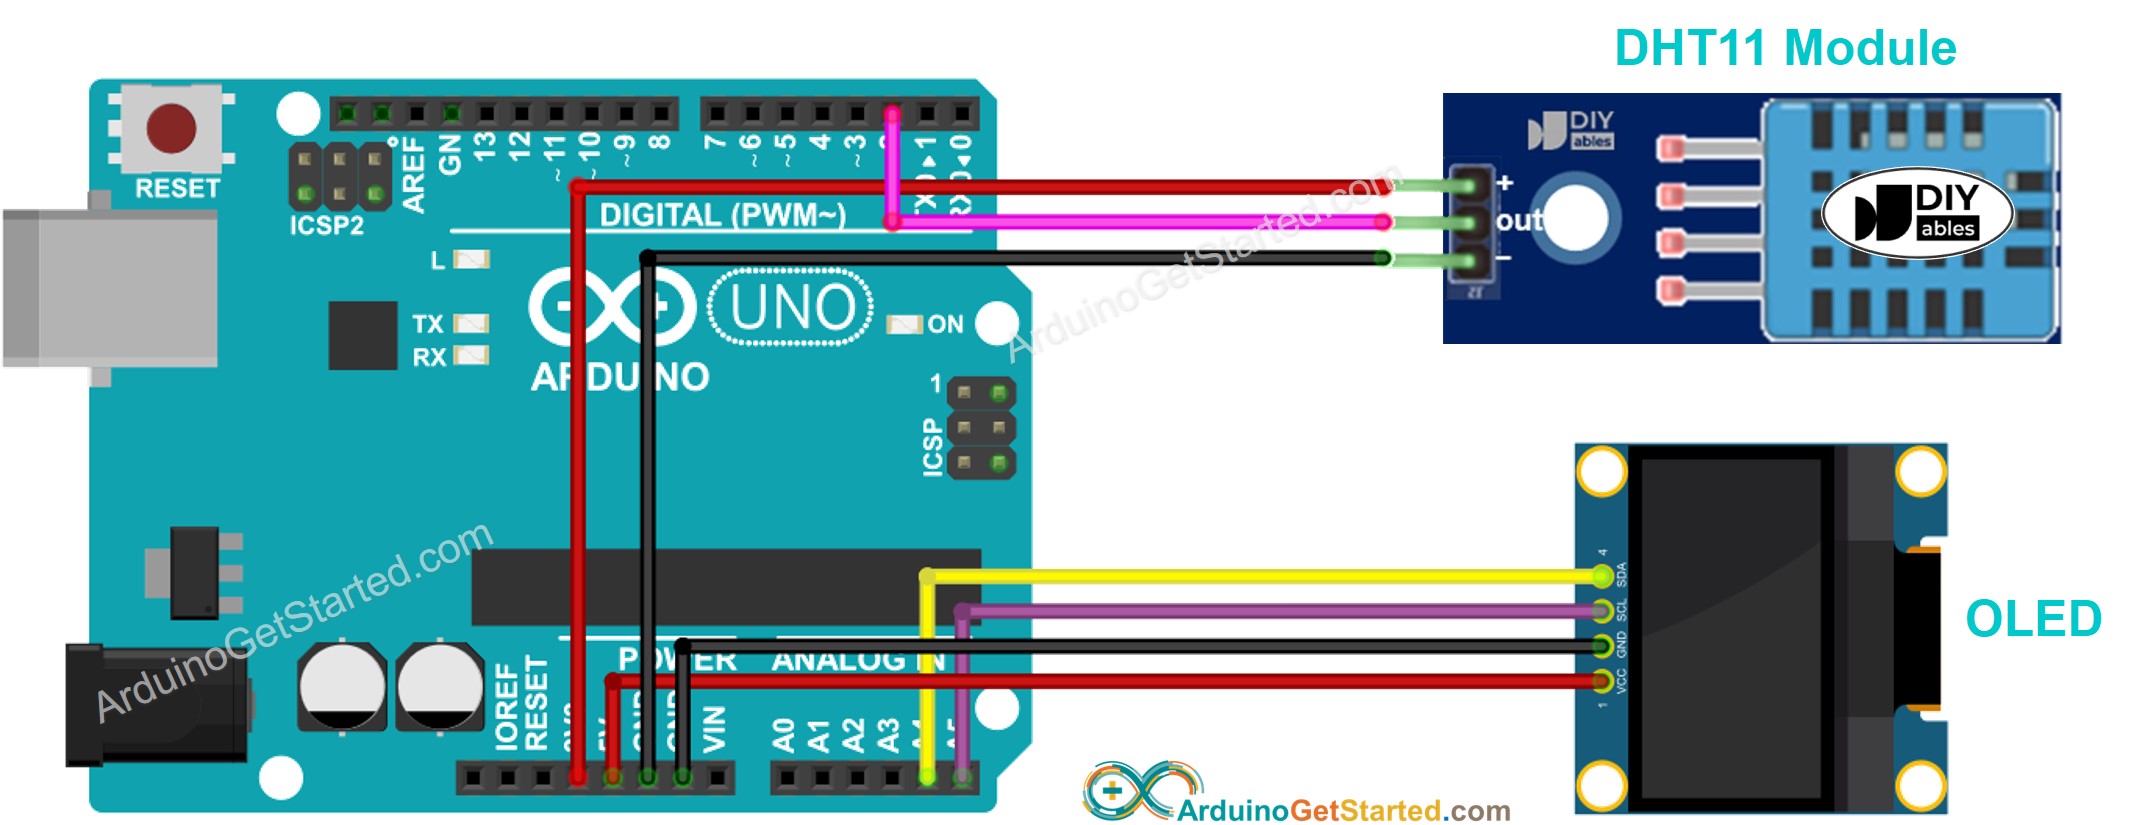
This image is created using Fritzing. Click to enlarge image
Código de Arduino - Sensor DHT11 - OLED
/*
* Este código de Arduino fue desarrollado por es.newbiely.com
* Este código de Arduino se proporciona al público sin ninguna restricción.
* Para tutoriales completos y diagramas de cableado, visite:
* https://es.newbiely.com/tutorials/arduino/arduino-dht11-oled
*/
#include <Wire.h>
#include <Adafruit_GFX.h>
#include <Adafruit_SSD1306.h>
#include <DHT.h>
#define SCREEN_WIDTH 128 // OLED display width, in pixels
#define SCREEN_HEIGHT 64 // OLED display height, in pixels
#define DHT11_PIN 2 // pin connected to DHT11 sensor
Adafruit_SSD1306 oled(SCREEN_WIDTH, SCREEN_HEIGHT, &Wire, -1); // create SSD1306 display object connected to I2C
DHT dht11(DHT11_PIN, DHT11);
String temperature;
String humidity;
void setup() {
Serial.begin(9600);
// initialize OLED display with address 0x3C for 128x64
if (!oled.begin(SSD1306_SWITCHCAPVCC, 0x3C)) {
Serial.println(F("SSD1306 allocation failed"));
while (true)
;
}
delay(2000); // wait for initializing
oled.clearDisplay(); // clear display
oled.setTextSize(3); // text size
oled.setTextColor(WHITE); // text color
oled.setCursor(0, 10); // position to display
dht11.begin(); // initialize DHT11 the temperature and humidity sensor
temperature.reserve(10); // to avoid fragmenting memory when using String
humidity.reserve(10); // to avoid fragmenting memory when using String
}
void loop() {
float humi = dht11.readHumidity(); // read humidity
float tempC = dht11.readTemperature(); // read temperature
// check if any reads failed
if (isnan(humi) || isnan(tempC)) {
temperature = "Failed";
humidity = "Failed";
} else {
temperature = String(tempC, 1); // one decimal places
temperature += char(247); // degree character
temperature += "C";
humidity = String(humi, 1); // one decimal places
humidity += "%";
}
Serial.print(tempC); // print to Serial Monitor
Serial.print("°C | " ); // print to Serial Monitor
Serial.print(humi); // print to Serial Monitor
Serial.println("%"); // print to Serial Monitor
oledDisplayCenter(temperature, humidity); // display temperature and humidity on OLED
}
void oledDisplayCenter(String temperature, String humidity) {
int16_t x1;
int16_t y1;
uint16_t width_T;
uint16_t height_T;
uint16_t width_H;
uint16_t height_H;
oled.getTextBounds(temperature, 0, 0, &x1, &y1, &width_T, &height_T);
oled.getTextBounds(temperature, 0, 0, &x1, &y1, &width_H, &height_H);
// display on horizontal and vertical center
oled.clearDisplay(); // clear display
oled.setCursor((SCREEN_WIDTH - width_T) / 2, SCREEN_HEIGHT / 2 - height_T - 5);
oled.println(temperature); // text to display
oled.setCursor((SCREEN_WIDTH - width_H) / 2, SCREEN_HEIGHT / 2 + 5);
oled.println(humidity); // text to display
oled.display();
}
Pasos R\u00e1pidos
- Abre Arduino IDE en tu PC.
- Navega al icono Bibliotecas en la barra izquierda del IDE de Arduino.
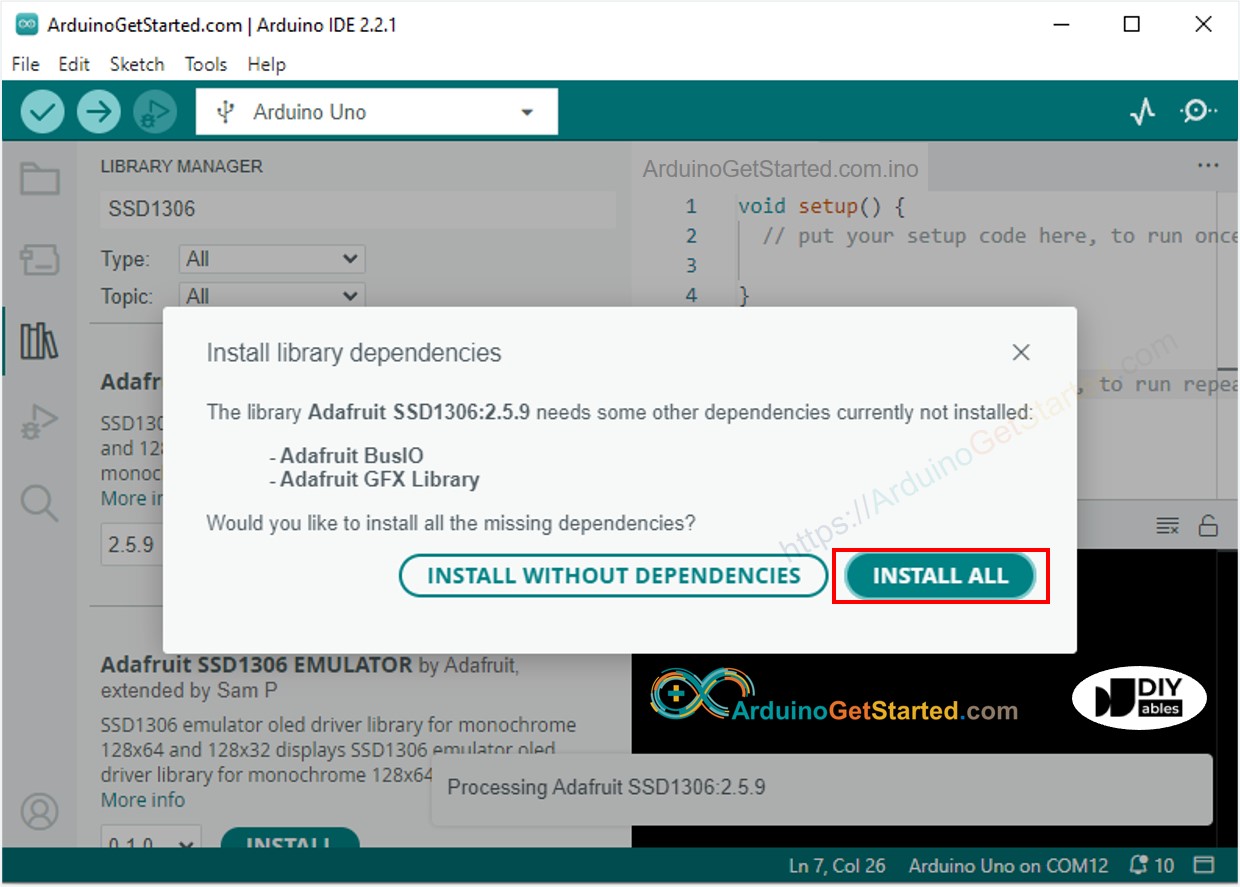
- Busca “SSD1306”, luego encuentra la biblioteca SSD1306 de Adafruit.
- Haz clic en el botón Instalar para instalar la biblioteca.

- Se te pedirá instalar otras dependencias de la biblioteca
- Haz clic en el botón Instalar todo para instalar todas las dependencias de la biblioteca.
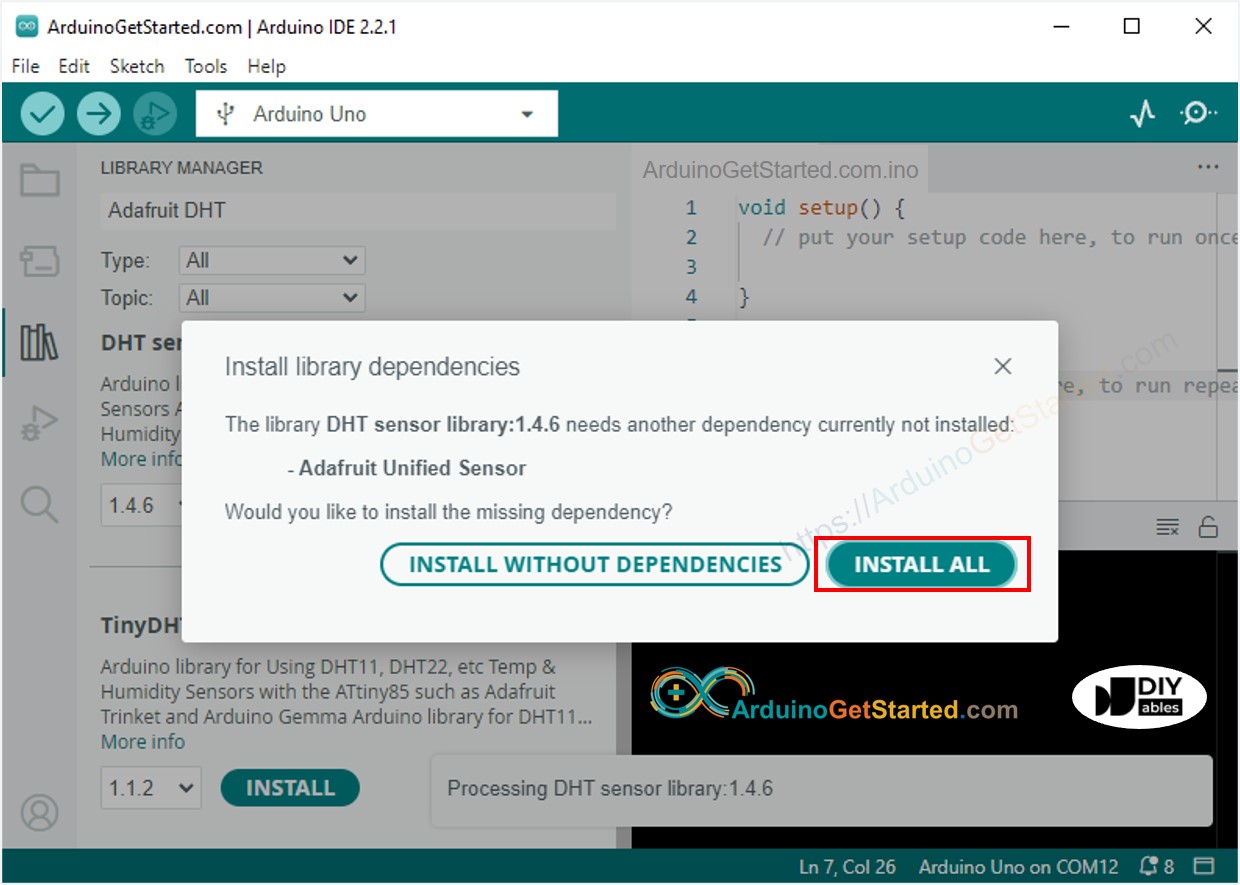
- Busca “DHT”, luego encuentra la biblioteca de sensores DHT de Adafruit.
- Haz clic en el botón Instalar para instalar la biblioteca.

- Se le pedirá instalar algunas dependencias de otras bibliotecas
- Haga clic en el botón Install All para todas las dependencias de la biblioteca.
- Copia el código anterior y ábrelo con Arduino IDE
- Haz clic en el botón Subir en Arduino IDE para subir el código al Arduino
- Coloca el sensor en agua caliente y fría, o agarra el sensor con tu mano
- Mira el resultado en OLED y en Monitor Serial
※ Nota:
El código de la sección Acerca de centra automáticamente el texto horizontal y verticalmente en la pantalla OLED.
Video Tutorial
Estamos considerando crear tutoriales en video. Si considera que los tutoriales en video son importantes, suscríbase a nuestro canal de YouTube para motivarnos a crear los videos.