Arduino - Sensor de movimiento - Reproductor de MP3
En este tutorial, exploraremos el uso de Arduino, un sensor de movimiento HC-SR501 y un reproductor MP3 para activar la reproducción de un archivo de audio grabado al detectar movimiento. Este proyecto es versátil y puede adaptarse a aplicaciones como proporcionar instrucciones de audio grabadas o advertencias cada vez que se detecte la presencia de una persona.
Hardware Requerido
Or you can buy the following kits:
| 1 | × | DIYables STEM V3 Starter Kit (Arduino included) | |
| 1 | × | DIYables Sensor Kit (30 sensors/displays) | |
| 1 | × | DIYables Sensor Kit (18 sensors/displays) |
Acerca del reproductor MP3 y del sensor de movimiento
Si no conoces un reproductor de MP3 y un sensor de movimiento (disposición de pines, cómo funciona, cómo programarlos...), aprende sobre ellos en los siguientes tutoriales:
Diagrama de Cableado
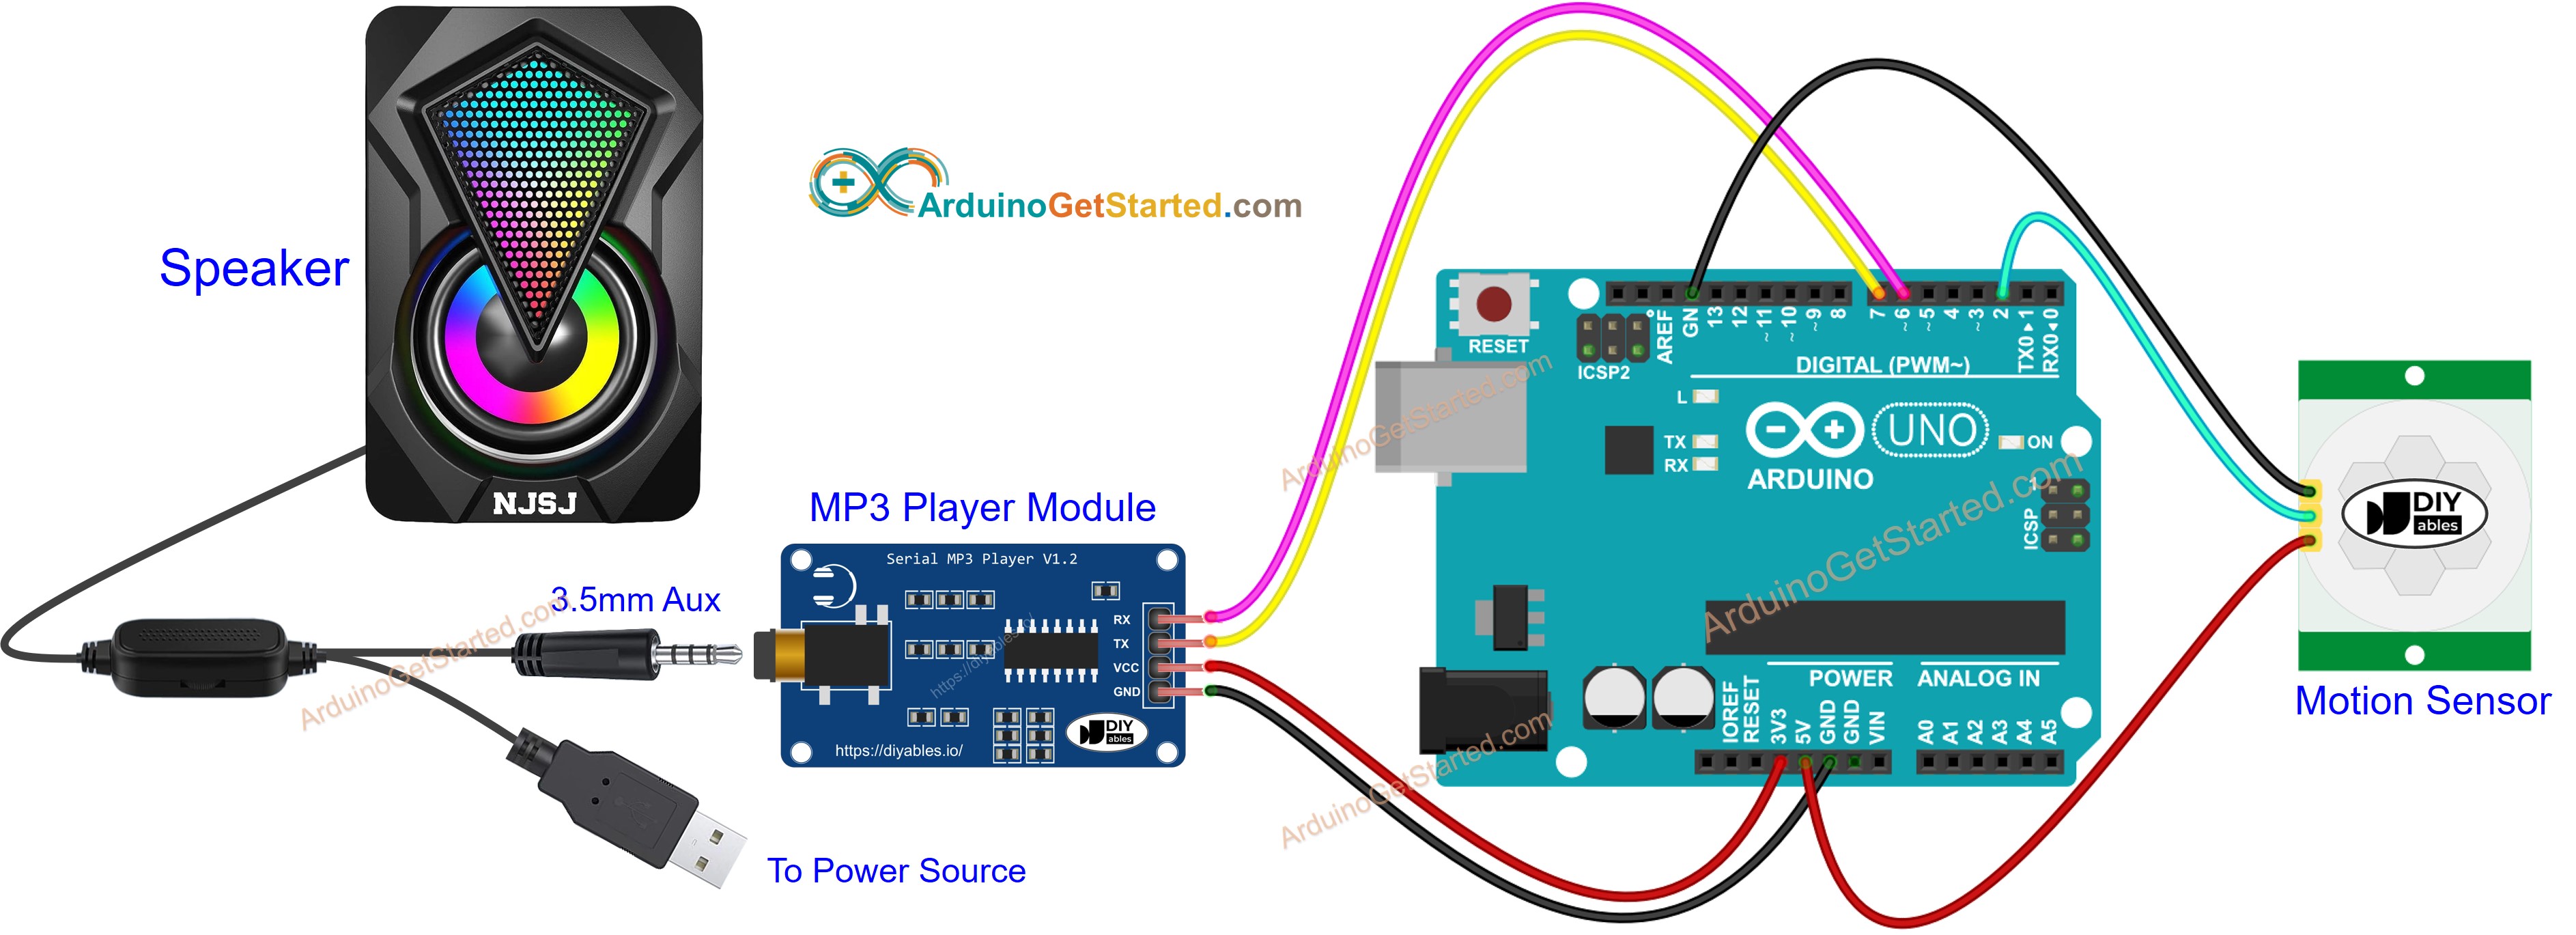
This image is created using Fritzing. Click to enlarge image
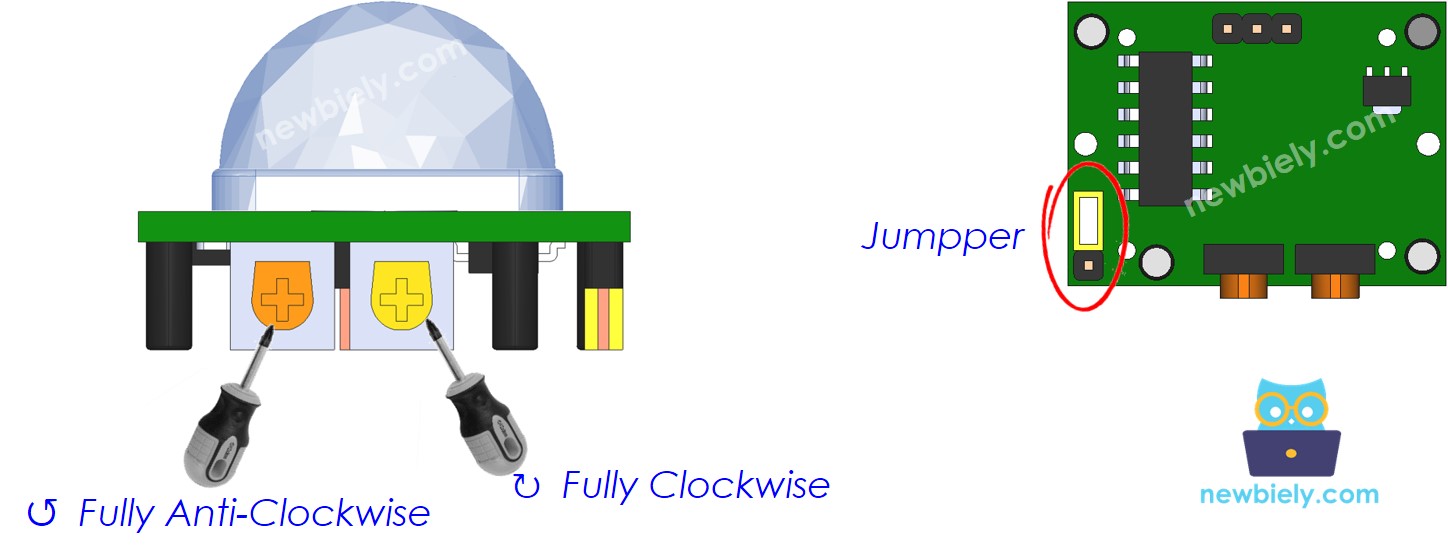
Configuración inicial del sensor de movimiento
| Time Delay Adjuster | Screw it in anti-clockwise direction fully. |
| Detection Range Adjuster | Screw it in clockwise direction fully. |
| Repeat Trigger Selector | Put jumper as shown on the image. |
Preparación
- Almacene previamente el archivo MP3 grabado que queremos reproducir en la tarjeta microSD.
- Inserte la tarjeta microSD en el módulo reproductor de MP3.
- Conecte el módulo reproductor de MP3 al Arduino.
- Conecte el altavoz al módulo reproductor de MP3.
- Conecte el altavoz a una fuente de alimentación.
- Conecte el sensor de movimiento al Arduino.
Código de Arduino - Sensor de movimiento controla el reproductor MP3
Pasos R\u00e1pidos
- Conectar Arduino al PC mediante un cable USB
- Abrir Arduino IDE, seleccionar la placa y el puerto correctos
- Copiar el código anterior y abrirlo con Arduino IDE
- Haz clic en el botón Subir en Arduino IDE para subir el código al Arduino
- Mueve la mano frente al sensor
- Escucha el audio desde el reproductor de MP3
Video Tutorial
Estamos considerando crear tutoriales en video. Si considera que los tutoriales en video son importantes, suscríbase a nuestro canal de YouTube para motivarnos a crear los videos.