ESP32 - Reloj OLED
En este tutorial, te guiaremos a través del proceso de crear un reloj OLED utilizando un ESP32, cubriendo los siguientes pasos:
- Lectura de la hora actual (hora, minuto y segundo) desde un módulo RTC DS3231 y su visualización en una pantalla OLED.
- Lectura de la hora actual (hora, minuto y segundo) desde un módulo RTC DS1307 y su visualización en una pantalla OLED.
Tienes la flexibilidad de elegir entre dos módulos RTC: DS3231 y DS1307. Para ayudarte a tomar una decisión informada, puedes consultar la comparación que se detalla en DS3231 vs DS1307.
Este tutorial proporcionará una guía completa para implementar un reloj OLED, mostrando la integración del ESP32 con cualquiera de los módulos RTC DS3231 o DS1307 para mostrar información de tiempo precisa en una pantalla OLED.
Hardware Requerido
Or you can buy the following kits:
| 1 | × | DIYables ESP32 Starter Kit (ESP32 included) | |
| 1 | × | DIYables Sensor Kit (30 sensors/displays) | |
| 1 | × | DIYables Sensor Kit (18 sensors/displays) |
Acerca del módulo RTC OLED, DS3231 y DS1307
¿No estás familiarizado con OLED, DS3231 y DS1307, incluyendo sus pines, funcionalidad y programación? Explora tutoriales completos sobre estos temas a continuación:
Instalar bibliotecas OLED y RTC
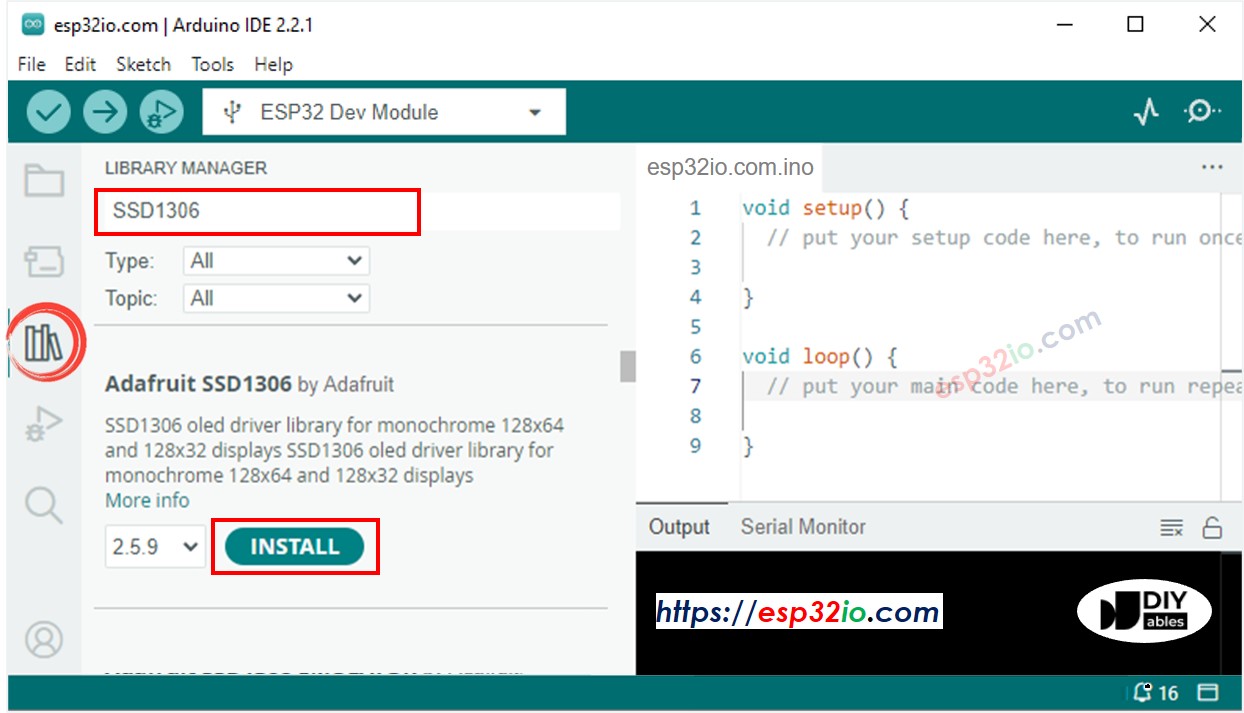
- Haz clic en el icono de Bibliotecas en la barra izquierda del IDE de Arduino.
- Busca “SSD1306”, luego encuentra la biblioteca SSD1306 de Adafruit
- Haz clic en el botón Instalar para instalar la biblioteca.
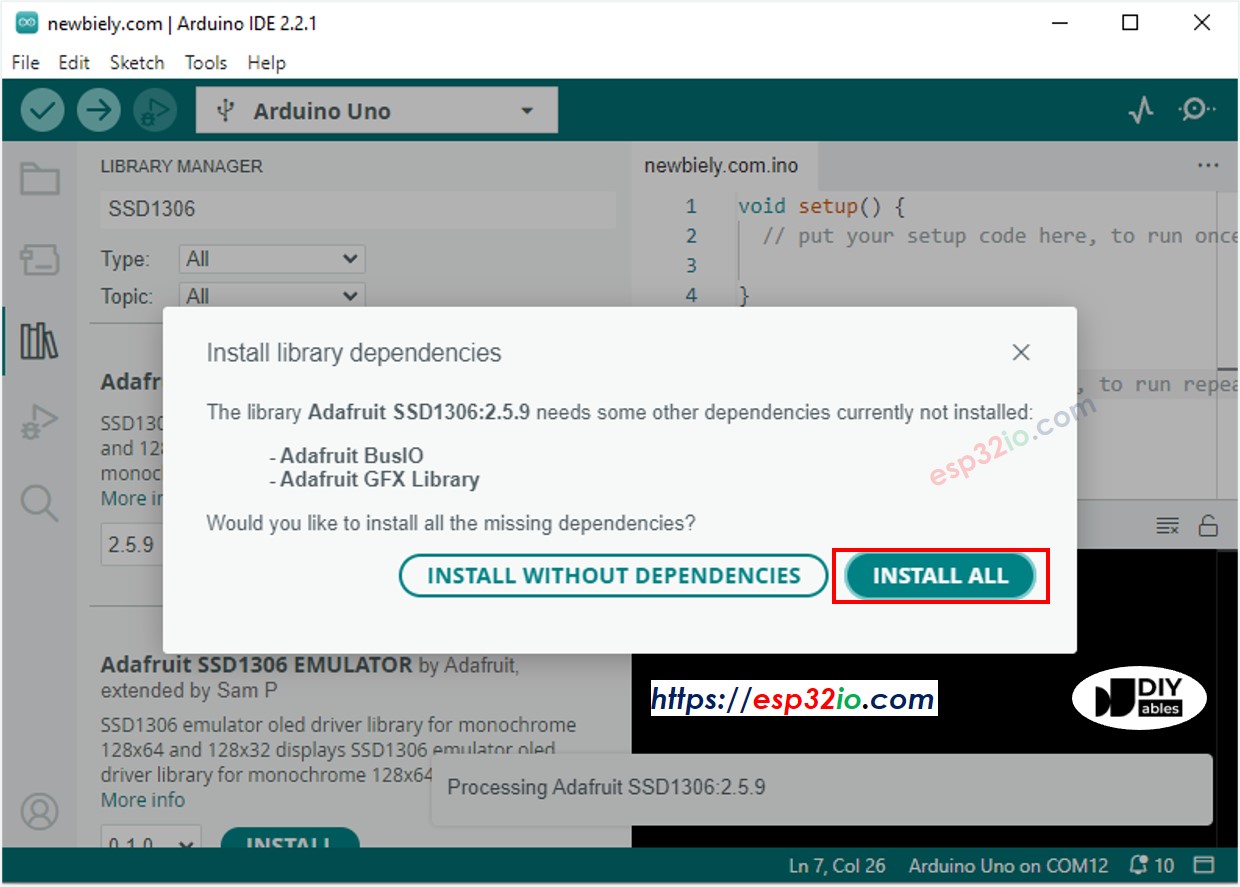
- Se le pedirá que instale algunas otras dependencias de la biblioteca.
- Haga clic en el botón Instalar todo para instalar todas las dependencias de la biblioteca.
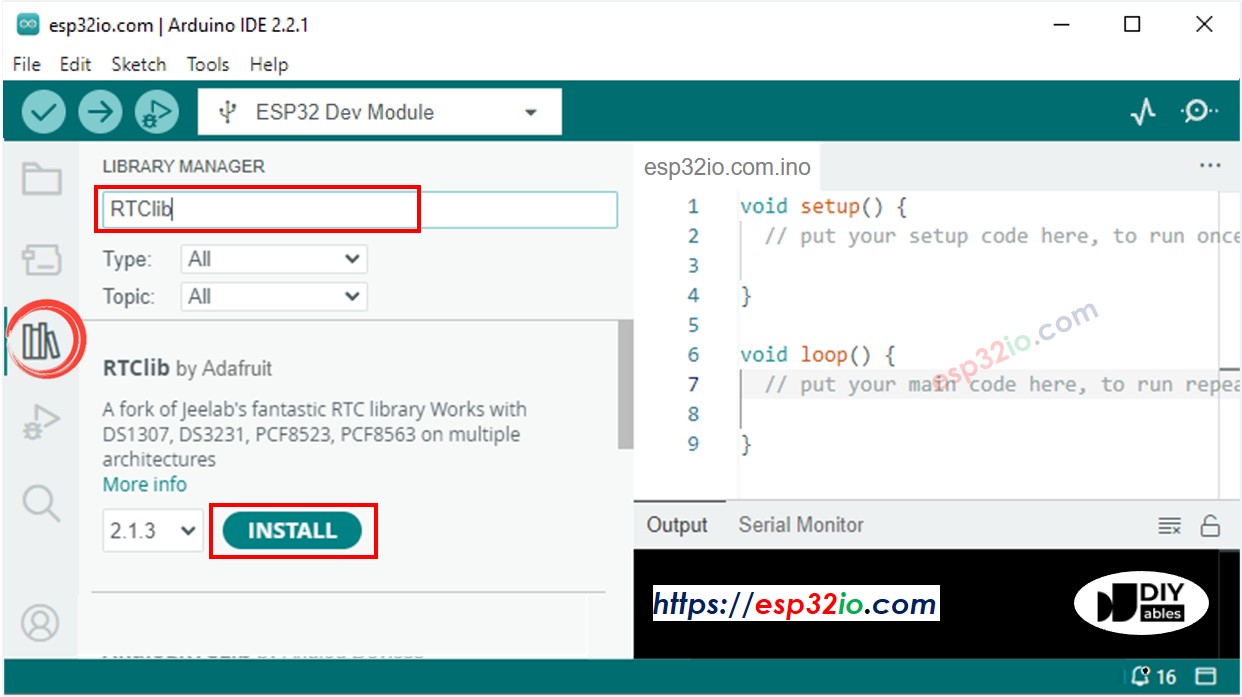
- Busca “RTClib”, luego localiza la biblioteca RTC de Adafruit
- Haz clic en el botón Instalar para instalar la biblioteca RTC.
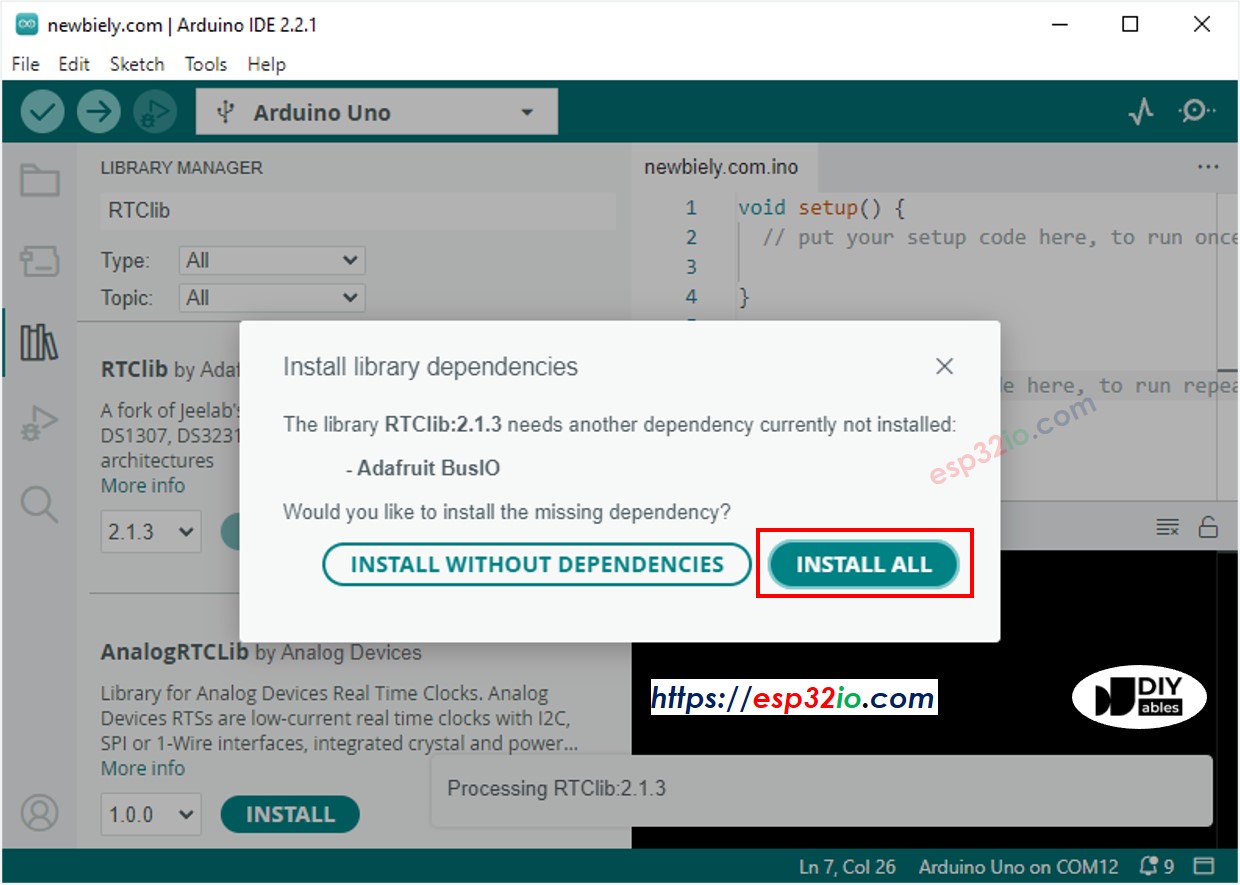
- Puede que se le pidan dependencias para la biblioteca
- Instale todas las dependencias de la biblioteca haciendo clic en el botón Instalar todo.
Lectura de la hora desde el módulo DS3231 RTC y mostrarla en la pantalla OLED
Diagrama de cableado
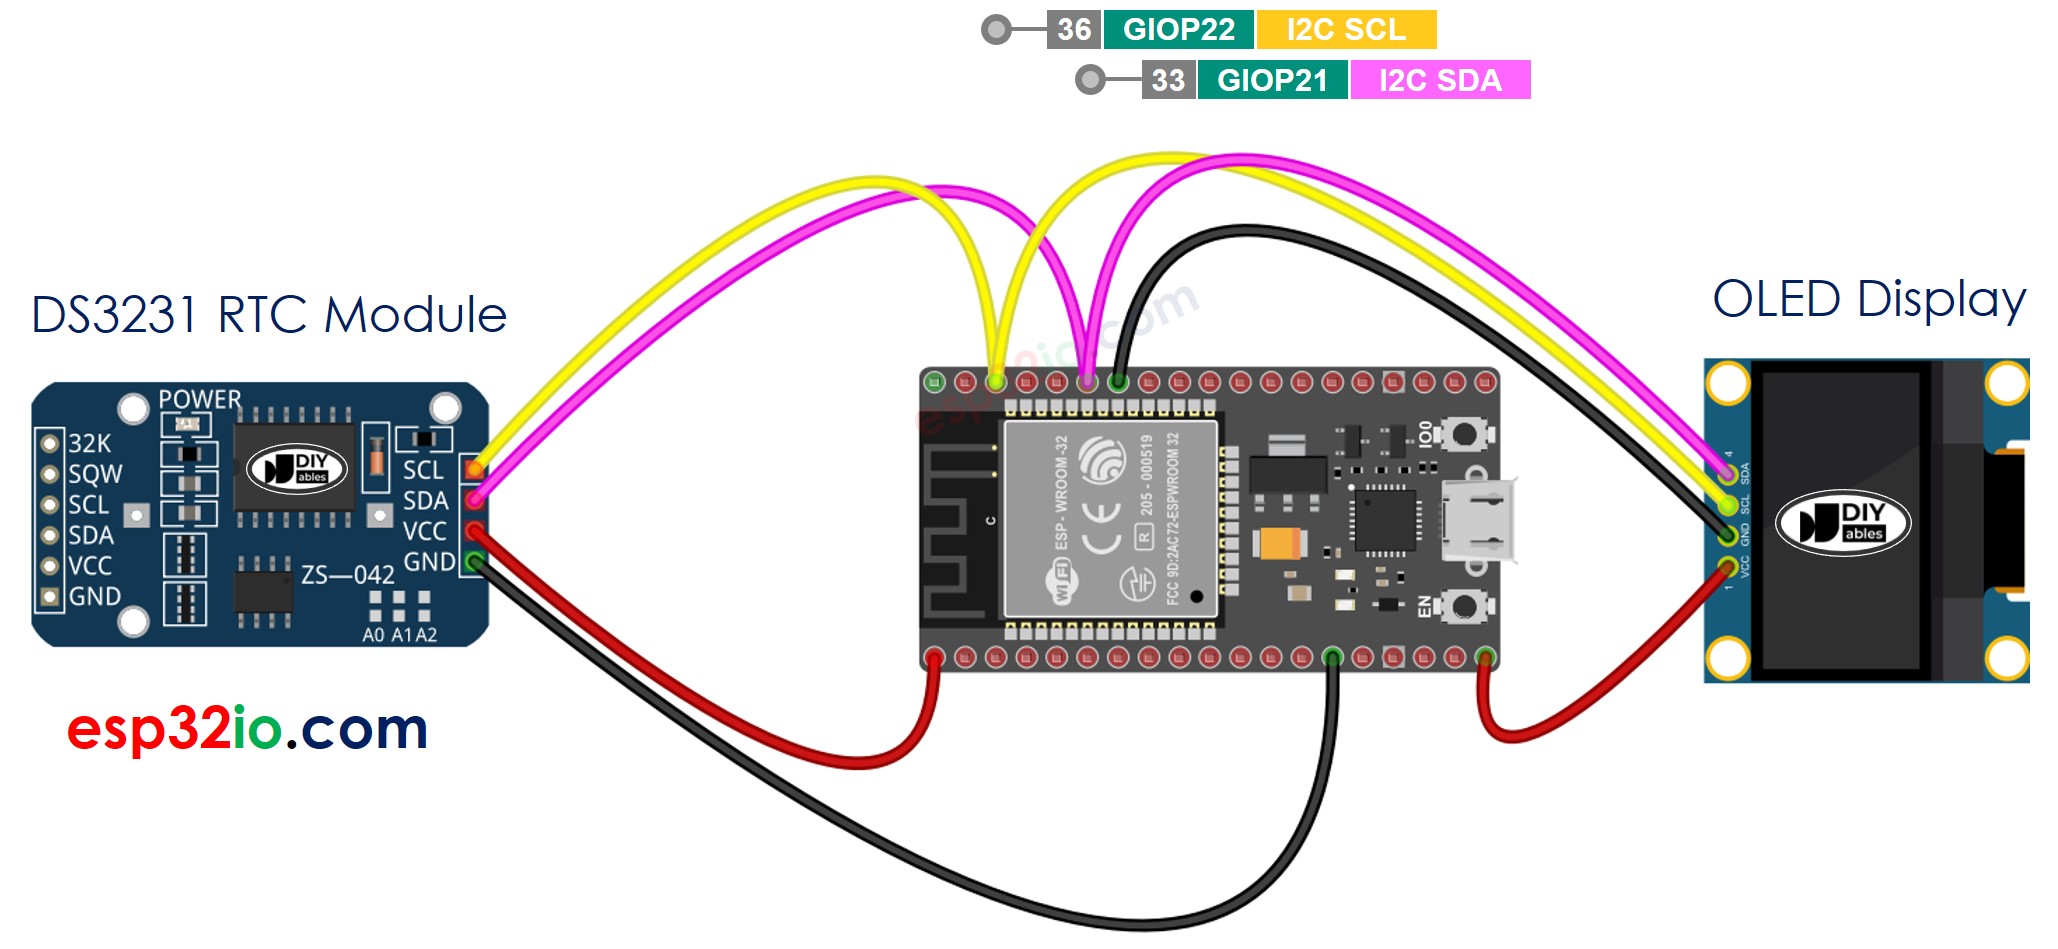
This image is created using Fritzing. Click to enlarge image
Si no sabe c\u00f3mo alimentar ESP32 y otros componentes, encuentre instrucciones en el siguiente tutorial: C\u00f3mo alimentar ESP32.
Código ESP32 - DS3231 y OLED
Pasos R\u00e1pidos
- Si es la primera vez que usas ESP32, consulta cómo configurar el entorno para ESP32 en Arduino IDE.
- Realiza el cableado tal como en la imagen de arriba.
- Conecta la placa ESP32 a tu PC mediante un cable micro USB.
- Abre Arduino IDE en tu PC.
- Selecciona la placa ESP32 correcta (p. ej. ESP32 Dev Module) y el puerto COM.
- Copia el código anterior y ábrelo con Arduino IDE
- Haz clic en el botón Upload en Arduino IDE para cargar el código en ESP32
- Ver el resultado en la pantalla OLED
Lectura de la hora desde el módulo RTC DS1307 y mostrarla en la pantalla OLED
Diagrama de cableado
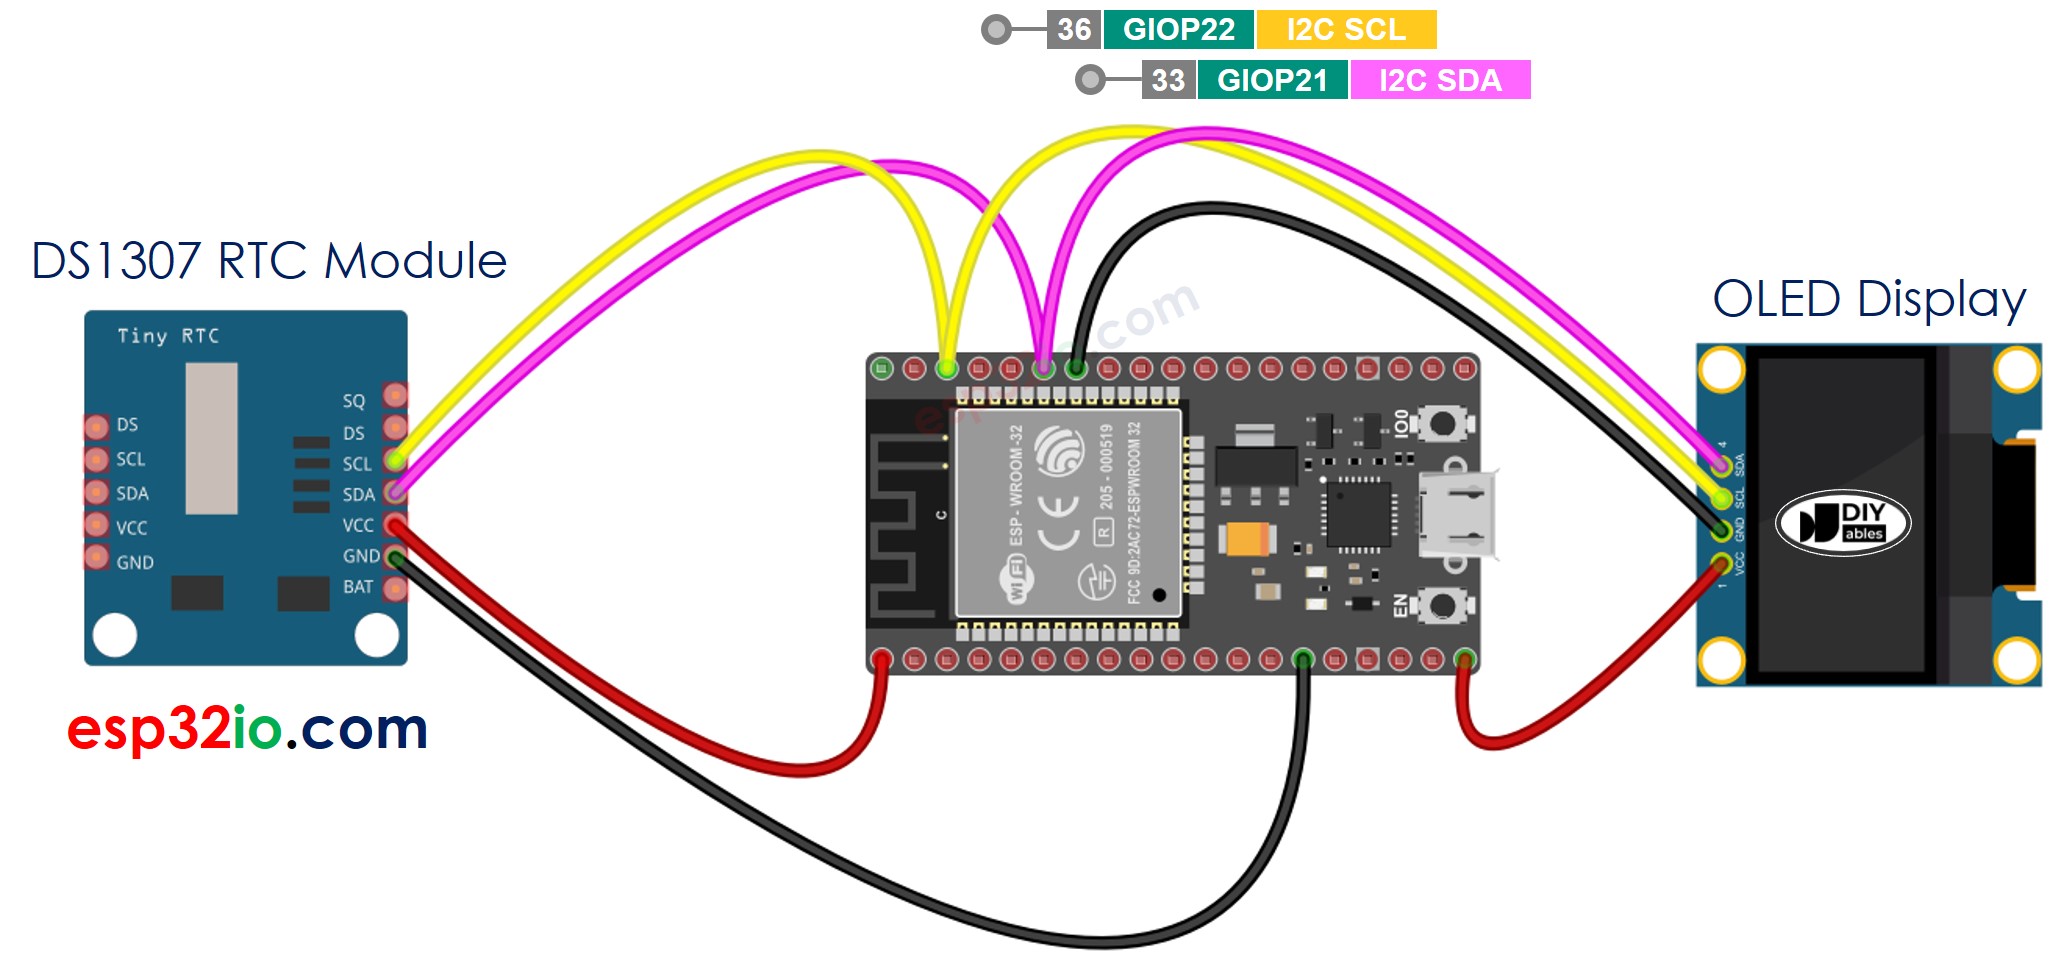
This image is created using Fritzing. Click to enlarge image
Código ESP32 - DS1307 y OLED
Pasos R\u00e1pidos
- Si es la primera vez que usas ESP32, consulta cómo configurar el entorno para ESP32 en Arduino IDE.
- Realiza el cableado tal como se muestra en la imagen de arriba.
- Conecta la placa ESP32 a tu PC mediante un cable micro USB
- Abre Arduino IDE en tu PC.
- Selecciona la placa ESP32 correcta (p. ej. ESP32 Dev Module) y el puerto COM.
- Copia el código anterior y ábrelo con Arduino IDE
- Haz clic en el botón Upload en Arduino IDE para subir el código a ESP32
- Ver el resultado en la pantalla OLED
Video Tutorial
Estamos considerando crear tutoriales en video. Si considera que los tutoriales en video son importantes, suscríbase a nuestro canal de YouTube para motivarnos a crear los videos.