ESP32 - Botón - Rebote
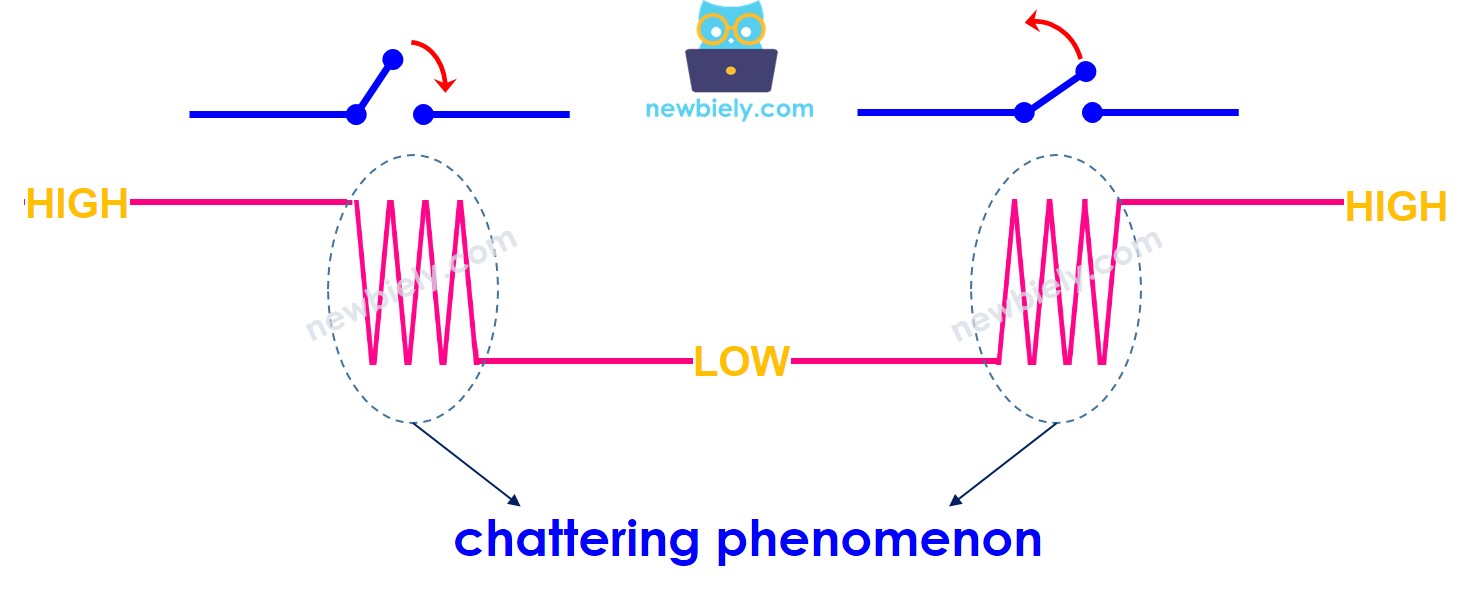
Cuando se presiona o se suelta un botón, o cuando se cambia un interruptor entre ENCENDIDO y APAGADO, su estado cambia de BAJO a ALTO (o de ALTO a BAJO) una sola vez. ¿Es correcto?
⇒ No, no es así. Eso se debe a que, en el mundo físico, cuando haces una pulsación única en un botón, el estado del botón cambia rápidamente entre nivel bajo y nivel alto varias veces en lugar de una vez. Esta es la característica mecánica y física. Este fenómeno se conoce con un nombre: chattering. El fenómeno de chattering provoca que el MCU lea múltiples pulsaciones del botón en respuesta a una pulsación real única. Esto resulta en un mal funcionamiento. El proceso para eliminar este fenómeno se llama debounce. Este tutorial muestra cómo hacerlo.
Este tutorial proporciona:
- Cómo aplicar anti-rebote a un botón en el código ESP32
- Cómo aplicar anti-rebote a un botón en el código ESP32 usando una biblioteca
- Cómo aplicar anti-rebote a varios botones en el código ESP32 usando una biblioteca
Hardware Requerido
Or you can buy the following kits:
| 1 | × | DIYables ESP32 Starter Kit (ESP32 included) | |
| 1 | × | DIYables Sensor Kit (30 sensors/displays) | |
| 1 | × | DIYables Sensor Kit (18 sensors/displays) |
Acerca del botón
Tenemos tutoriales específicos sobre el botón. El tutorial contiene información detallada e instrucciones paso a paso sobre el pinout de hardware, el principio de funcionamiento, la conexión de cableado al ESP32 y el código para ESP32... Obtenga más información sobre ellos en los siguientes enlaces:
Diagrama de Cableado
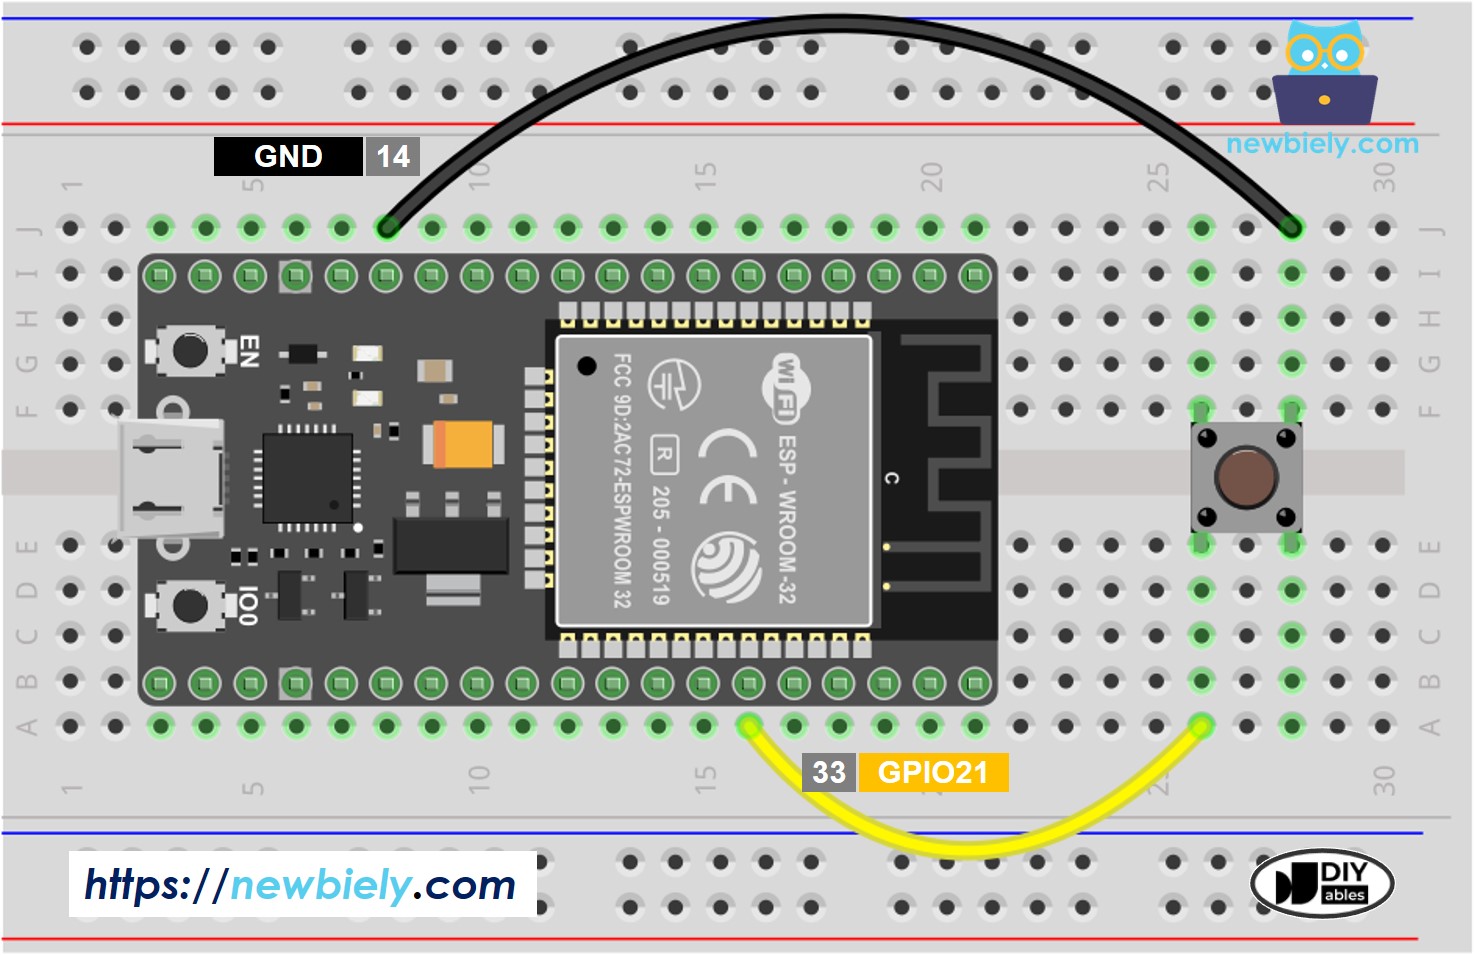
This image is created using Fritzing. Click to enlarge image
Si no sabe c\u00f3mo alimentar ESP32 y otros componentes, encuentre instrucciones en el siguiente tutorial: C\u00f3mo alimentar ESP32.
Para que quede claro, ejecutemos el código ESP32 SIN y CON debounce, y comparemos sus resultados
Lectura de botón sin antirrebote
Pasos R\u00e1pidos
- Si es la primera vez que usas ESP32, consulta cómo configurar el entorno para ESP32 en Arduino IDE.
- Realiza el cableado como en la imagen anterior.
- Conecta la placa ESP32 a tu PC mediante un cable micro USB.
- Abre Arduino IDE en tu PC.
- Selecciona la placa ESP32 adecuada (p. ej. ESP32 Dev Module) y el puerto COM.
- Copia el código a continuación y pégalo en Arduino IDE.
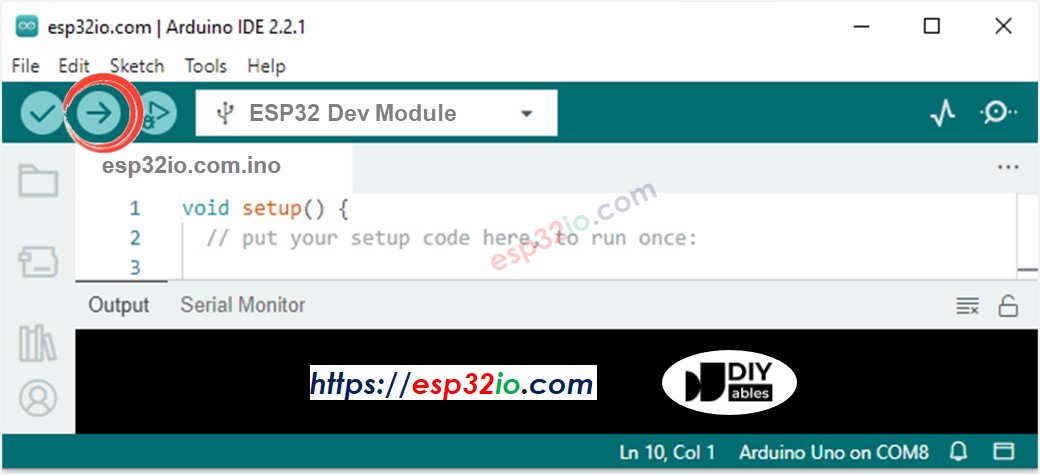
- Compila y carga el código en la placa ESP32 haciendo clic en el botón Subir en el IDE de Arduino
- Abrir el Monitor Serial en el IDE de Arduino

- Presione el botón una vez, pero manténgalo presionado durante varios segundos y luego suéltelo.
- Vea el resultado en el Monitor Serial. Se muestra a continuación.
⇒ Como puedes ver, solo realizaste una única pulsación y liberación, pero el ESP32 lee múltiples pulsaciones y liberaciones.
※ Nota:
El fenómeno de chattering no ocurre todo el tiempo. Si no ocurre, por favor pruebe la prueba anterior varias veces.
Lectura de un botón con antirrebote
Pasos R\u00e1pidos
- Si es la primera vez que usas ESP32, consulta cómo configurar el entorno para ESP32 en Arduino IDE.
- Copia el código a continuación y pégalo en el IDE de Arduino.
- Compilar y subir código a la placa ESP32 haciendo clic en el botón Subir en el IDE de Arduino
- Abrir el Monitor Serial en el IDE de Arduino
- Mantén pulsado el botón durante varios segundos y luego suéltalo.
- Mira el resultado en el Monitor Serial. Se muestra a continuación:
⇒ Como puedes ver, realizaste una pulsación y liberación, y el ESP32 leyó una pulsación y liberación. El rebote está eliminado.
Lo Hicimos Fácil - Código de Antirrebote de Botón ESP32 con Biblioteca
Para facilitar a los principiantes, especialmente cuando se aplica antirrebote a varios botones, hemos creado una biblioteca de botones llamada ezButton. Puedes aprender sobre la biblioteca ezButton aquí.
Código de antirrebote de botón ESP32 para un único botón
Código de antirrebote de botón ESP32 para varios botones
Escribamos código de debounce para tres botones.
El diagrama de cableado
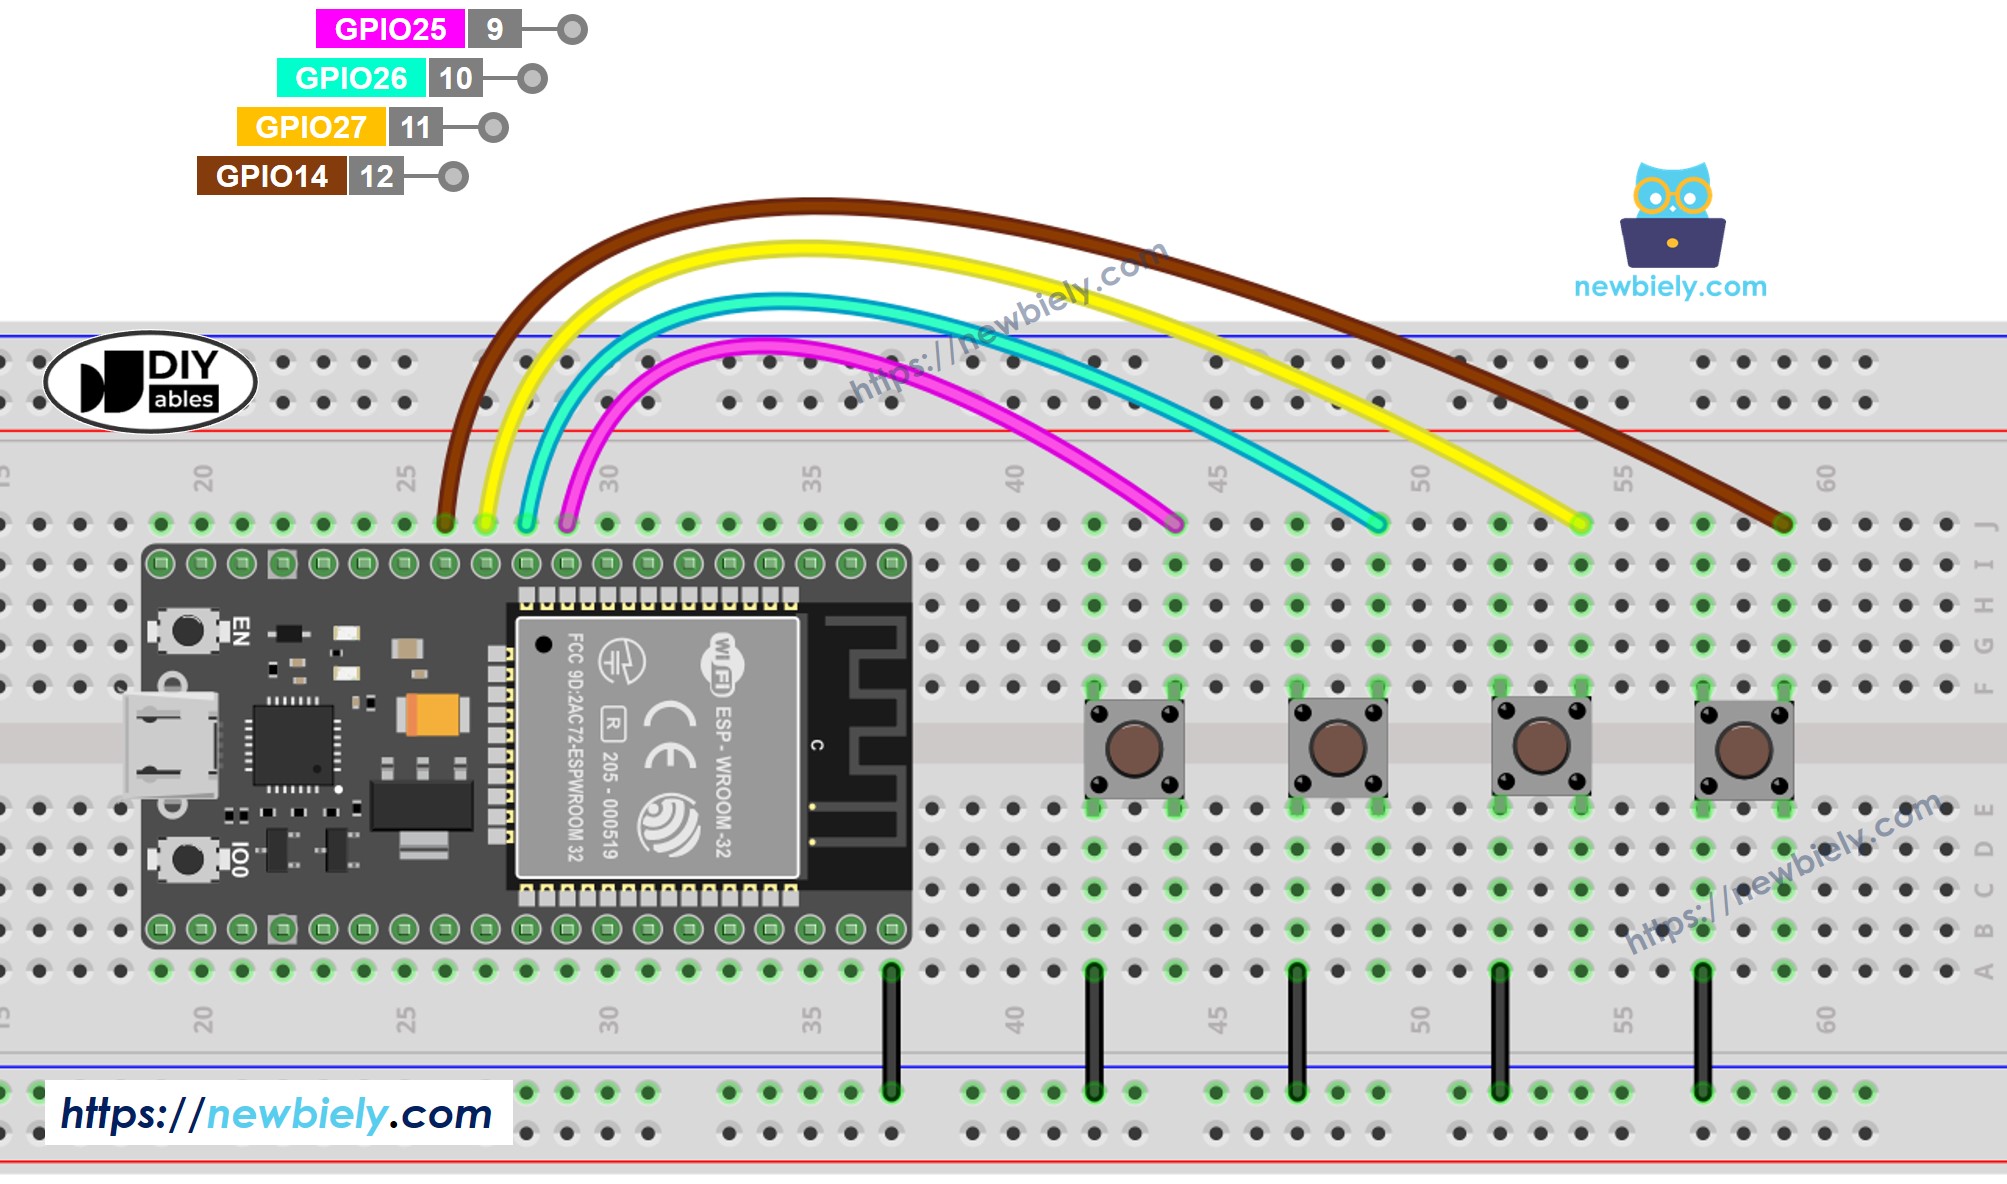
This image is created using Fritzing. Click to enlarge image
Video Tutorial
Estamos considerando crear tutoriales en video. Si considera que los tutoriales en video son importantes, suscríbase a nuestro canal de YouTube para motivarnos a crear los videos.
Conocimientos Adicionales
- DEBOUNCE_TIME el valor depende del hardware. Diferentes hardware pueden usar valores diferentes.
- El tiempo de rebote también debe aplicarse para el interruptor de encendido/apagado, el interruptor de fin de carrera, el interruptor de láminas (reed switch) y el sensor táctil ...