ESP8266 - Trazador Web

Este tutorial te enseña cómo construir un trazador basado en la web similar al Serial Plotter que se encuentra en el IDE de Arduino. Esta configuración te permite monitorear de manera conveniente datos en tiempo real de un ESP8266 usando un navegador web, ya sea en tu teléfono inteligente o en tu PC. Visualizará los datos en un formato gráfico similar al que observas en el Serial Plotter del IDE de Arduino.

Plotter web basado en ESP8266 NodeMCU

Hardware Requerido

1×ESP8266 NodeMCU
1×Cable USB Tipo-A a Tipo-C (para PC USB-A)
1×Cable USB Tipo-C a Tipo-C (para PC USB-C)
1×(Recomendado) Placa de Expansión de Terminales de Tornillo para ESP8266
1×(Recomendado) Divisor de Alimentación para ESP8266 Tipo-C

Or you can buy the following kits:

1×DIYables Sensor Kit (30 sensors/displays)
1×DIYables Sensor Kit (18 sensors/displays)
Divulgación: Algunos de los enlaces proporcionados en esta sección son enlaces de afiliado de Amazon. Podemos recibir una comisión por las compras realizadas a través de estos enlaces sin costo adicional para usted. Apreciamos su apoyo.

Cómo funciona Web Plotter

  • El código del ESP8266 crea tanto un servidor web como un servidor WebSocket.
  • Cuando un usuario accede a la página web alojada en la placa ESP8266 mediante un navegador, el servidor web del ESP8266 envía de vuelta el contenido web (HTML, CSS, JavaScript) al navegador.
  • El código JavaScript que se ejecuta en el navegador web renderiza un gráfico similar al Serial Plotter.
  • Al hacer clic en el botón de conexión en la página, el código JavaScript establece una conexión WebSocket con el servidor WebSocket que se ejecuta en la placa ESP8266.
  • El ESP8266 envía datos a través de la conexión WebSocket al navegador en un formato similar al utilizado por el Serial Plotter (detalles proporcionados en la siguiente sección).
  • El código JavaScript en el navegador recibe los datos y los grafica en el gráfico.

El formato de datos que ESP8266 envía al plotter web

Para trazar varias variables, necesitamos separar las variables entre sí mediante la secuencia “\t” o el carácter " ". El último valor debe terminarse con la secuencia “\r\n”.

En detalle:

  • La primera variable
plotter.broadcastTXT(line_1);
  • Las variables intermedias
plotter.broadcastTXT("\t"); // a tab '\t' or space ' ' character is printed between the two values. plotter.broadcastTXT(line_2); plotter.broadcastTXT("\t"); // a tab '\t' or space ' ' character is printed between the two values. plotter.broadcastTXT(line_3);
  • La última variable
plotter.broadcastTXT("\t"); // a tab '\t' or space ' ' character is printed between the two values. plotter.broadcastTXT(line_4); plotter.broadcastTXT("\r\n"); // the last value is terminated by a carriage return and a newline characters.

Para más detalles, consulte el tutorial ESP8266 - Serial Plotter.

Código ESP8266 - Plotter Web

El contenido de la página web (HTML, CSS, JavaScript) se almacena por separado en un archivo index.h. Por lo tanto, tendremos dos archivos de código en el IDE de Arduino:

  • Un archivo .ino con código para ESP8266, que crea un servidor web y un servidor WebSocket
  • Un archivo .h que contiene el contenido de la página web

Pasos R\u00e1pidos

Para empezar con ESP8266 en el IDE de Arduino, siga estos pasos:

  • Consulta el tutorial cómo configurar el entorno para ESP8266 en Arduino IDE si es la primera vez que usas ESP8266.
  • Conecta la placa ESP8266 a tu computadora usando un cable USB.
  • Abre Arduino IDE en tu computadora.
  • Elige la placa ESP8266 correcta, por ejemplo (p. ej. NodeMCU 1.0 (Módulo ESP-12E)), y su puerto COM correspondiente.
  • Abre el Administrador de Bibliotecas haciendo clic en el icono Administrador de Bibliotecas en la barra de navegación izquierda de Arduino IDE.
  • Busca la librería “WebSockets”, luego encuentra la librería WebSockets creada por Markus Sattler.
  • Haz clic en el botón Instalar para instalar la librería WebSockets.
Biblioteca WebSockets para ESP8266 NodeMCU
  • En el IDE de Arduino, crea un nuevo sketch, ponle un nombre, por ejemplo, newbiely.com.ino
  • Copia el código de abajo y ábrelo con el IDE de Arduino
/* * Este código de ESP8266 NodeMCU fue desarrollado por es.newbiely.com * Este código de ESP8266 NodeMCU se proporciona al público sin ninguna restricción. * Para tutoriales completos y diagramas de cableado, visite: * https://es.newbiely.com/tutorials/esp8266/esp8266-web-plotter */ #include <ESP8266WiFi.h> #include <ESP8266WebServer.h> #include "index.h" // contains HTML, JavaScript and CSS const char* ssid = "YOUR_WIFI_SSID"; // CHANGE IT TO MATCH YOUR OWN NETWORK CREDENTIALS const char* password = "YOUR_WIFI_PASSWORD"; // CHANGE IT TO MATCH YOUR OWN NETWORK CREDENTIALS ESP8266WebServer server(80); // Web server on port 80 WebSocketsServer plotter = WebSocketsServer(81); // WebSocket server on port 81 int last_update = 0; void setup() { Serial.begin(9600); delay(500); // Connect to Wi-Fi WiFi.begin(ssid, password); while (WiFi.status() != WL_CONNECTED) { delay(1000); Serial.println("Connecting to WiFi..."); } Serial.println("Connected to WiFi"); // Initialize WebSocket server plotter.begin(); // Serve a basic HTML page with JavaScript to create the WebSocket connection server.on("/", HTTP_GET, []() { Serial.println("Web Server: received a web page request"); String html = HTML_CONTENT; // Use the HTML content from the index.h file server.send(200, "text/html", html); }); server.begin(); Serial.print("ESP8266 Web Server's IP address: "); Serial.println(WiFi.localIP()); } void loop() { // Handle client requests server.handleClient(); // Handle WebSocket events plotter.loop(); if (millis() - last_update > 500) { last_update = millis(); String line_1 = String(random(0, 100)); String line_2 = String(random(0, 100)); String line_3 = String(random(0, 100)); String line_4 = String(random(0, 100)); // TO SERIAL PLOTTER Serial.print(line_1); Serial.print("\t"); // A tab character ('\t') or a space (' ') is printed between the two values. Serial.print(line_2); Serial.print("\t"); // A tab character ('\t') or a space (' ') is printed between the two values. Serial.print(line_3); Serial.print("\t"); // A tab character ('\t') or a space (' ') is printed between the two values. Serial.println(line_4); // The last value is terminated by a carriage return ('\r') and a newline ('\n') character. // TO WEB PLOTTER plotter.broadcastTXT(line_1); plotter.broadcastTXT("\t"); // A tab character ('\t') or a space (' ') is printed between the two values. plotter.broadcastTXT(line_2); plotter.broadcastTXT("\t"); // A tab character ('\t') or a space (' ') is printed between the two values. plotter.broadcastTXT(line_3); plotter.broadcastTXT("\t"); // A tab character ('\t') or a space (' ') is printed between the two values. plotter.broadcastTXT(line_4); plotter.broadcastTXT("\r\n"); // The last value is terminated by a carriage return ('\r') and a newline ('\n') character. } }
  • Modifica la información de WiFi (SSID y contraseña) en el código para que coincida con las credenciales de tu propia red.
  • Crea el archivo index.h en el IDE de Arduino mediante:
    • Ya sea haciendo clic en el botón justo debajo del icono del monitor serie y eligiendo Nueva pestaña, o usando las teclas Ctrl+Shift+N.
    Arduino IDE 2 añade un archivo
    • Da el nombre al archivo index.h y haz clic en el botón OK
    Arduino IDE 2 añade el archivo index.h
    • Copia el código de abajo y pégalo en el index.h.
    /* * Este código de ESP8266 NodeMCU fue desarrollado por es.newbiely.com * Este código de ESP8266 NodeMCU se proporciona al público sin ninguna restricción. * Para tutoriales completos y diagramas de cableado, visite: * https://es.newbiely.com/tutorials/esp8266/esp8266-web-plotter */ const char *HTML_CONTENT = R"=====( <!DOCTYPE html> <html> <head> <title>ESP8266 - Web Plotter</title> <meta name="viewport" content="width=device-width, initial-scale=0.7"> <style> body {text-align: center; height: 750px; } h1 {font-weight: bold; font-size: 20pt; padding-bottom: 5px; color: navy; } h2 {font-weight: bold; font-size: 15pt; padding-bottom: 5px; } button {font-weight: bold; font-size: 15pt; } #footer {width: 100%; margin: 0px; padding: 0px 0px 10px 0px; bottom: 0px; } .sub-footer {margin: 0 auto; position: relative; width:400px; } .sub-footer a {position: absolute; font-size: 10pt; top: 3px; } </style> <script> var COLOR_BACKGROUND = "#FFFFFF"; var COLOR_TEXT = "#000000"; var COLOR_BOUND = "#000000"; var COLOR_GRIDLINE = "#F0F0F0"; var COLOR_LINE = ["#0000FF", "#FF0000", "#009900", "#FF9900", "#CC00CC", "#666666", "#00CCFF", "#000000"]; var LEGEND_WIDTH = 10; var X_TITLE_HEIGHT = 40; var Y_TITLE_WIDTH = 40; var X_VALUE_HEIGHT = 40; var Y_VALUE_WIDTH = 50; var PLOTTER_PADDING_TOP = 30; var PLOTTER_PADDING_RIGHT = 30; var X_GRIDLINE_NUM = 5; var Y_GRIDLINE_NUM = 4; var WSP_WIDTH = 400; var WSP_HEIGHT = 200; var MAX_SAMPLE = 50; // in sample var X_MIN = 0; var X_MAX = MAX_SAMPLE; var Y_MIN = -5; var Y_MAX = 5; var X_TITLE = "X"; var Y_TITLE = "Y"; var plotter_width; var plotter_height; var plotter_pivot_x; var plotter_pivot_y; var sample_count = 0; var buffer = ""; var data = []; var webSocket; var canvas; var ctx; function plotter_init(){ canvas = document.getElementById("graph"); canvas.style.backgroundColor = COLOR_BACKGROUND; ctx = canvas.getContext("2d"); canvas_resize(); setInterval(update_plotter, 1000 / 60); } function plotter_to_esp8266(){ if(webSocket == null){ webSocket = new WebSocket("ws://" + window.location.host + ":81"); document.getElementById("ws_state").innerHTML = "CONNECTING"; webSocket.onopen = ws_onopen; webSocket.onclose = ws_onclose; webSocket.onmessage = ws_onmessage; webSocket.binaryType = "arraybuffer"; } else webSocket.close(); } function ws_onopen(){ document.getElementById("ws_state").innerHTML = "<span style='color: blue'>CONNECTED</span>"; document.getElementById("btn_connect").innerHTML = "Disconnect"; } function ws_onclose(){ document.getElementById("ws_state").innerHTML = "<span style='color: gray'>CLOSED</span>"; document.getElementById("btn_connect").innerHTML = "Connect"; webSocket.onopen = null; webSocket.onclose = null; webSocket.onmessage = null; webSocket = null; } function ws_onmessage(e_msg){ e_msg = e_msg || window.event; // MessageEvent console.log(e_msg.data); buffer += e_msg.data; buffer = buffer.replace(/\r\n/g, "\n"); buffer = buffer.replace(/\r/g, "\n"); while(buffer.indexOf("\n") == 0) buffer = buffer.substr(1); if(buffer.indexOf("\n") <= 0) return; var pos = buffer.lastIndexOf("\n"); var str = buffer.substr(0, pos); var new_sample_arr = str.split("\n"); buffer = buffer.substr(pos + 1); for(var si = 0; si < new_sample_arr.length; si++) { var str = new_sample_arr[si]; var arr = []; if(str.indexOf("\t") > 0) arr = str.split("\t"); else arr = str.split(" "); for(var i = 0; i < arr.length; i++){ var value = parseFloat(arr[i]); if(isNaN(value)) continue; if(i >= data.length) { var new_line = [value]; data.push(new_line); // new line } else data[i].push(value); } sample_count++; } for(var line = 0; line < data.length; line++){ while(data[line].length > MAX_SAMPLE) data[line].splice(0, 1); } auto_scale(); } function map(x, in_min, in_max, out_min, out_max){ return (x - in_min) * (out_max - out_min) / (in_max - in_min) + out_min; } function get_random_color(){ var letters = '0123456789ABCDEF'; var _color = '#'; for (var i = 0; i < 6; i++) _color += letters[Math.floor(Math.random() * 16)]; return _color; } function update_plotter(){ if(sample_count <= MAX_SAMPLE) X_MAX = sample_count; else X_MAX = 50; ctx.clearRect(0, 0, WSP_WIDTH, WSP_HEIGHT); ctx.save(); ctx.translate(plotter_pivot_x, plotter_pivot_y); ctx.font = "bold 20px Arial"; ctx.textBaseline = "middle"; ctx.textAlign = "center"; ctx.fillStyle = COLOR_TEXT; // draw X axis title if(X_TITLE != "") ctx.fillText(X_TITLE, plotter_width / 2, X_VALUE_HEIGHT + X_TITLE_HEIGHT / 2); // draw Y axis title if(Y_TITLE != ""){ ctx.rotate(-90 * Math.PI / 180); ctx.fillText(Y_TITLE, plotter_height / 2, -Y_VALUE_WIDTH - Y_TITLE_WIDTH / 2); ctx.rotate(90 * Math.PI / 180); } ctx.font = "16px Arial"; ctx.textAlign = "right"; ctx.strokeStyle = COLOR_BOUND; for(var i = 0; i <= Y_GRIDLINE_NUM; i++){ var y_gridline_px = -map(i, 0, Y_GRIDLINE_NUM, 0, plotter_height); y_gridline_px = Math.round(y_gridline_px) + 0.5; ctx.beginPath(); ctx.moveTo(0, y_gridline_px); ctx.lineTo(plotter_width, y_gridline_px); ctx.stroke(); ctx.strokeStyle = COLOR_BOUND; ctx.beginPath(); ctx.moveTo(-7 , y_gridline_px); ctx.lineTo(4, y_gridline_px); ctx.stroke(); var y_gridline_value = map(i, 0, Y_GRIDLINE_NUM, Y_MIN, Y_MAX); y_gridline_value = y_gridline_value.toFixed(1); ctx.fillText(y_gridline_value + "", -15, y_gridline_px); ctx.strokeStyle = COLOR_GRIDLINE; } ctx.strokeStyle = COLOR_BOUND; ctx.textAlign = "center"; ctx.beginPath(); ctx.moveTo(0.5, y_gridline_px - 7); ctx.lineTo(0.5, y_gridline_px + 4); ctx.stroke(); for(var i = 0; i <= X_GRIDLINE_NUM; i++){ var x_gridline_px = map(i, 0, X_GRIDLINE_NUM, 0, plotter_width); x_gridline_px = Math.round(x_gridline_px) + 0.5; ctx.beginPath(); ctx.moveTo(x_gridline_px, 0); ctx.lineTo(x_gridline_px, -plotter_height); ctx.stroke(); ctx.strokeStyle = COLOR_BOUND; ctx.beginPath(); ctx.moveTo(x_gridline_px, 7); ctx.lineTo(x_gridline_px, -4); ctx.stroke(); var x_gridline_value; if(sample_count <= MAX_SAMPLE) x_gridline_value = map(i, 0, X_GRIDLINE_NUM, X_MIN, X_MAX); else x_gridline_value = map(i, 0, X_GRIDLINE_NUM, sample_count - MAX_SAMPLE, sample_count);; ctx.fillText(x_gridline_value.toString(), x_gridline_px, X_VALUE_HEIGHT / 2 + 5); ctx.strokeStyle = COLOR_GRIDLINE; } var line_num = data.length; for(var line = 0; line < line_num; line++){ // draw graph var sample_num = data[line].length; if(sample_num >= 2){ var y_value = data[line][0]; var x_px = 0; var y_px = -map(y_value, Y_MIN, Y_MAX, 0, plotter_height); if(line == COLOR_LINE.length) COLOR_LINE.push(get_random_color()); ctx.strokeStyle = COLOR_LINE[line]; ctx.beginPath(); ctx.moveTo(x_px, y_px); for(var i = 0; i < sample_num; i++){ y_value = data[line][i]; x_px = map(i, X_MIN, X_MAX -1, 0, plotter_width); y_px = -map(y_value, Y_MIN, Y_MAX, 0, plotter_height); ctx.lineTo(x_px, y_px); } ctx.stroke(); } // draw legend var x = plotter_width - (line_num - line) * LEGEND_WIDTH - (line_num - line - 1) * LEGEND_WIDTH / 2; var y = -plotter_height - PLOTTER_PADDING_TOP / 2 - LEGEND_WIDTH / 2; ctx.fillStyle = COLOR_LINE[line]; ctx.beginPath(); ctx.rect(x, y, LEGEND_WIDTH, LEGEND_WIDTH); ctx.fill(); } ctx.restore(); } function canvas_resize(){ canvas.width = 0; // to avoid wrong screen size canvas.height = 0; document.getElementById('footer').style.position = "fixed"; var width = window.innerWidth - 20; var height = window.innerHeight - 20; WSP_WIDTH = width; WSP_HEIGHT = height - document.getElementById('header').offsetHeight - document.getElementById('footer').offsetHeight; canvas.width = WSP_WIDTH; canvas.height = WSP_HEIGHT; ctx.font = "16px Arial"; var y_min_text_size = ctx.measureText(Y_MIN.toFixed(1) + "").width; var y_max_text_size = ctx.measureText(Y_MAX.toFixed(1) + "").width; Y_VALUE_WIDTH = Math.round(Math.max(y_min_text_size, y_max_text_size)) + 15; plotter_width = WSP_WIDTH - Y_VALUE_WIDTH - PLOTTER_PADDING_RIGHT; plotter_height = WSP_HEIGHT - X_VALUE_HEIGHT - PLOTTER_PADDING_TOP; plotter_pivot_x = Y_VALUE_WIDTH; plotter_pivot_y = WSP_HEIGHT - X_VALUE_HEIGHT; if(X_TITLE != "") { plotter_height -= X_TITLE_HEIGHT; plotter_pivot_y -= X_TITLE_HEIGHT; } if(Y_TITLE != "") { plotter_width -= Y_TITLE_WIDTH; plotter_pivot_x += Y_TITLE_WIDTH; } ctx.lineWidth = 1; } function auto_scale(){ if(data.length >= 1){ var max_arr = []; var min_arr = []; for(var i = 0; i < data.length; i++){ if(data[i].length >= 1){ var max = Math.max.apply(null, data[i]); var min = Math.min.apply(null, data[i]); max_arr.push(max); min_arr.push(min); } } var max = Math.max.apply(null, max_arr); var min = Math.min.apply(null, min_arr); var MIN_DELTA = 10.0; if((max - min) < MIN_DELTA){ var mid = (max + min) / 2; max = mid + MIN_DELTA / 2; min = mid - MIN_DELTA / 2; } var range = max - min; var exp; if (range == 0.0) exp = 0; else exp = Math.floor(Math.log10(range / 4)); var scale = Math.pow(10, exp); var raw_step = (range / 4) / scale; var step; potential_steps =[1.0, 1.5, 2.0, 2.5, 3.0, 4.0, 5.0, 6.0, 8.0, 10.0]; for (var i = 0; i < potential_steps.length; i++) { if (potential_steps[i] < raw_step) continue; step = potential_steps[i] * scale; Y_MIN = step * Math.floor(min / step); Y_MAX = Y_MIN + step * (4); if (Y_MAX >= max) break; } var count = 5 - Math.floor((Y_MAX - max) / step); Y_MAX = Y_MIN + step * (count - 1); ctx.font = "16px Arial"; var y_min_text_size = ctx.measureText(Y_MIN.toFixed(1) + "").width; var y_max_text_size = ctx.measureText(Y_MAX.toFixed(1) + "").width; Y_VALUE_WIDTH = Math.round(Math.max(y_min_text_size, y_max_text_size)) + 15; plotter_width = WSP_WIDTH - Y_VALUE_WIDTH - PLOTTER_PADDING_RIGHT; plotter_pivot_x = Y_VALUE_WIDTH; } } window.onload = plotter_init; </script> </head> <body onresize="canvas_resize()"> 
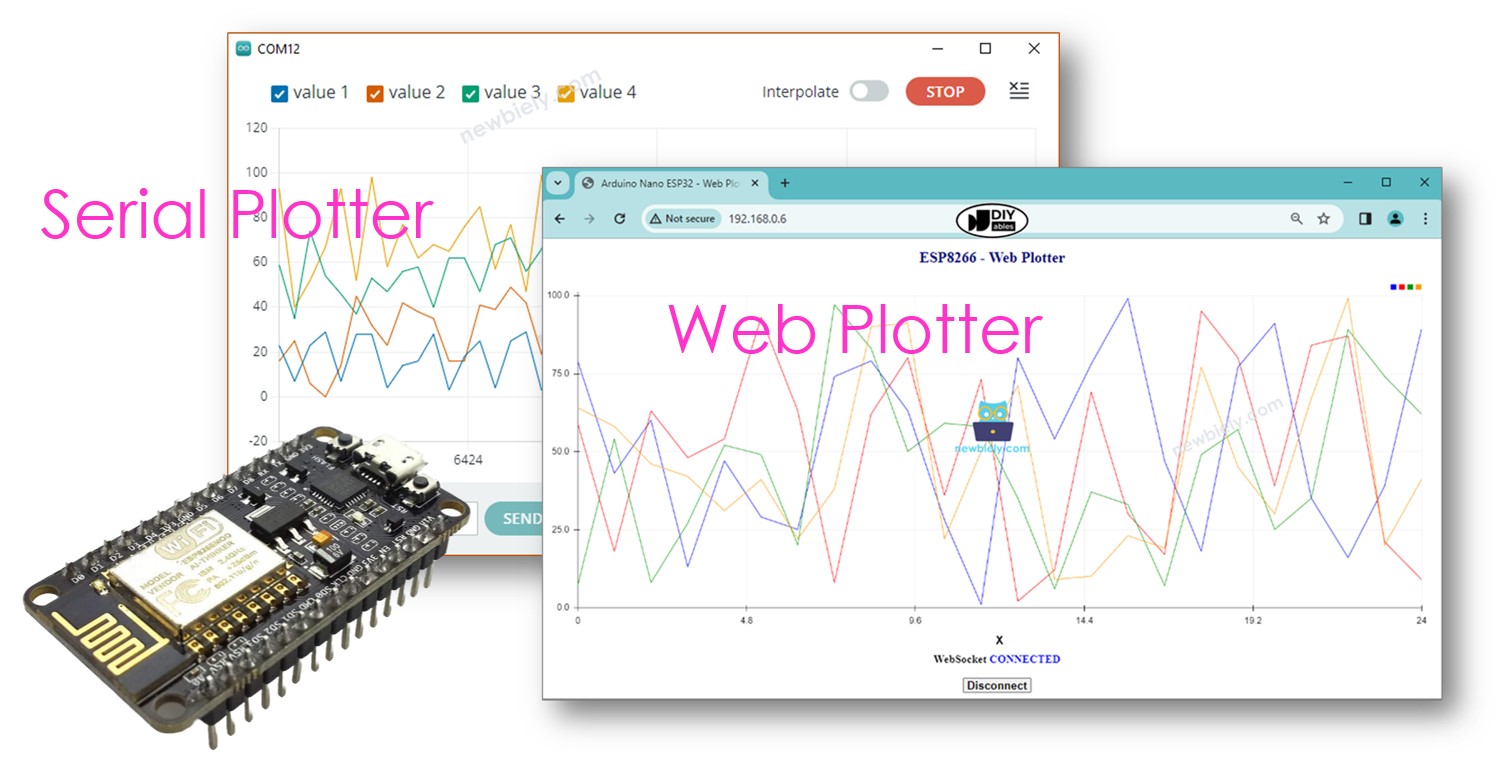
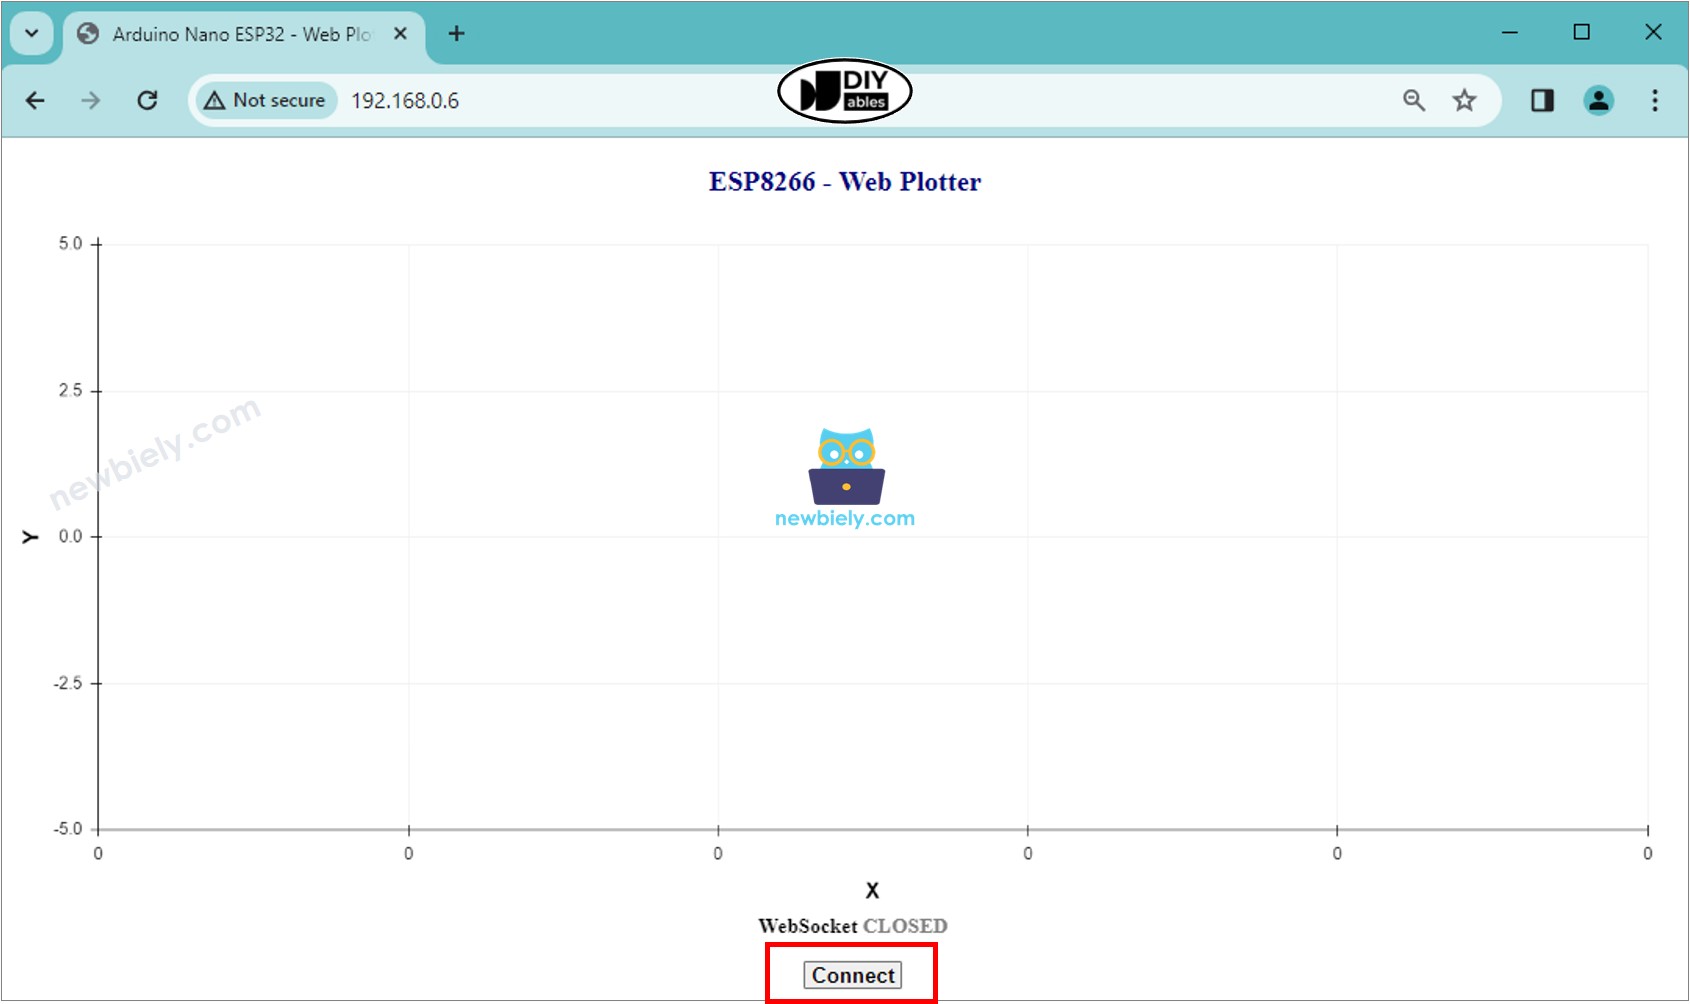
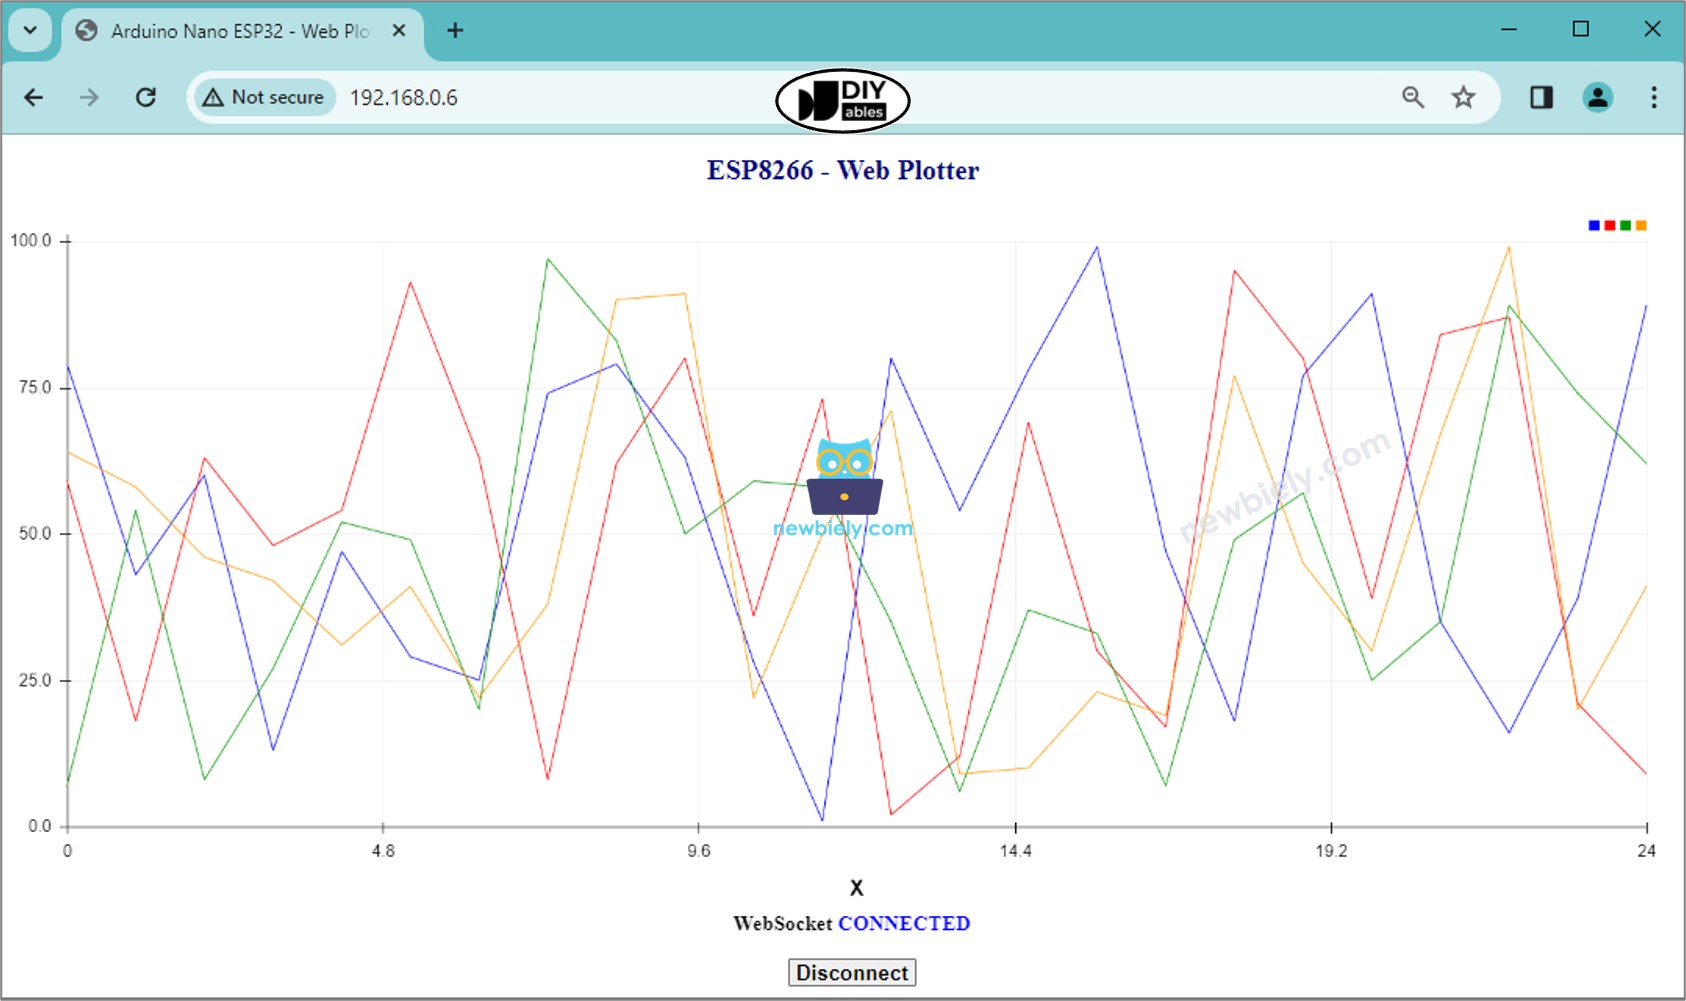
<h1 id="header">ESP8266 - Web Plotter</h1> <canvas id="graph"></canvas> <br> <div id="footer"> <div class="sub-footer"> <h2>WebSocket <span id="ws_state"><span style="color: gray">CLOSED</span></span></h2> </div> <button id="btn_connect" type="button" onclick="plotter_to_esp8266();">Connect</button> </div> </body> </html> )=====";
    • Ahora tienes el código en dos archivos: newbiely.com.ino y index.h
    • Haz clic en el botón Subir en el IDE de Arduino para subir el código al ESP8266.
    • Abre el Monitor Serial
    • Consulta el resultado en el Monitor Serial.
    COM6
    Send
    Connecting to WiFi... Connected to WiFi ESP8266 Web Server's IP address IP address: 192.168.0.2
    Autoscroll Show timestamp
    Clear output
    9600 baud  
    Newline  
    • Tenga en cuenta la dirección IP que se muestra y introduzca esta dirección en la barra de direcciones de un navegador web en su teléfono inteligente o PC.
    • Verá la página web como se muestra a continuación:
    Navegador web para plotter ESP8266 NodeMCU
    • Haz clic en el botón CONECTAR para conectar la página web al ESP8266 mediante WebSocket.
    • Verás que el plotter grafica los datos como se muestra en la imagen a continuación.
    Gráfico web de ESP8266 NodeMCU
    • Puedes abrir el Serial Plotter en el IDE de Arduino para comparar con el Web Plotter en el navegador web.

    ※ Nota:

    • Si modificas el contenido HTML en el index.h y no tocas nada en el archivo newbiely.com.ino, cuando compiles y subas el código al ESP8266, el IDE de Arduino no actualizará el contenido HTML.
    • Para hacer que Arduino IDE actualice el contenido HTML en este caso, haz un cambio en el archivo newbiely.com.ino (por ejemplo, añadir una línea en blanco, añadir un comentario...)

    Explicación de código línea por línea

    El código anterior de ESP8266 contiene una explicación línea por línea. ¡Por favor lea los comentarios en el código!

※ NUESTROS MENSAJES

  • No dude en compartir el enlace de este tutorial. Sin embargo, por favor no use nuestro contenido en otros sitios web. Hemos invertido mucho esfuerzo y tiempo en crear el contenido, ¡por favor respete nuestro trabajo!