ESP8266 - Zumbador piezoeléctrico
Este tutorial te enseña cómo usar el ESP8266 para controlar el zumbador piezoeléctrico. En detalle, aprenderemos:
- Cómo funciona un zumbador piezoeléctrico
- Cómo conectar el zumbador piezoeléctrico a una placa ESP8266
- Cómo programar el ESP8266 para que el zumbador piezoeléctrico genere sonido.
- Cómo programar el ESP8266 para que el zumbador piezoeléctrico reproduzca una melodía de una canción
Hardware Requerido
Or you can buy the following kits:
| 1 | × | DIYables Sensor Kit (30 sensors/displays) | |
| 1 | × | DIYables Sensor Kit (18 sensors/displays) |
Acerca del zumbador piezoeléctrico
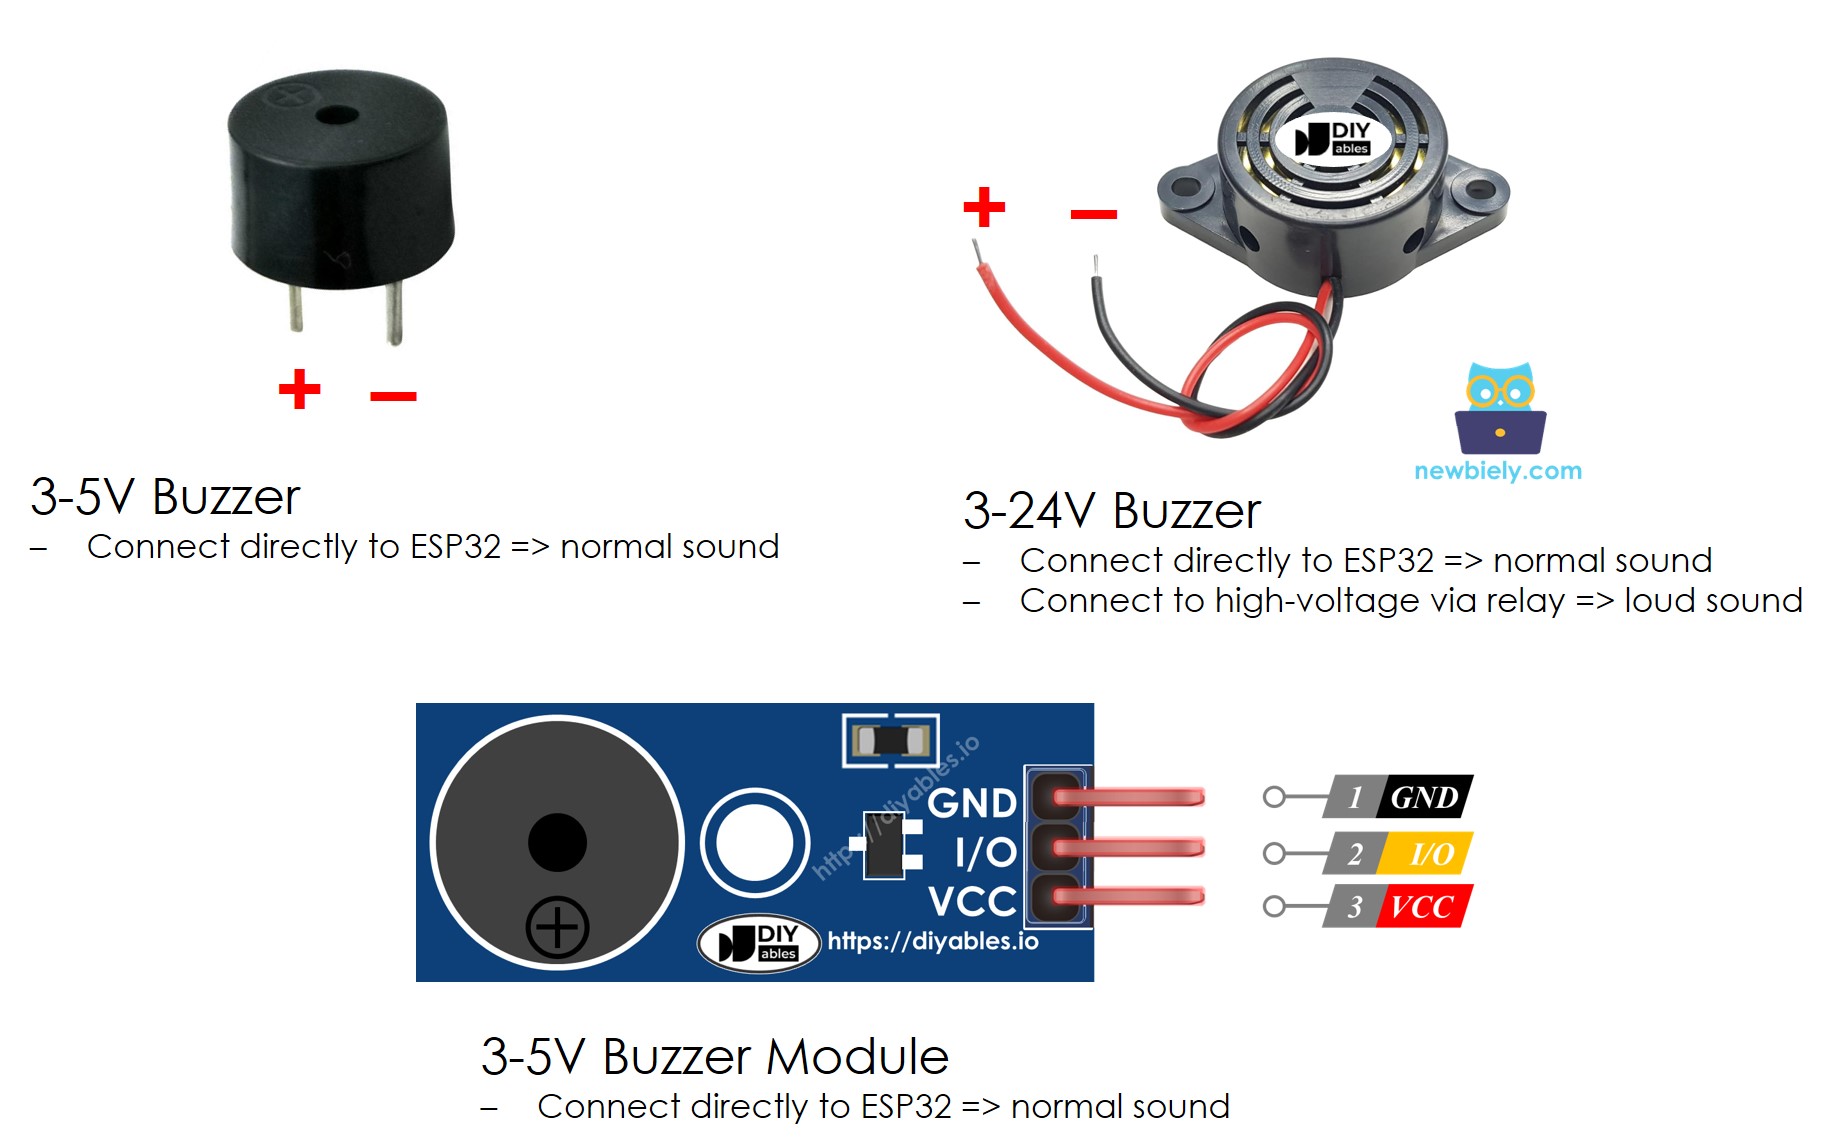
Un zumbador piezoeléctrico se utiliza para producir sonido, pitidos o incluso una melodía.
Disponible en el mercado hay un zumbador activo de 3 a 24 V que funciona tanto como un zumbador activo de 3 a 5 V como un zumbador de alta tensión (12 V y más). Cuando se conecta directamente a un pin de Arduino, este zumbador emite un sonido estándar, lo que lo hace adecuado para aplicaciones como indicadores sonoros (por ejemplo, sonidos de un teclado numérico). Alternativamente, cuando se conecta a una fuente de alta tensión a través de un relé, genera un sonido fuerte, lo que lo hace ideal para señales de advertencia.
Pinout del zumbador piezoeléctrico
El zumbador piezoeléctrico suele tener dos pines:
- El pin negativo (-) debe conectarse a GND (0 V)
- El pin positivo (+) recibe la señal de control desde ESP8266 (directamente, o indirectamente a través de un relé)
Cómo funciona un zumbador piezoeléctrico
Diagrama de Cableado
- El diagrama de cableado entre ESP8266 y el zumbador piezoeléctrico
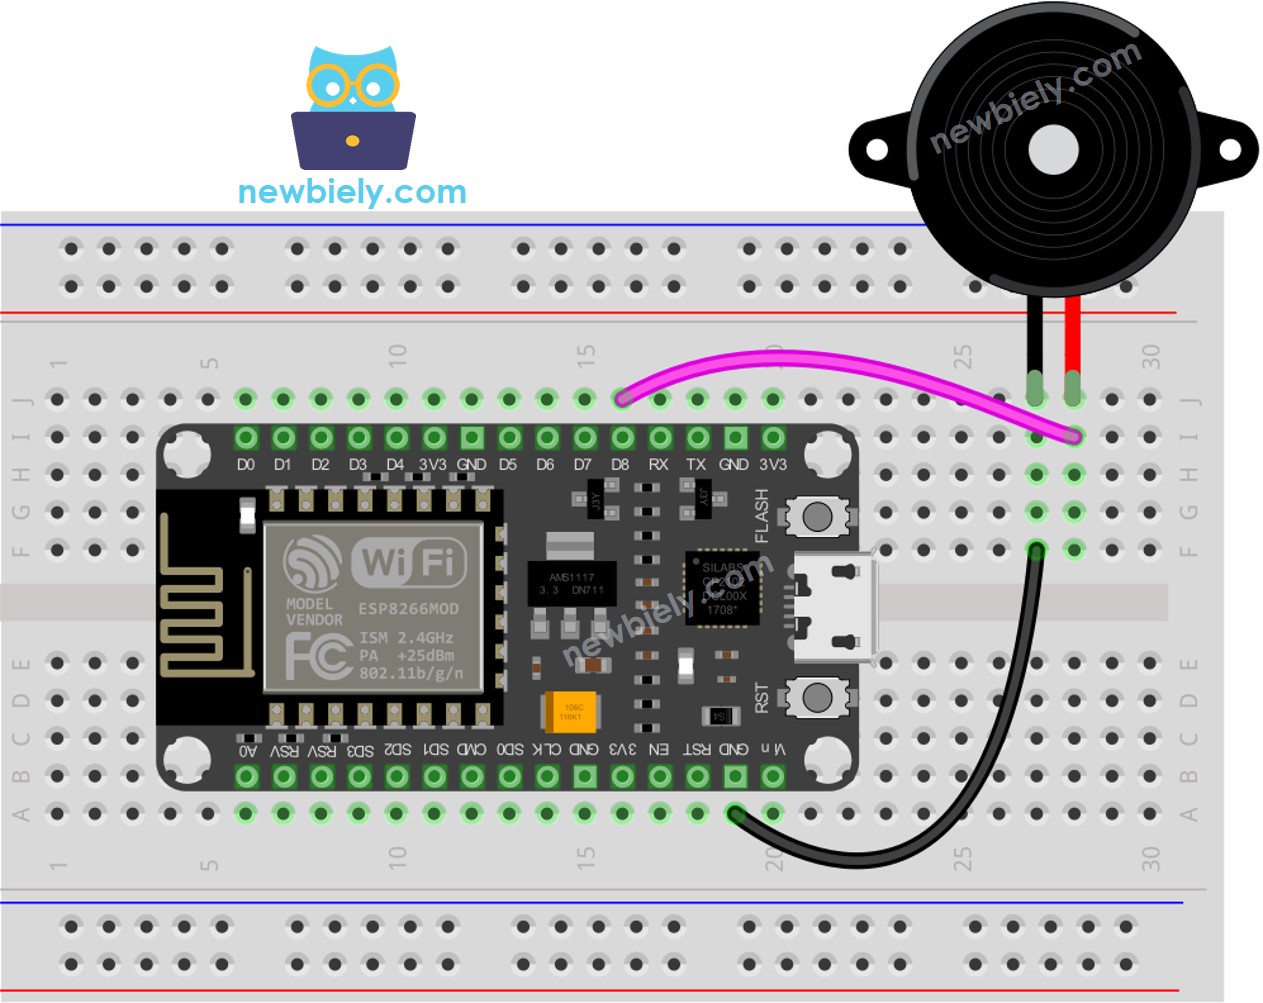
This image is created using Fritzing. Click to enlarge image
Para obtener m\u00e1s informaci\u00f3n, consulte Pines del ESP8266 y c\u00f3mo alimentar ESP8266 y otros componentes.
- El diagrama de cableado entre el ESP8266 y el módulo de zumbador piezoeléctrico
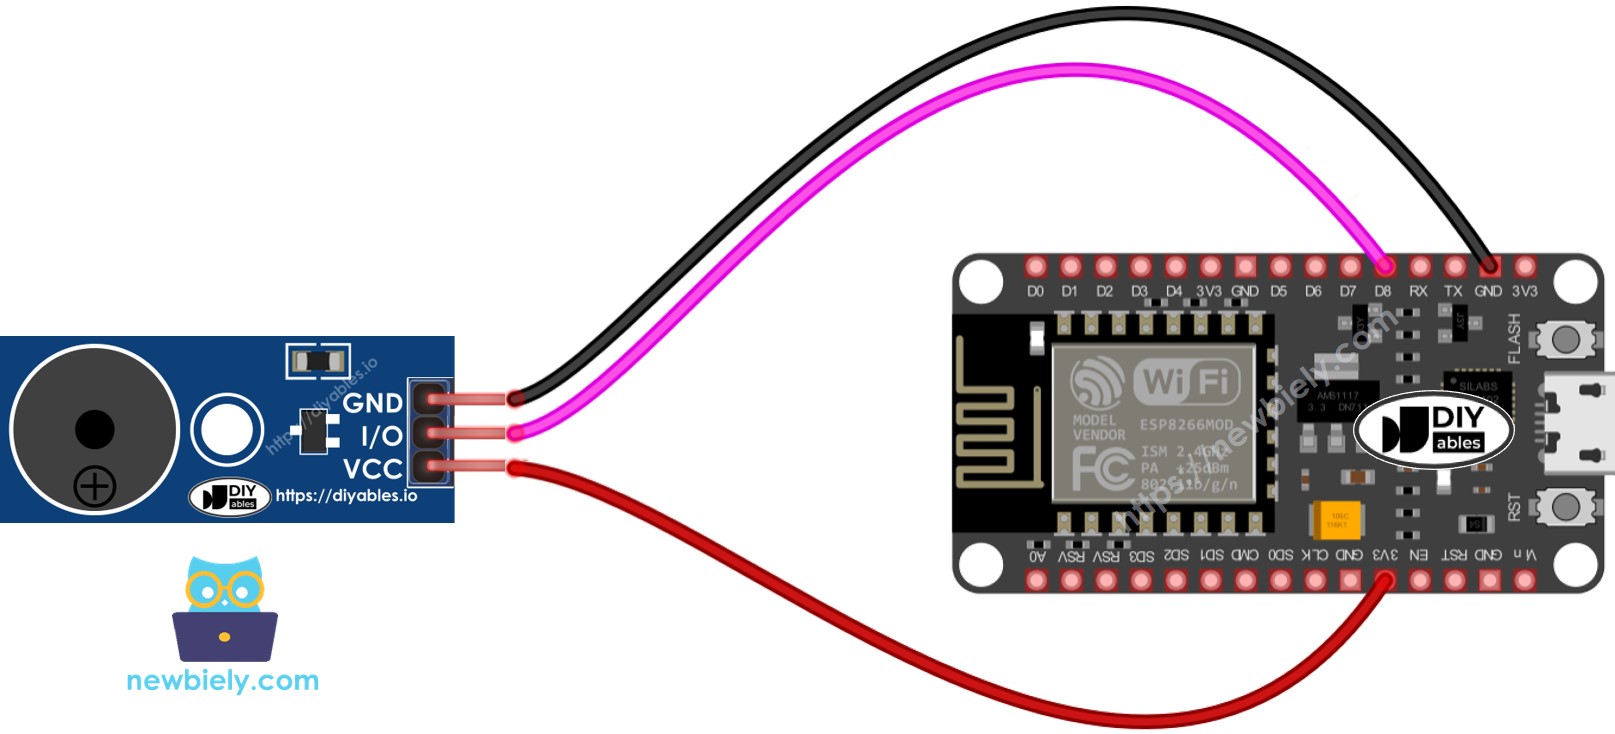
This image is created using Fritzing. Click to enlarge image
Código ESP8266
Pasos R\u00e1pidos
Para empezar con ESP8266 en el IDE de Arduino, siga estos pasos:
- Consulta el tutorial cómo configurar el entorno para ESP8266 en Arduino IDE si es la primera vez que usas ESP8266.
- Conecta los componentes tal como se muestra en el diagrama.
- Conecta la placa ESP8266 a tu computadora usando un cable USB.
- Abre Arduino IDE en tu computadora.
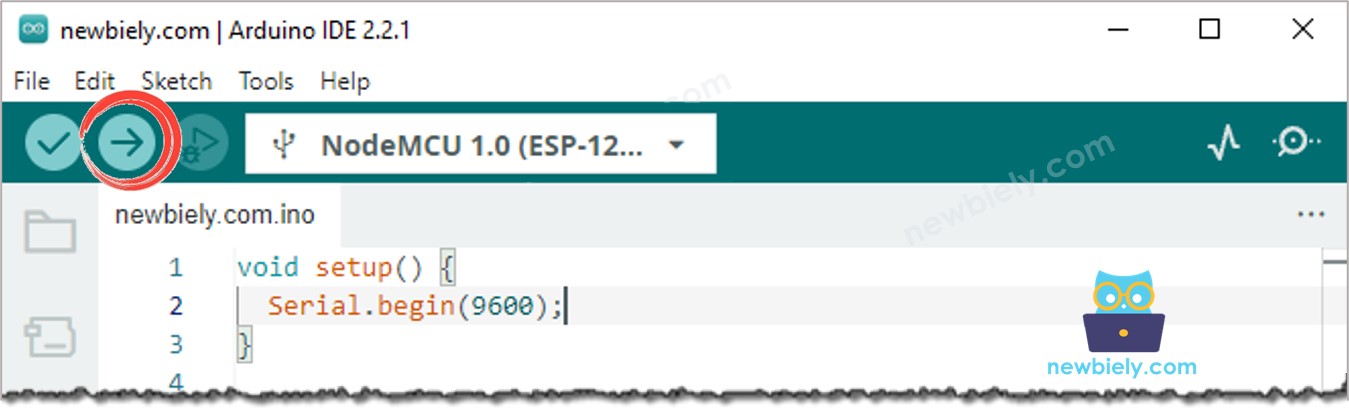
- Elige la placa ESP8266 correcta, como (por ejemplo NodeMCU 1.0 (ESP-12E Module)), y su puerto COM respectivo.
- Copia el código y ábrelo con Arduino IDE.
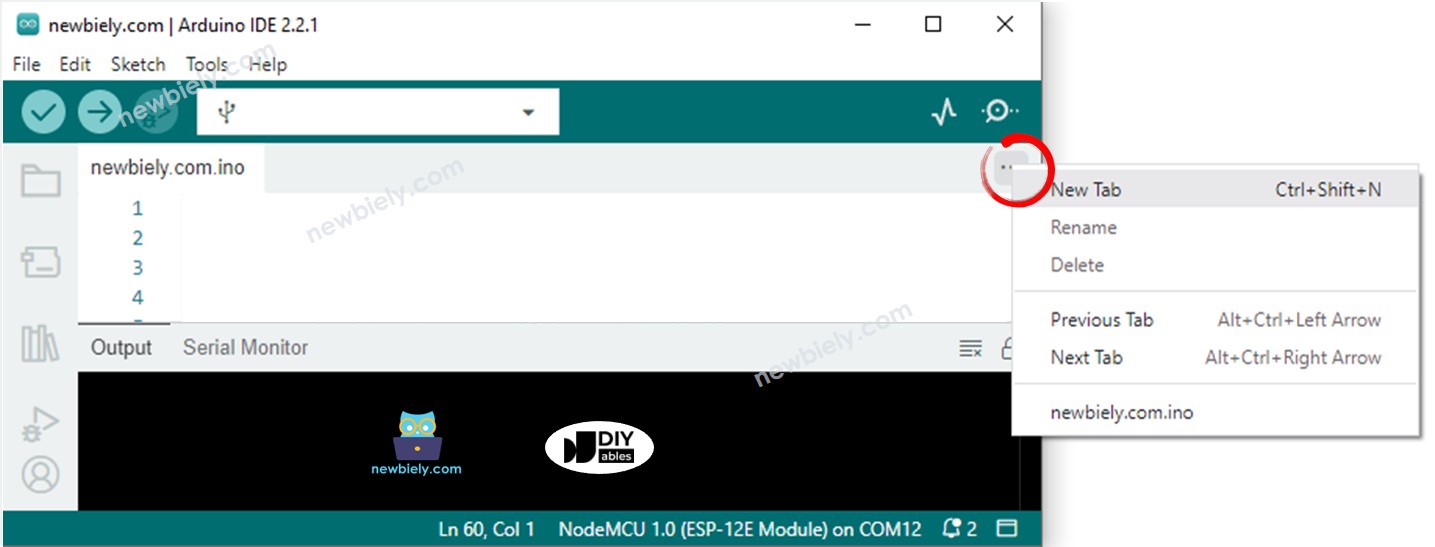
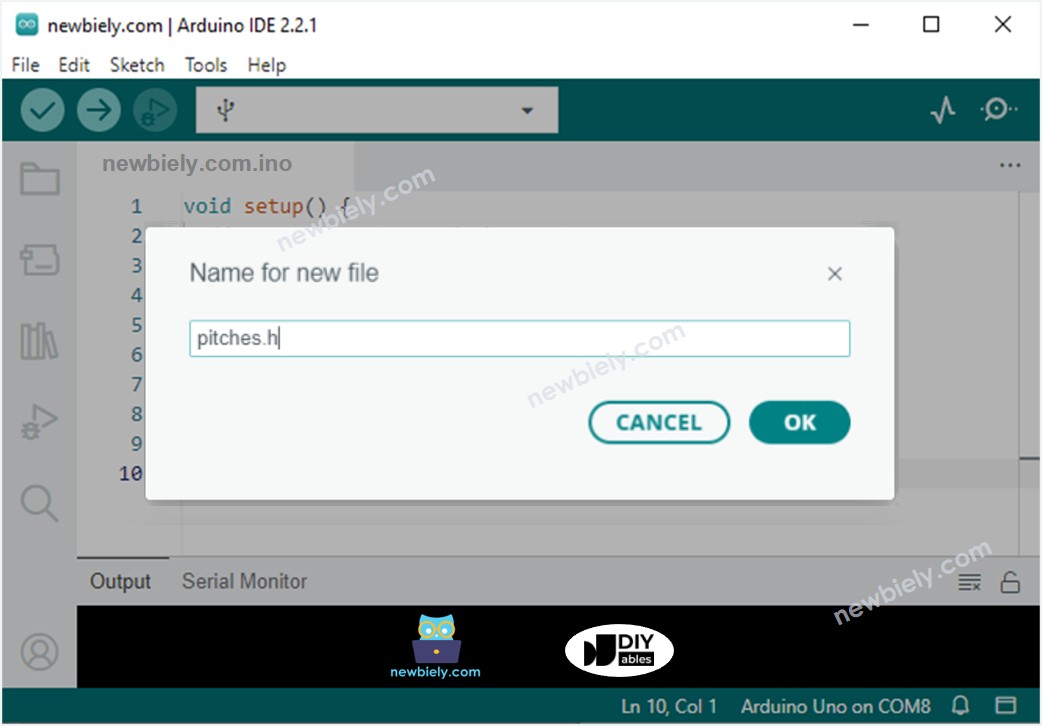
- Crea el pitches.h archivo en Arduino IDE de la siguiente manera:
- Haz clic en el botón justo debajo del icono del monitor serie y elige Nueva pestaña, o usa las teclas Ctrl+Shift+N.
- Introduce el nombre del archivo pitches.h y haz clic en el botón Aceptar
- Copie el código de abajo y péguelo en el archivo creado pitches.h.
- Copia el código anterior y ábrelo con el IDE de Arduino.
- Haz clic en el botón Subir en el IDE de Arduino para compilar y cargar el código en la placa ESP8266.
- Escucha la melodía.
Modificando el código ESP8266
Ahora, vamos a modificar el código para reproducir la canción 'Jingle Bells'.
Debemos modificar los valores de dos arreglos: int melody[] y int noteDurations[].
※ Nota:
El código anterior utiliza la función delay(). Esto provoca que el resto del código se bloquee mientras se reproduce una melodía. Para evitarlo, en su lugar se puede usar la biblioteca ezBuzzer. Esta biblioteca está diseñada específicamente para permitir que los zumbadores emitan pitidos o reproduzcan melodías sin bloquear el resto del código.
Video Tutorial
Estamos considerando crear tutoriales en video. Si considera que los tutoriales en video son importantes, suscríbase a nuestro canal de YouTube para motivarnos a crear los videos.
Desafíate a ti mismo
- Utilice un zumbador piezoeléctrico para reproducir su canción favorita.
- Active automáticamente una alarma cuando alguien se acerque a sus objetos de valor. Ver: ESP8266 - Motion Sensor para obtener más información.