ESP8266 - OLED
Este tutorial te enseña cómo usar ESP8266 con una pantalla OLED. En detalle, aprenderemos:
- Cómo conectar la pantalla OLED con ESP8266.
- Cómo programar el ESP8266 para mostrar texto y un número en la pantalla OLED.
- Cómo programar el ESP8266 para centrar el texto y el número vertical y horizontalmente en la pantalla OLED.
- Cómo programar el ESP8266 para dibujar en la pantalla OLED.
- Cómo programar el ESP8266 para mostrar una imagen en la pantalla OLED.
Hardware Requerido
Or you can buy the following kits:
| 1 | × | DIYables Sensor Kit (30 sensors/displays) | |
| 1 | × | DIYables Sensor Kit (18 sensors/displays) |
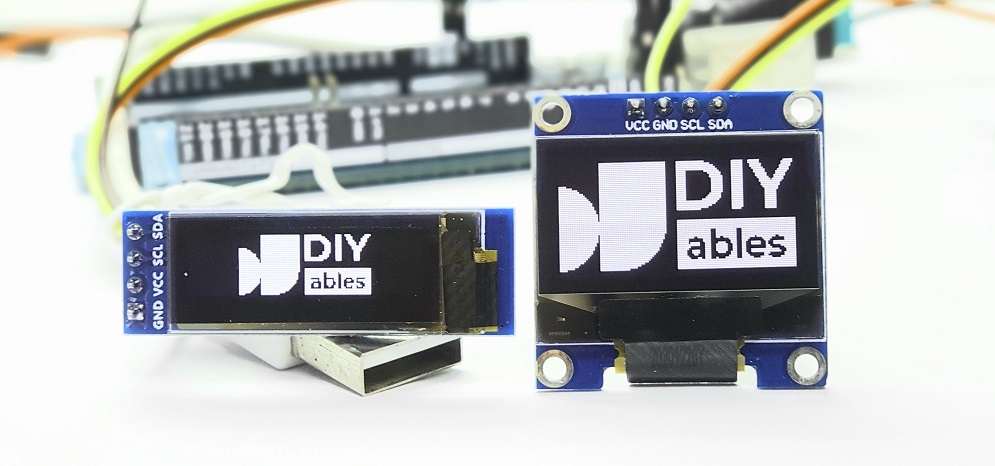
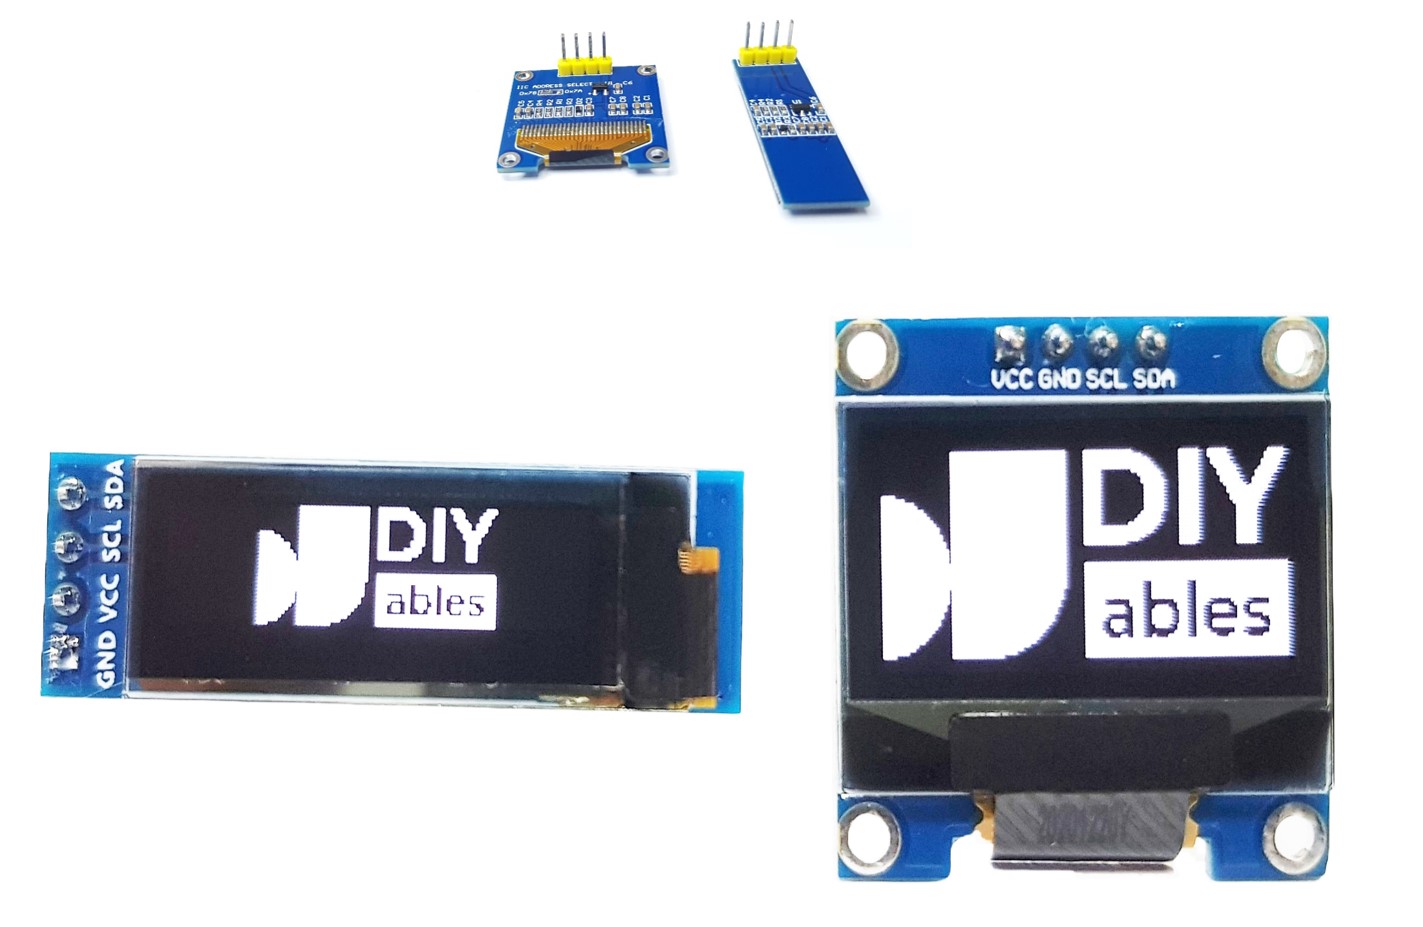
Acerca de la pantalla OLED
Existen varios tipos de pantallas OLED disponibles. La pantalla OLED SSD1306 I2C de 128x64 y 128x32 es la más utilizada con ESP8266.
Pinout de la pantalla OLED I2C
- Pin GND: debe estar conectado a la tierra del ESP8266.
- Pin VCC: es la fuente de alimentación para la pantalla, que debe conectarse a 3.3V o 5V.
- Pin SCL: es un pin de reloj serie para la interfaz I2C.
- Pin SDA: es un pin de datos serial para la interfaz I2C.
※ Nota:
- Los pines de un módulo OLED pueden diferir entre fabricantes y tipos de módulos. Es esencial consultar siempre las etiquetas impresas en el módulo OLED. ¡Presta atención!
- Este tutorial utiliza la pantalla OLED que tiene el controlador I2C SSD1306. Lo hemos probado con la pantalla OLED de DIYables y funciona perfectamente.
Diagrama de Cableado
- Diagrama de cableado entre ESP8266 y OLED 128x64
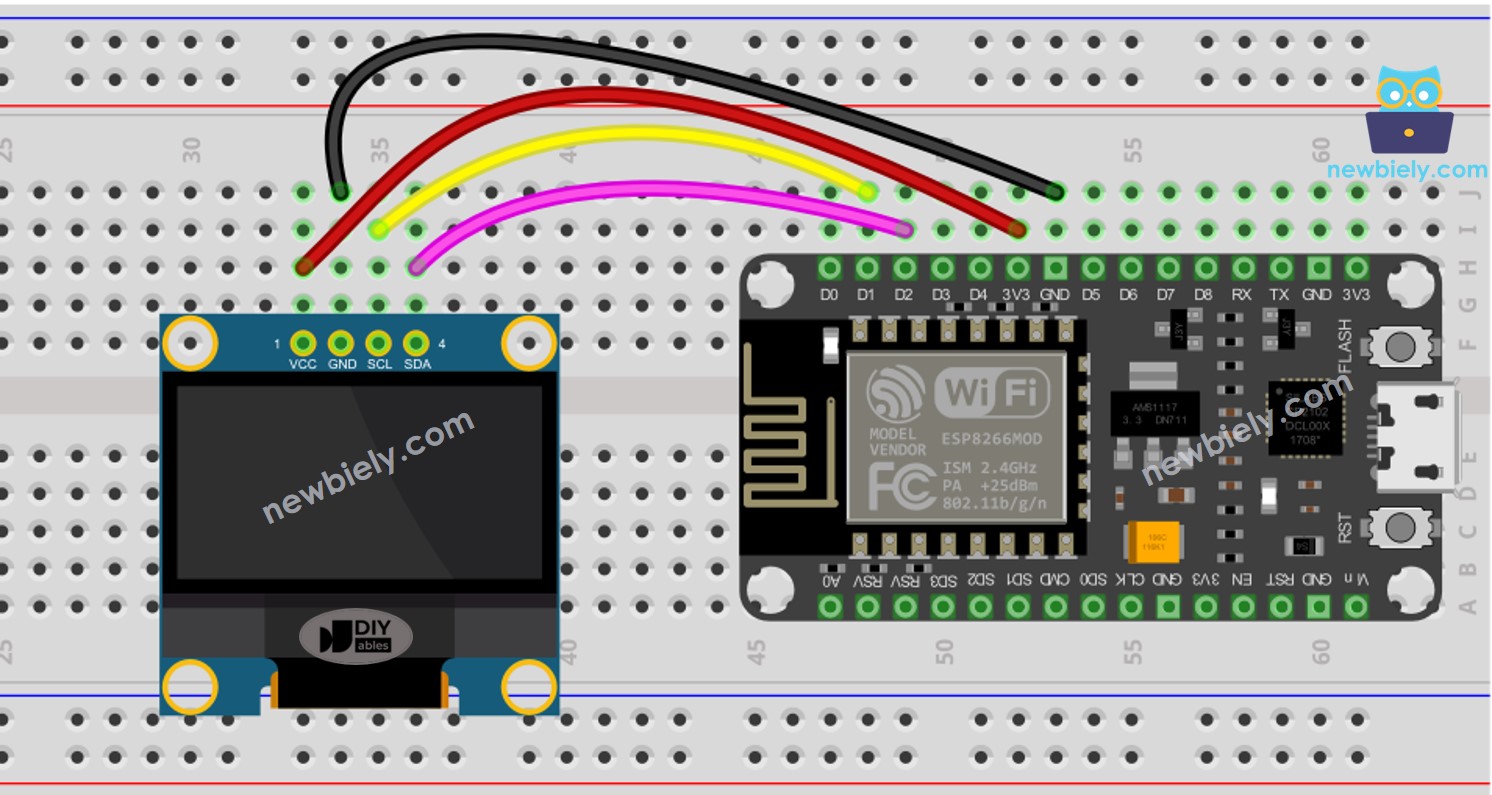
This image is created using Fritzing. Click to enlarge image
Para obtener m\u00e1s informaci\u00f3n, consulte Pines del ESP8266 y c\u00f3mo alimentar ESP8266 y otros componentes.
- Diagrama de cableado entre ESP8266 y OLED 128x32
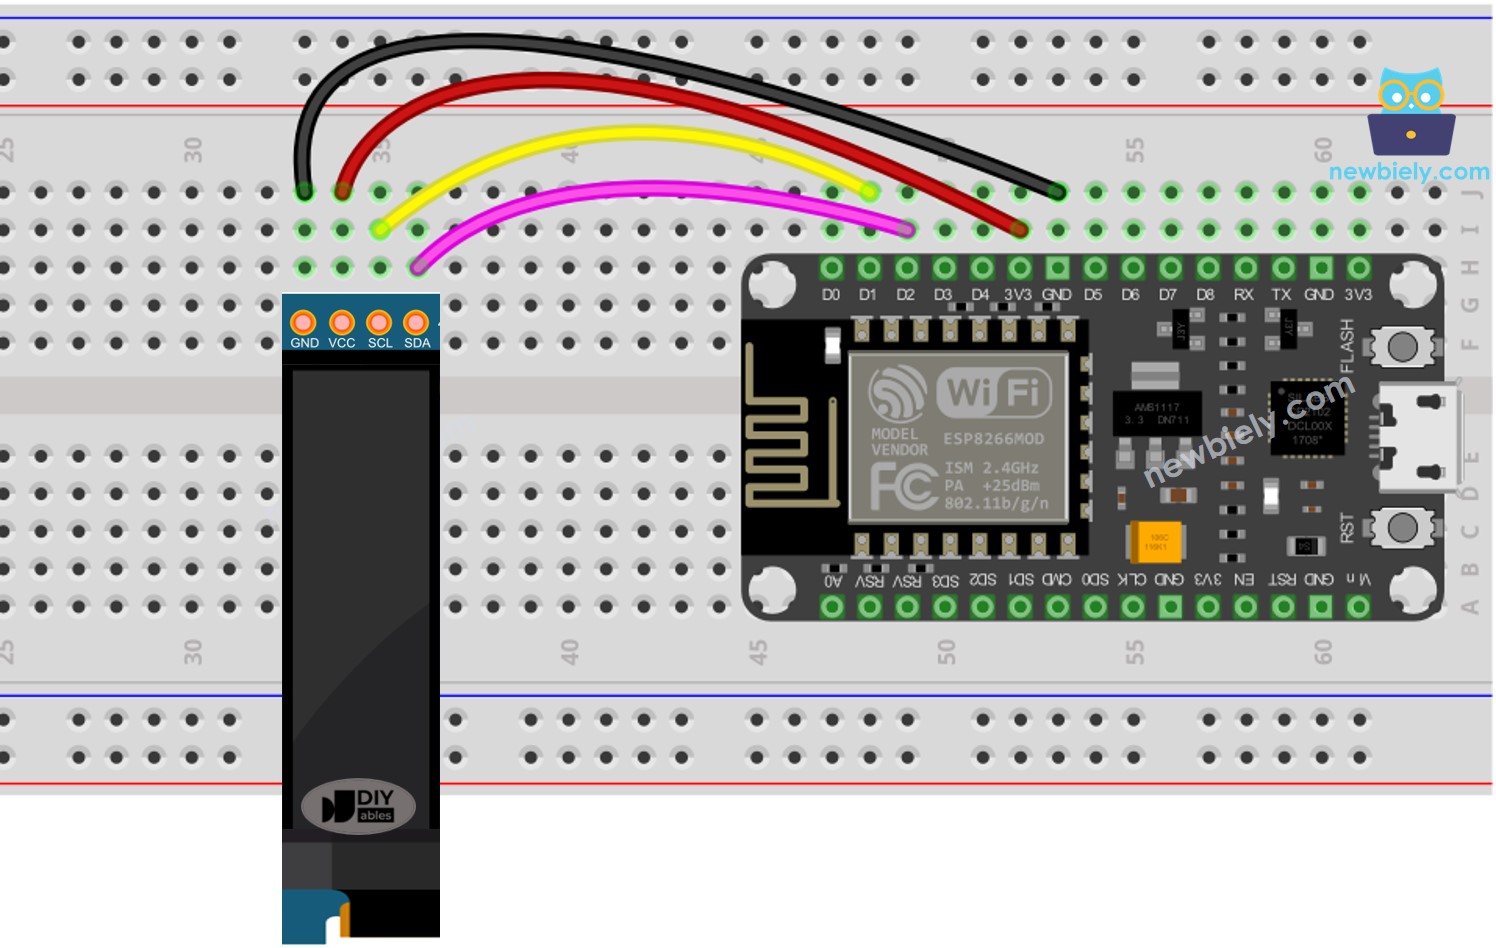
This image is created using Fritzing. Click to enlarge image
La tabla de cableado entre el ESP8266 y la pantalla OLED:
| OLED Module | ESP8266 |
|---|---|
| Vin | 3.3V |
| GND | GND |
| SDA | D2 (GPIO4) |
| SCL | D1 (GPIO5) |
Cómo usar OLED con ESP8266
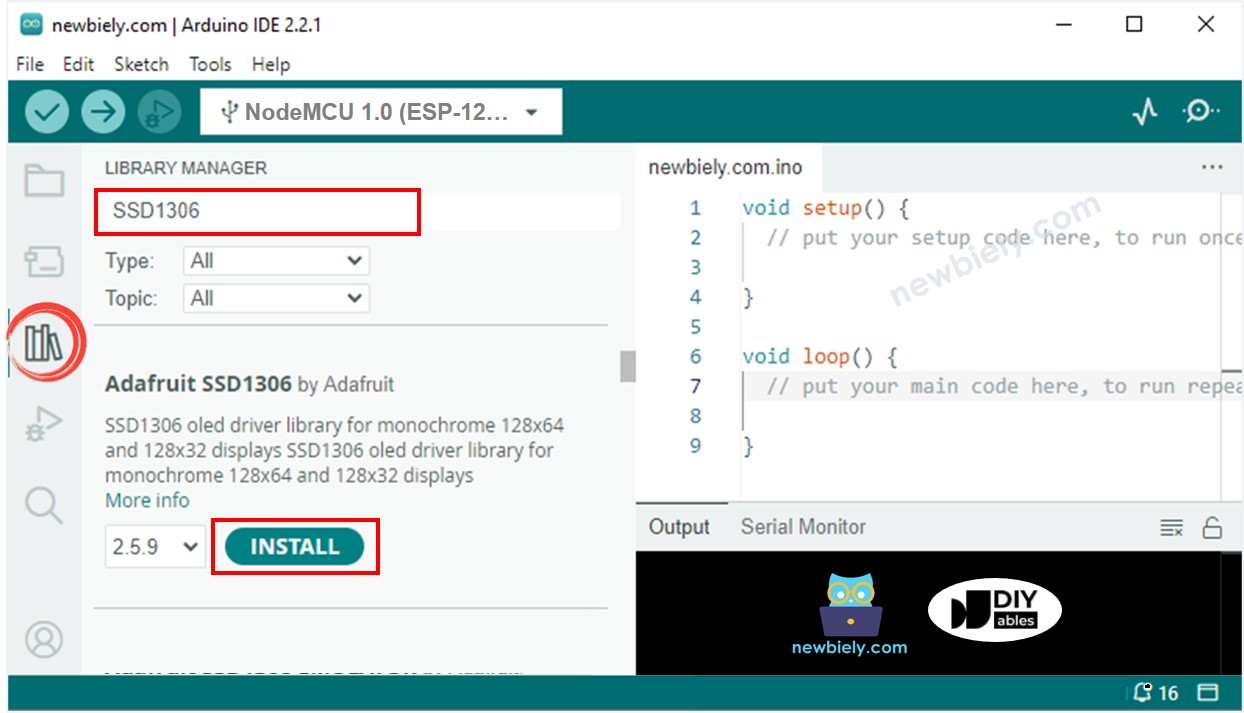
Instalar la biblioteca OLED SSD1306
- Haz clic en el icono de Bibliotecas en la barra izquierda del IDE de Arduino.
- Busca “SSD1306” y localiza la biblioteca SSD1306 de Adafruit.
- Luego, pulsa el botón Instalar para completar la instalación.
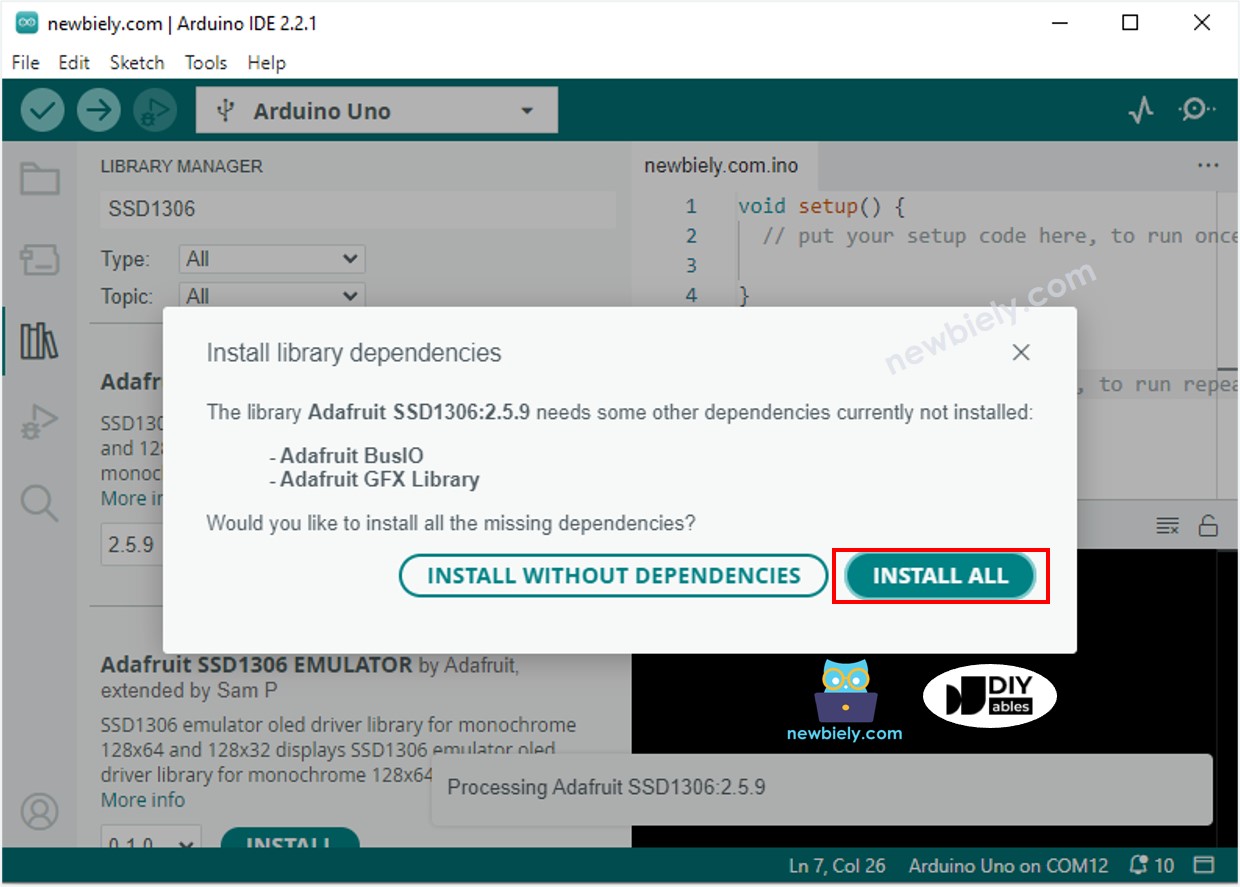
- Se le pedirá que instale algunas otras dependencias de bibliotecas.
- Para instalarlas todas, haga clic en el botón Instalar todo.
Cómo programar para OLED
- Incluir la biblioteca
- Especifica las dimensiones de la pantalla OLED como 128 x 64.
- Especifica las dimensiones de una pantalla OLED de 128x32.
- Crear un objeto del tipo SSD1306 OLED.
- En la función setup(), inicializa la pantalla OLED.
- Luego, puedes mostrar texto, imágenes y crear líneas...
A partir de ahora, todos los códigos son para OLED 128x64, pero se pueden adaptar a OLED 128x32 cambiando el tamaño de la pantalla y ajustando las coordenadas si es necesario.
Código ESP8266 - Mostrar texto en la pantalla OLED
Aquí hay algunas funciones que se pueden usar para mostrar texto en la pantalla OLED:
- oled.clearDisplay(): todos los píxeles están apagados.
- oled.drawPixel(x,y, color): dibuja un píxel en las coordenadas x, y.
- oled.setTextSize(n): establece el tamaño de fuente; admite tamaños de 1 a 8.
- oled.setCursor(x,y): establece las coordenadas para comenzar a escribir texto.
- oled.setTextColor(WHITE): establece el color del texto.
- oled.setTextColor(BLACK, WHITE): establece el color del texto y el color de fondo.
- oled.println(“message”): imprime los caracteres.
- oled.println(number): imprime un número.
- oled.println(number, HEX): imprime un número en formato hexadecimal.
- oled.display(): llama a este método para que los cambios surtan efecto.
- oled.startscrollright(start, stop): desplaza el texto de izquierda a derecha.
- oled.startscrollleft(start, stop): desplaza el texto de derecha a izquierda.
- oled.startscrolldiagright(start, stop): desplaza el texto diagonalmente desde la esquina inferior izquierda hasta la esquina superior derecha.
- oled.startscrolldiagleft(start, stop): desplaza el texto diagonalmente desde la esquina inferior derecha hasta la esquina superior izquierda.
- oled.stopscroll(): detén el desplazamiento.
Cómo centrar vertical y horizontalmente el texto/número en OLED
Para aprender a centrar texto y números en OLED, por favor consulte Cómo centrar vertical y horizontalmente en OLED. Si desea saber cómo centrar texto y números en OLED, eche un vistazo a Cómo centrar vertical y horizontalmente en OLED.
Código ESP8266 - Dibujo en OLED
Código ESP8266 – Mostrar imagen
Para mostrar una imagen en la pantalla OLED, primero debemos convertirla de su formato original a un arreglo de mapa de bits. Esto se puede hacer utilizando la herramienta en línea proporcionada. La siguiente imagen muestra cómo convertir una imagen en un arreglo de mapa de bits. Como ejemplo, he convertido el icono de Arduino en un arreglo de mapa de bits.
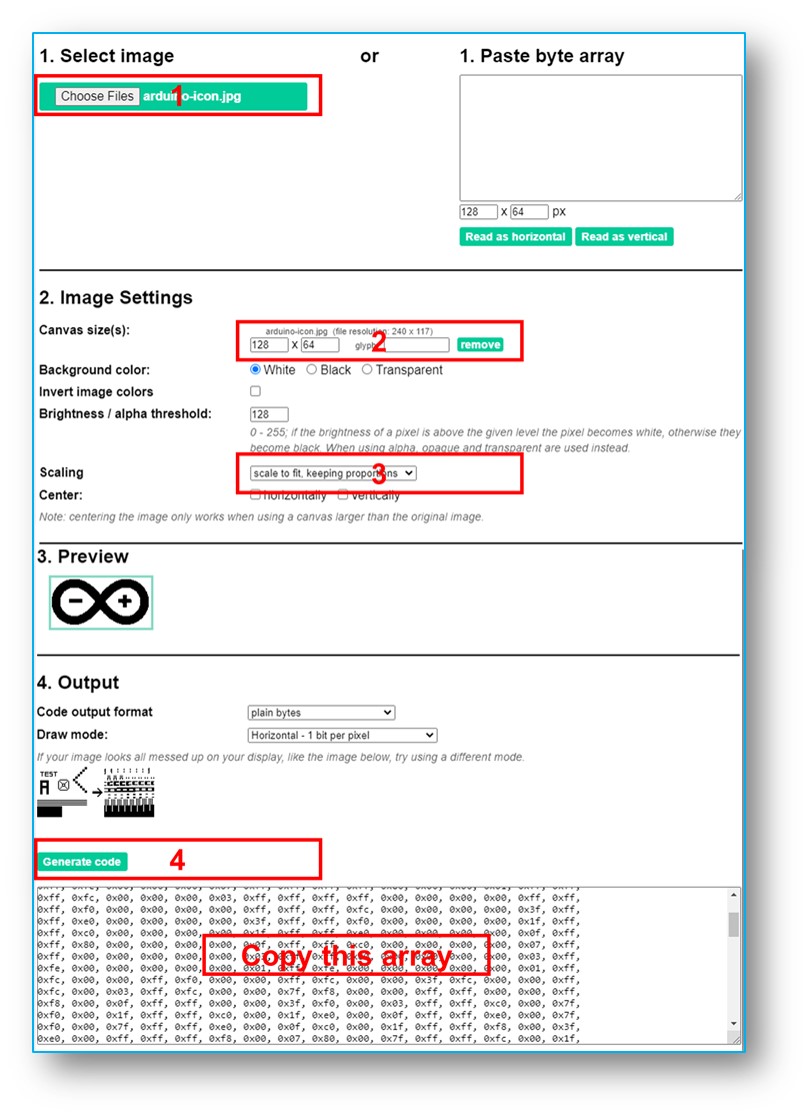
Una vez que la conversión esté completa, toma el código del arreglo y reemplaza el arreglo ArduinoIcon en el código de abajo por ese código.
※ Nota:
- El tamaño de la imagen no debe exceder el tamaño de la pantalla.
- Si quieres usar el código para un OLED 128x32, debes redimensionar la imagen y modificar el ancho y la altura en la función oled.drawBitmap();.
Solución de problemas de OLED
Verifique que el OLED esté funcionando correctamente siguiendo estos pasos:
- Asegúrate de que el cableado esté correcto.
- Confirma que tu OLED I2C utilice el controlador SSD1306.
- Utiliza el código del escáner de direcciones I2C en el ESP8266 para verificar la dirección I2C del OLED.
La salida mostrada en el Monitor Serial es: .
El Monitor Serial muestra el siguiente resultado: