Arduino Nano - Sensor de Temperatura y Humedad - OLED
Este tutorial le indica cómo leer la temperatura y la humedad de un sensor DHT11/DHT22 y mostrarlas en un OLED.
Hardware Requerido
You can use DHT22 sensor instead of DHT11 sensor.
| 1 | × | (Recomendado) Placa de Expansión de Terminales de Tornillo para Arduino Nano | |
| 1 | × | (Recomendado) Placa de Expansión Breakout para Arduino Nano | |
| 1 | × | (Recomendado) Divisor de Alimentación para Arduino Nano |
Or you can buy the following kits:
| 1 | × | DIYables Sensor Kit (30 sensors/displays) | |
| 1 | × | DIYables Sensor Kit (18 sensors/displays) |
Sobre la pantalla OLED, sensor de temperatura y humedad DHT11 y DHT22
Si no está familiarizado con la pantalla OLED, el sensor de temperatura y humedad DHT11 y DHT22 (disposición de pines, funcionalidad, programación ...), los siguientes tutoriales pueden ayudarle:
- Arduino Nano - OLED tutorial
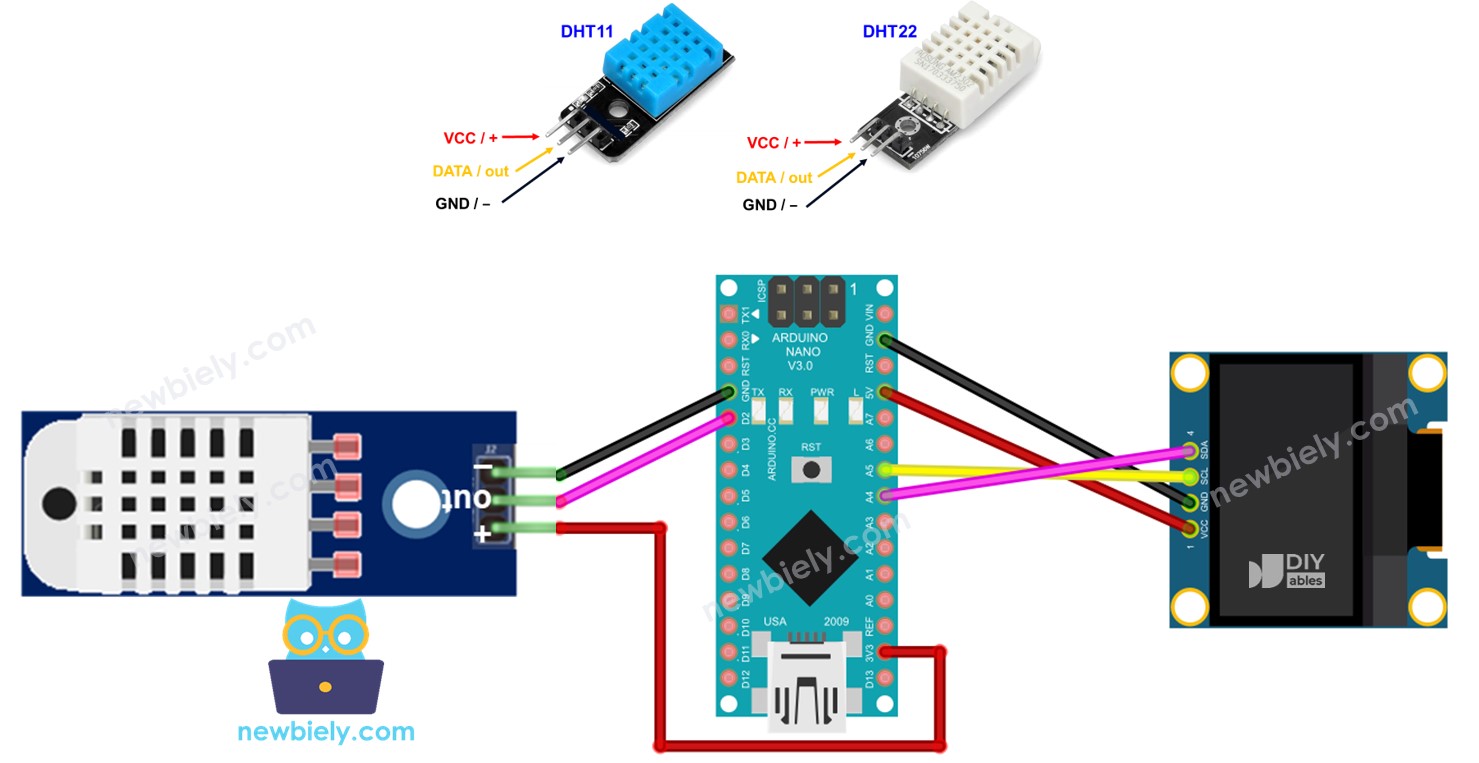
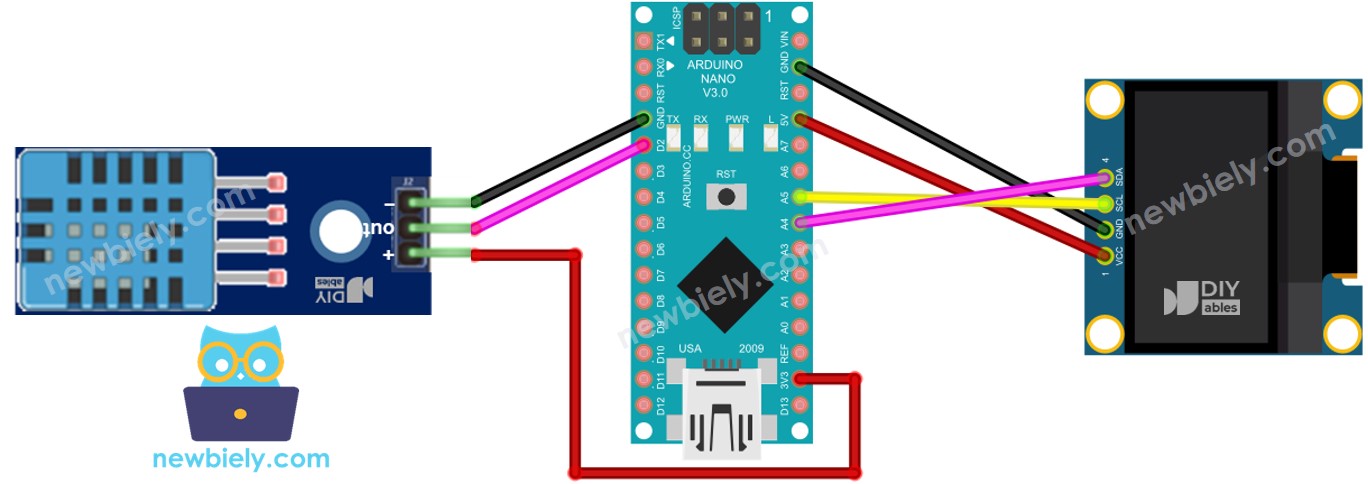
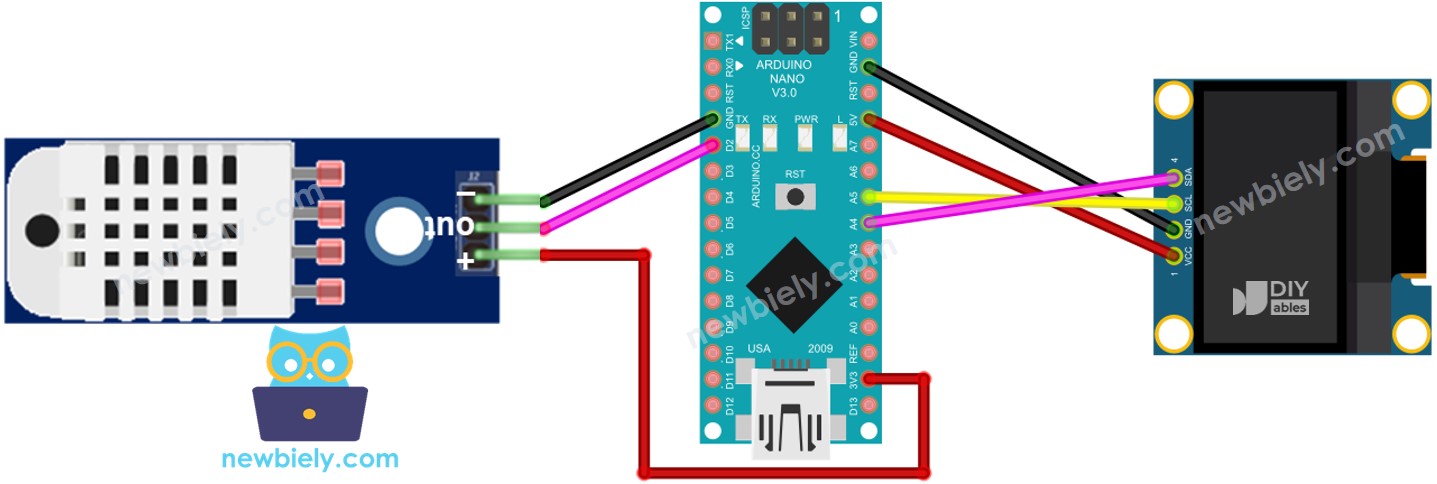
Diagrama de Cableado
Arduino Nano - Cableado del LCD para el módulo DHT11
This image is created using Fritzing. Click to enlarge image
Arduino Nano - Cableado del módulo LCD para DHT22
This image is created using Fritzing. Click to enlarge image
Ver La mejor forma de alimentar Arduino Nano y otros componentes.
Código para Arduino Nano - Sensor DHT11 - OLED
Pasos R\u00e1pidos
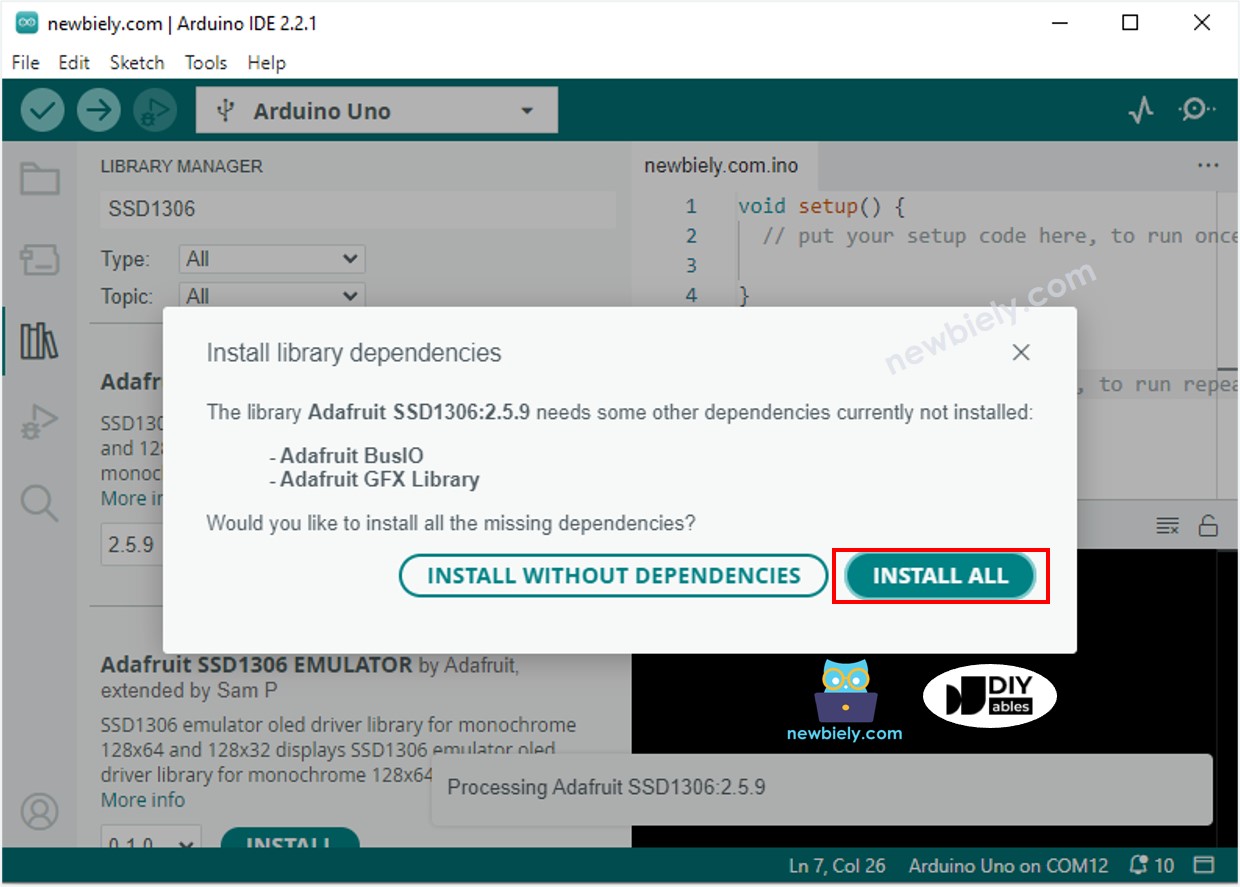
- Haz clic en el icono de Bibliotecas en la barra izquierda del IDE de Arduino.
- Busca “SSD1306” y luego localiza la biblioteca SSD1306 de Adafruit.
- Haz clic en el botón Instalar para instalar la biblioteca.

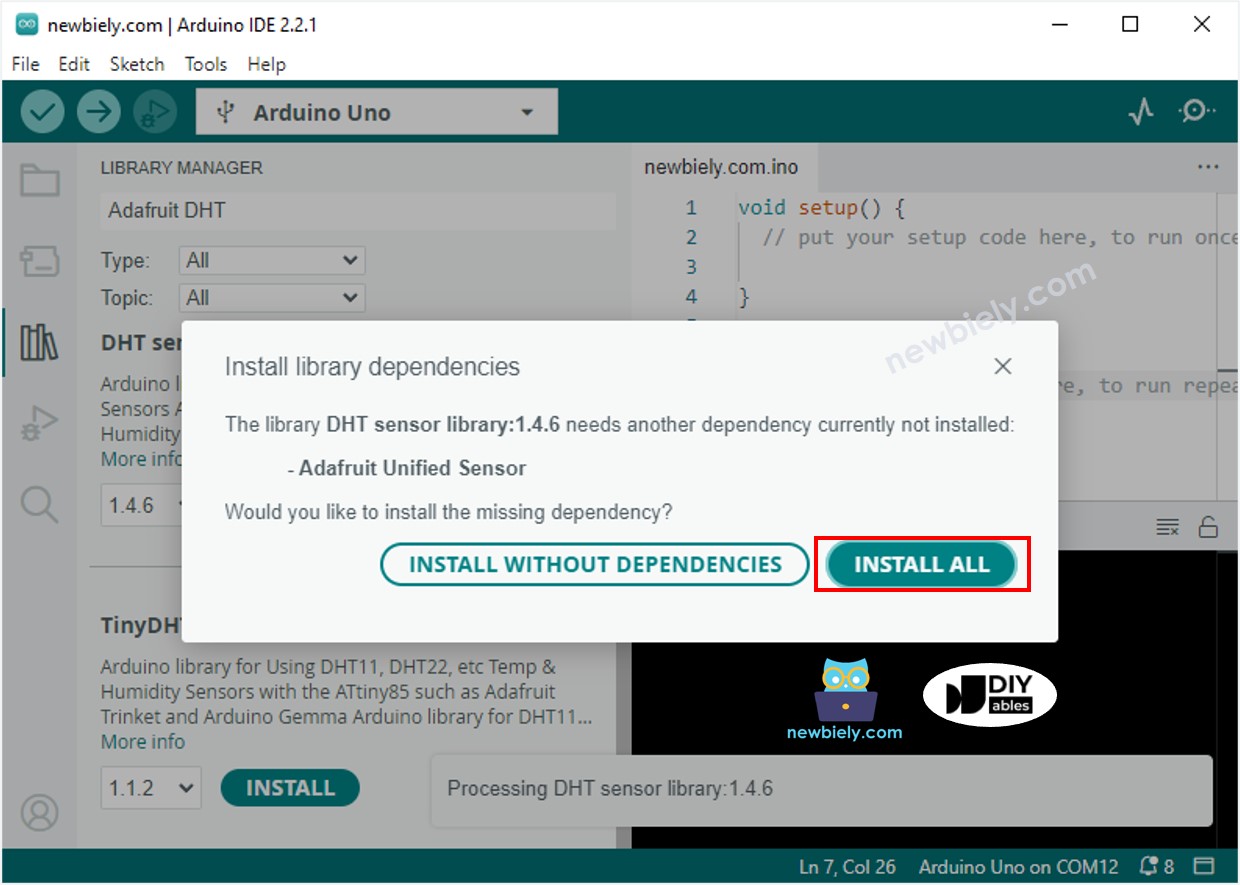
- Se le pedirá instalar algunas otras dependencias de la biblioteca.
- Presione el botón Instalar todo para completar la instalación de todas las dependencias de la biblioteca.
- Busca “DHT” y localiza la biblioteca de sensores DHT de Adafruit.
- Presiona el botón Instalar para instalar la biblioteca.

- Se le pedirá instalar algunas otras dependencias de la biblioteca.
- Haga clic en el botón Instalar todo para instalar todas las dependencias de la biblioteca.
- Copie el código anterior y ábralo en el IDE de Arduino.
- Haga clic en el botón Subir en el IDE de Arduino para enviar el código al Arduino Nano.
- Coloque el sensor en agua caliente y fría, o sosténgalo en la mano.
- Verifique el resultado en la pantalla OLED y en el Monitor serie.
※ Nota:
El código en cuestión centra automáticamente el texto tanto horizontal como verticalmente en una pantalla OLED.
Código de Arduino Nano - Sensor DHT22 - OLED
※ Nota:
El código para DHT11 y DHT22 es el mismo, excepto por una línea. La biblioteca utilizada para ambos también es la misma.
Video Tutorial
Estamos considerando crear tutoriales en video. Si considera que los tutoriales en video son importantes, suscríbase a nuestro canal de YouTube para motivarnos a crear los videos.