Arduino Nano - OLED
Este tutorial te enseña cómo usar Arduino Nano con una pantalla OLED. En detalle, aprenderemos:
- Cómo conectar una pantalla OLED con Arduino Nano.
- Cómo programar Arduino Nano para mostrar texto y un número en la pantalla OLED.
- Cómo programar Arduino Nano para centrar el texto y el número vertical y horizontalmente en la pantalla OLED.
- Cómo programar Arduino Nano para dibujar en la pantalla OLED.
- Cómo programar Arduino Nano para mostrar una imagen en la pantalla OLED.
Hardware Requerido
Or you can buy the following kits:
| 1 | × | DIYables Sensor Kit (30 sensors/displays) | |
| 1 | × | DIYables Sensor Kit (18 sensors/displays) |
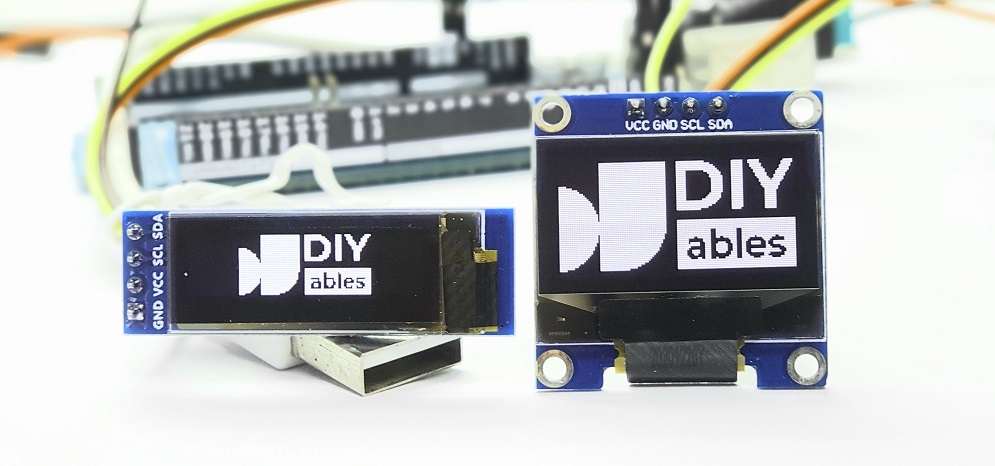
Acerca de la pantalla OLED
Existen varios tipos de pantallas OLED disponibles. La pantalla OLED SSD1306 I2C de 128×64 y 128×32 es la más utilizada con Arduino Nano.
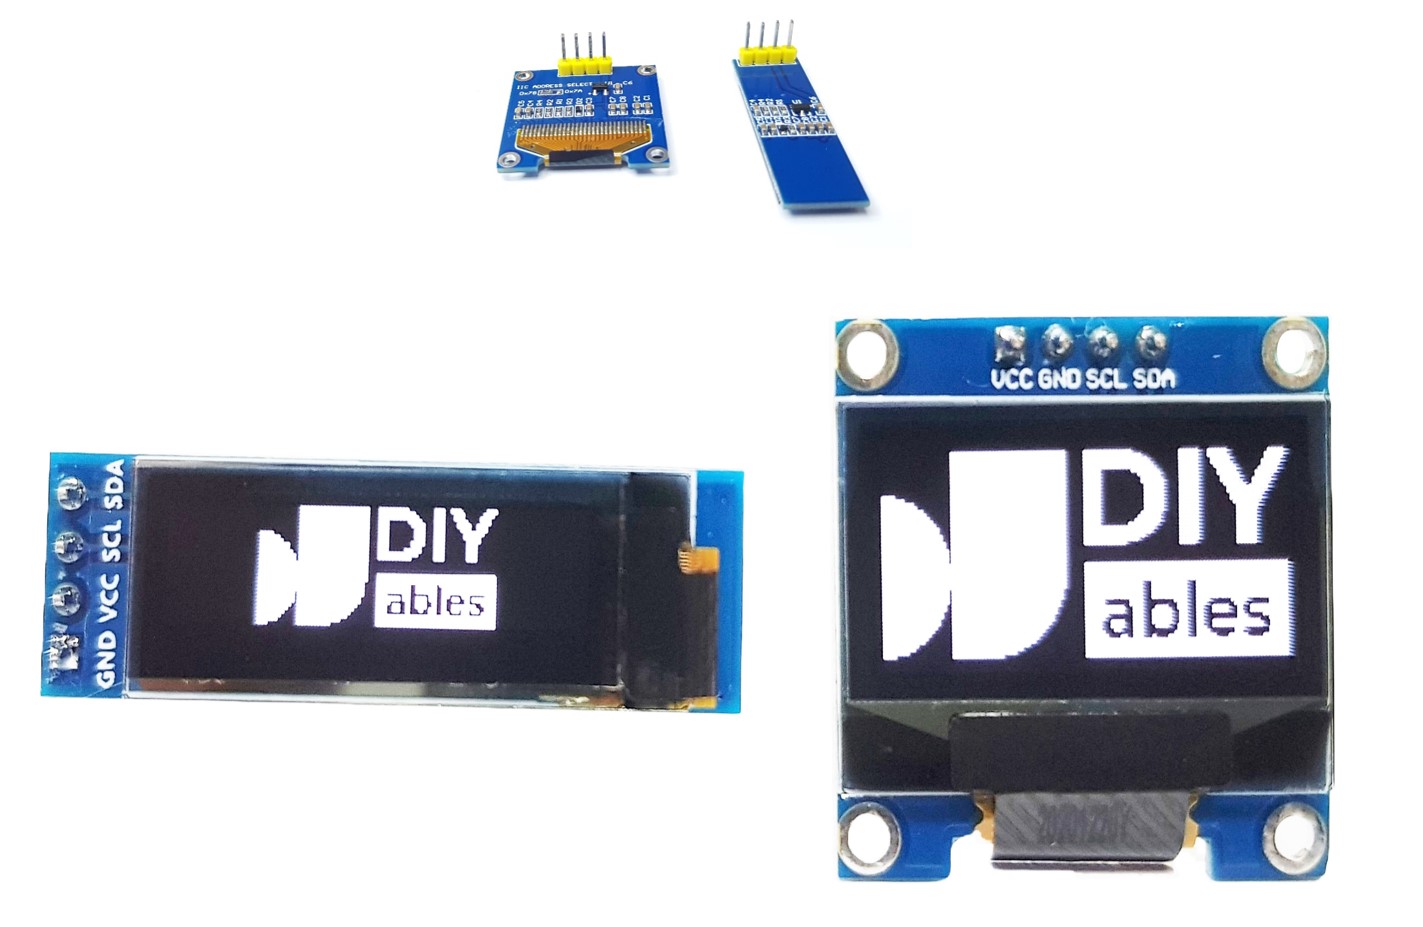
Pinout de la pantalla OLED I2C
- Pin GND: Este debe conectarse al GND del Arduino Nano.
- Pin VCC: Este es el suministro de energía para la pantalla, que debe conectarse a 3.3V o 5V.
- Pin SCL: Este es un pin de reloj serial para la interfaz I2C.
- Pin SDA: Este es un pin de datos serial para la interfaz I2C.
※ Nota:
- Los pines del módulo OLED pueden variar dependiendo del fabricante y del tipo. Por favor, utilice las etiquetas impresas en el módulo OLED. ¡Por favor, observe de cerca!
- Este tutorial utiliza la pantalla OLED que está controlada por el controlador I2C SSD1306. Hemos probado la pantalla OLED de DIYables y funciona perfectamente.
Diagrama de Cableado
- Diagrama de cableado entre Arduino Nano y OLED 128x64
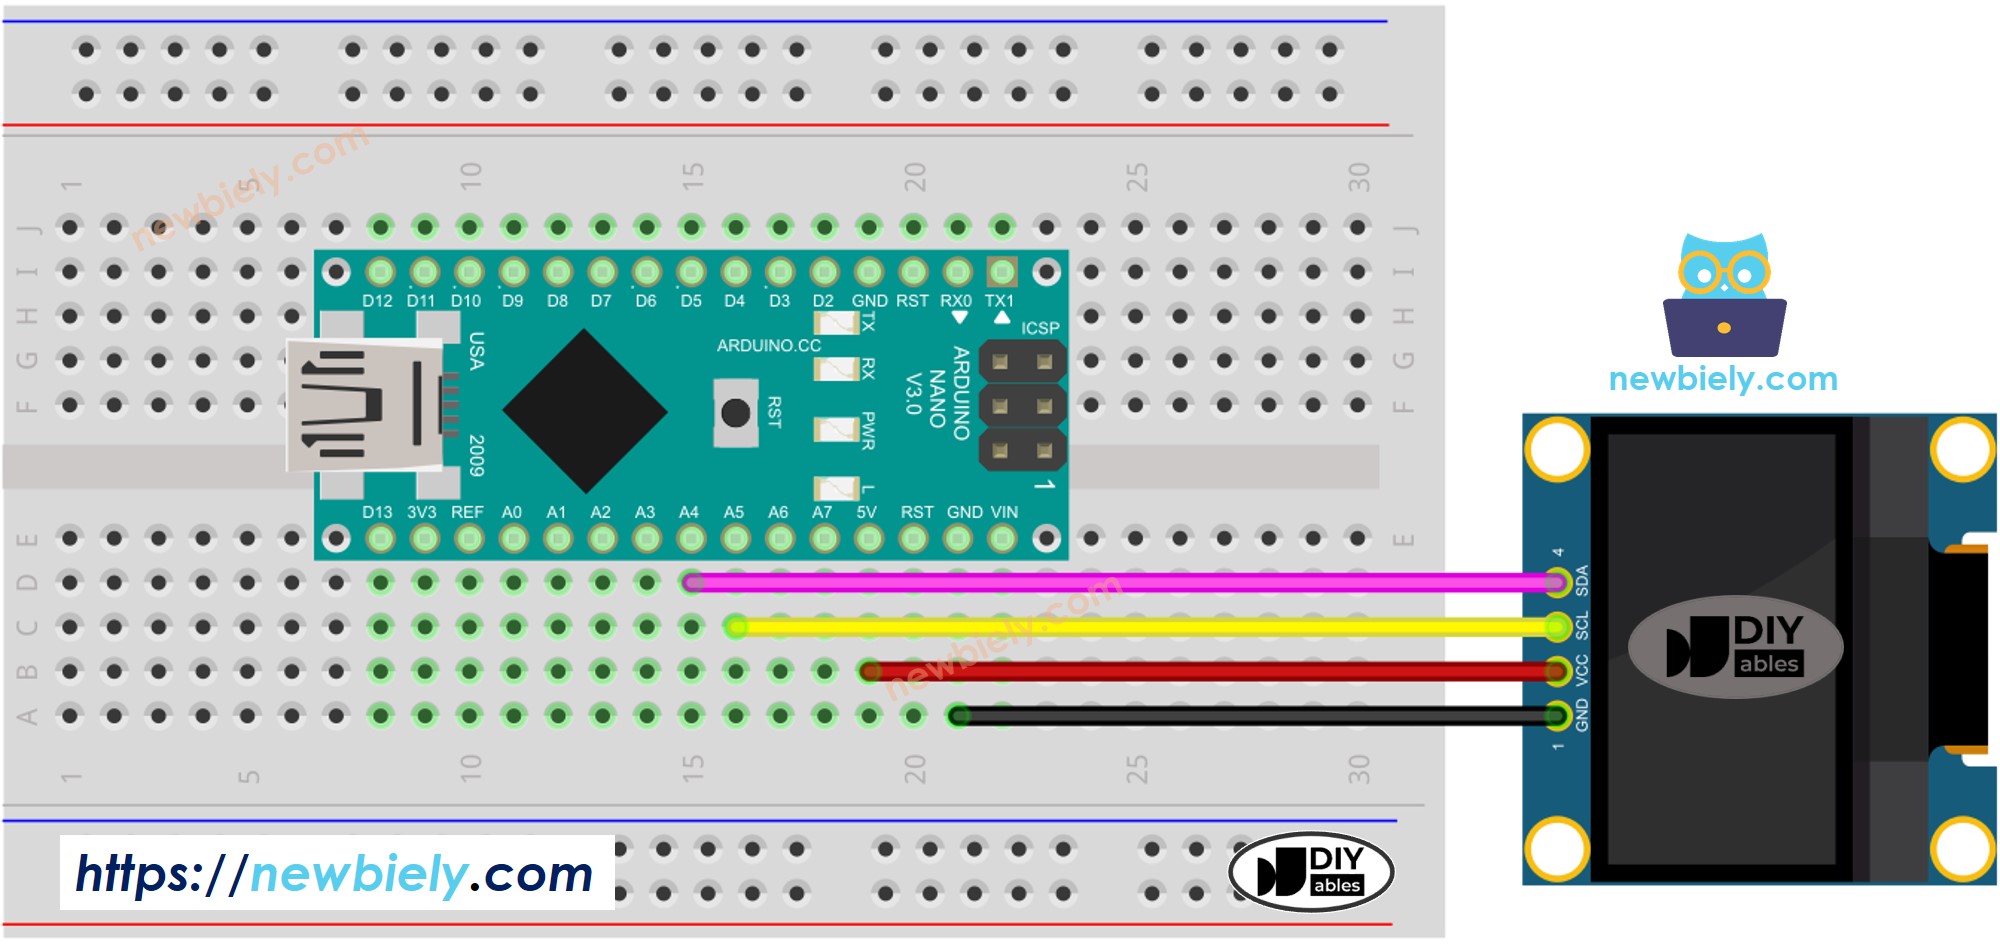
This image is created using Fritzing. Click to enlarge image
- Diagrama de cableado entre Arduino Nano y OLED 128x32
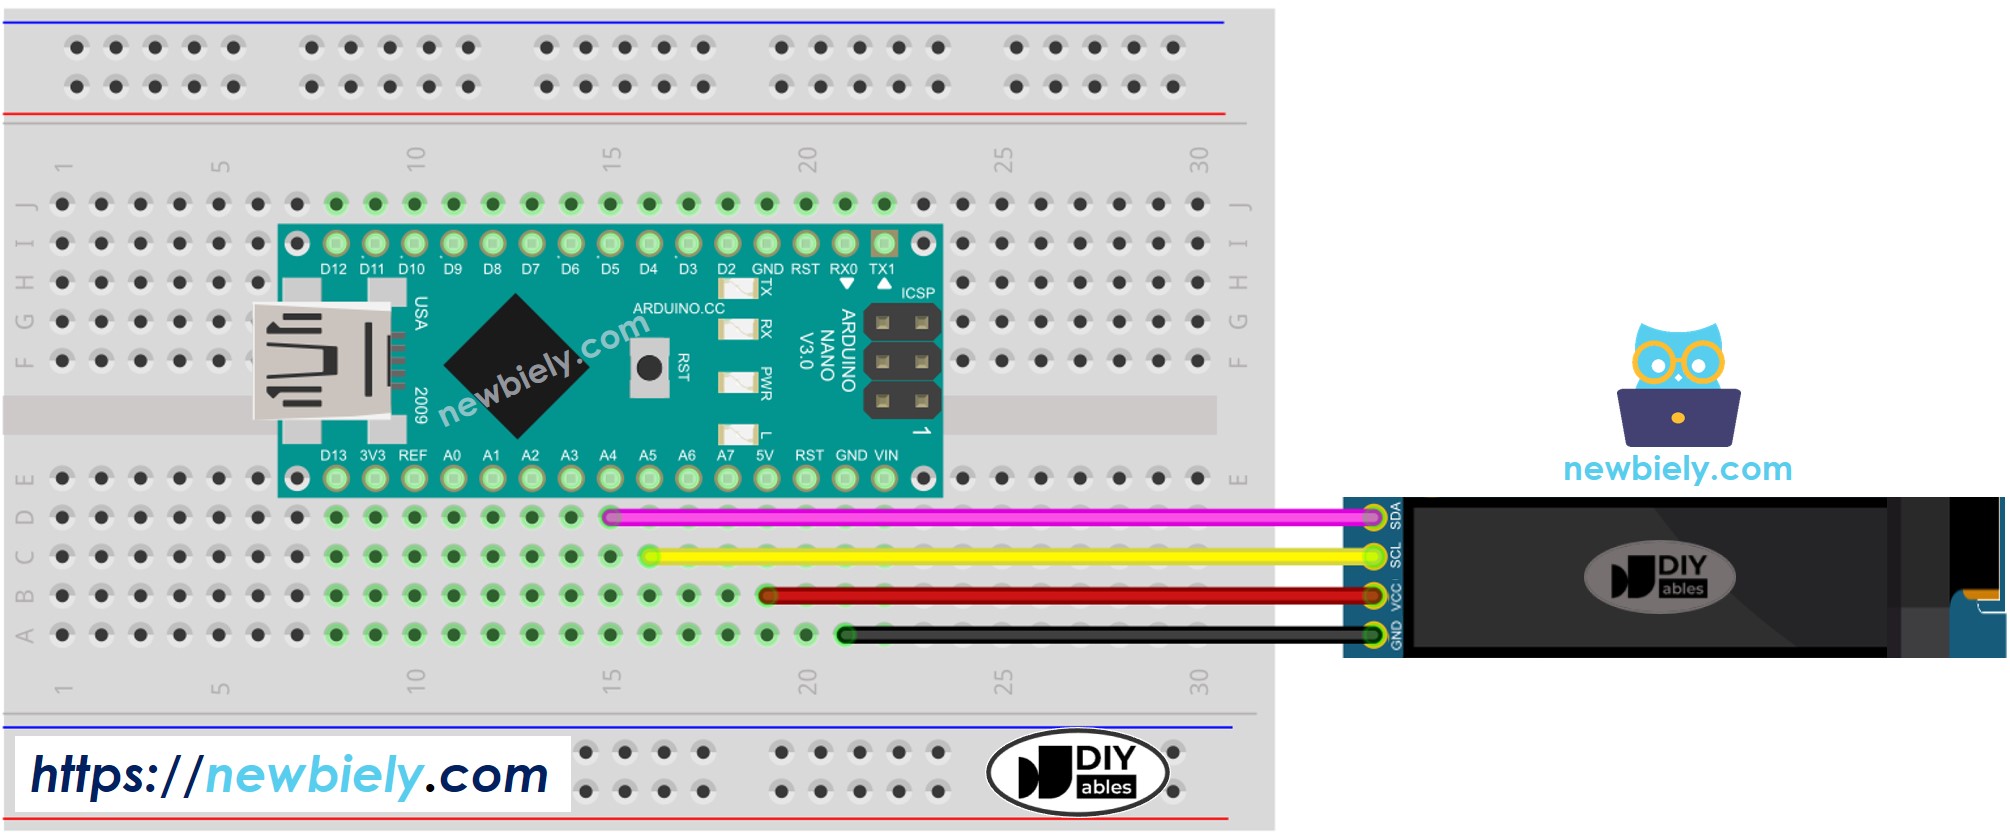
This image is created using Fritzing. Click to enlarge image
Ver La mejor forma de alimentar Arduino Nano y otros componentes.
La tabla de cableado entre Arduino Nano y la pantalla OLED:
| OLED Module | Arduino Nano |
|---|---|
| Vin | 5V |
| GND | GND |
| SDA | A4 |
| SCL | A5 |
Cómo usar OLED con Arduino Nano
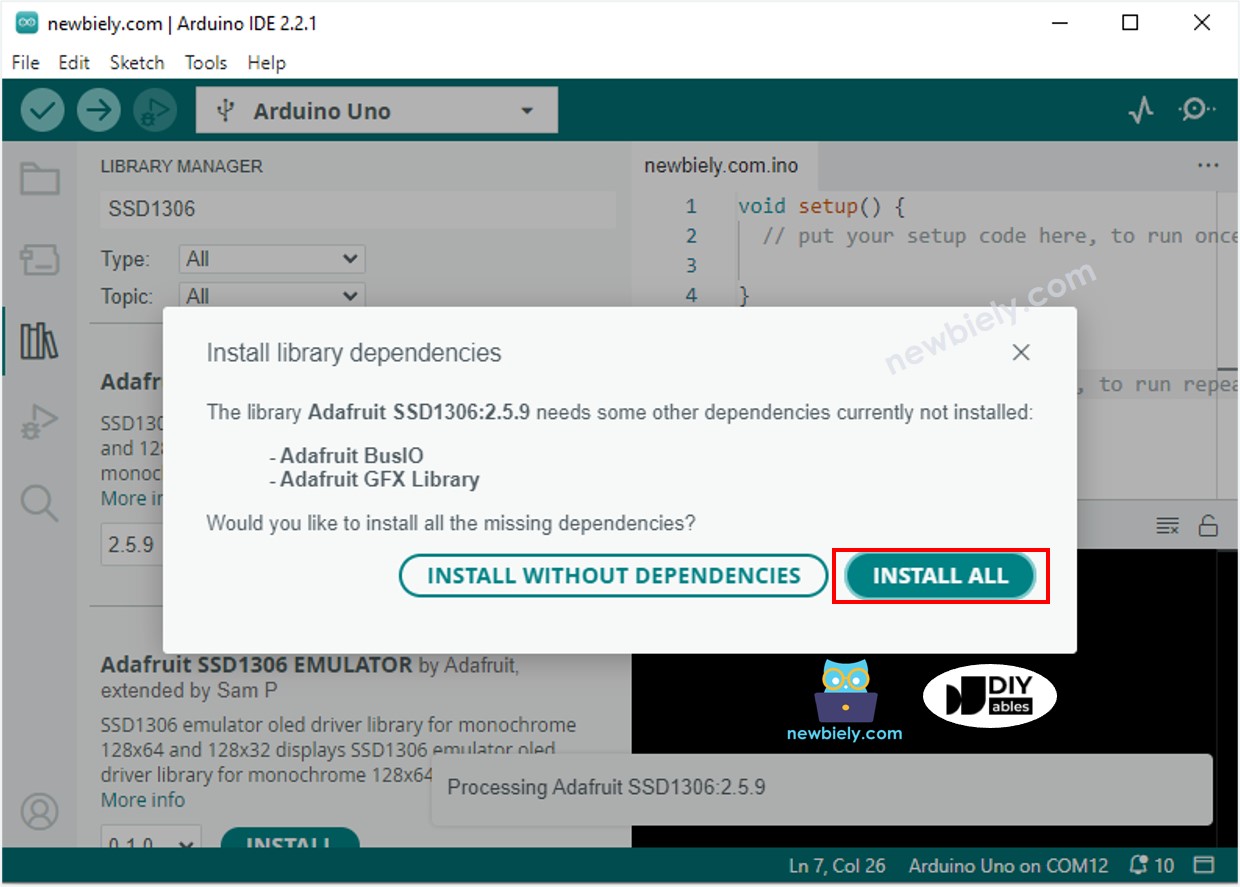
Instalar la biblioteca SSD1306 OLED
- Haz clic en el icono de Bibliotecas en la barra izquierda del IDE de Arduino.
- Busca “SSD1306” y localiza la librería SSD1306 de Adafruit.
- Luego, pulsa el botón Instalar para completar la instalación.

- Se le pedirá que instale dependencias de bibliotecas adicionales.
- Para instalarlas todas, haga clic en el botón Instalar todo.
Cómo programar para OLED
- Incluye la biblioteca
- Especifique las dimensiones de la pantalla OLED como 128 x 64.
- O especificar las dimensiones de una pantalla OLED de 128x32.
- Crea un objeto del tipo SSD1306 OLED.
- En la función setup(), inicializa la pantalla OLED.
- Entonces, puedes mostrar texto, imágenes y dibujar una línea...
A partir de ahora, todos los códigos serán para OLED 128x64. Sin embargo, es fácil modificarlos para OLED 128x32 cambiando el tamaño de la pantalla y ajustando las coordenadas si es necesario.
Código de Arduino Nano - Mostrar texto en OLED
Estas son algunas funciones que se pueden usar para mostrar texto en el OLED:
- oled.clearDisplay(): todos los píxeles están apagados.
- oled.drawPixel(x,y, color): dibujar un píxel en las coordenadas x,y.
- oled.setTextSize(n): configurar el tamaño de fuente, admite tamaños del 1 al 8.
- oled.setCursor(x,y): definir las coordenadas para empezar a escribir texto.
- oled.setTextColor(WHITE): definir el color del texto.
- oled.setTextColor(BLACK, WHITE): definir el color del texto y el color de fondo.
- oled.println(“message”): imprimir los caracteres.
- oled.println(number): imprimir un número.
- oled.println(number, HEX): imprimir un número en formato hexadecimal.
- oled.display(): llamar a este método para que los cambios surtan efecto.
- oled.startscrollright(start, stop): desplaza el texto de izquierda a derecha.
- oled.startscrollleft(start, stop): desplaza el texto de derecha a izquierda.
- oled.startscrolldiagright(start, stop): desplaza el texto desde la esquina inferior izquierda hasta la esquina superior derecha.
- oled.startscrolldiagleft(start, stop): desplaza el texto desde la esquina inferior derecha hasta la esquina superior izquierda.
- oled.stopscroll(): detener el desplazamiento.
Cómo centrar vertical y horizontalmente el texto/número en OLED
Para obtener información sobre cómo alinear el texto y los números vertical y horizontalmente en una pantalla OLED, por favor consulte Cómo centrar vertical y horizontalmente en una pantalla OLED.
Código de Arduino Nano - Dibujo en OLED
Código de Arduino Nano – Mostrar Imagen
Para mostrar una imagen en OLED, primero debemos convertir la imagen (en cualquier formato) a un arreglo de mapa de bits. Esto se puede lograr utilizando la herramienta en línea. La siguiente imagen muestra cómo convertir una imagen a un arreglo de mapa de bits; he utilizado el ícono de Arduino Nano como ejemplo.
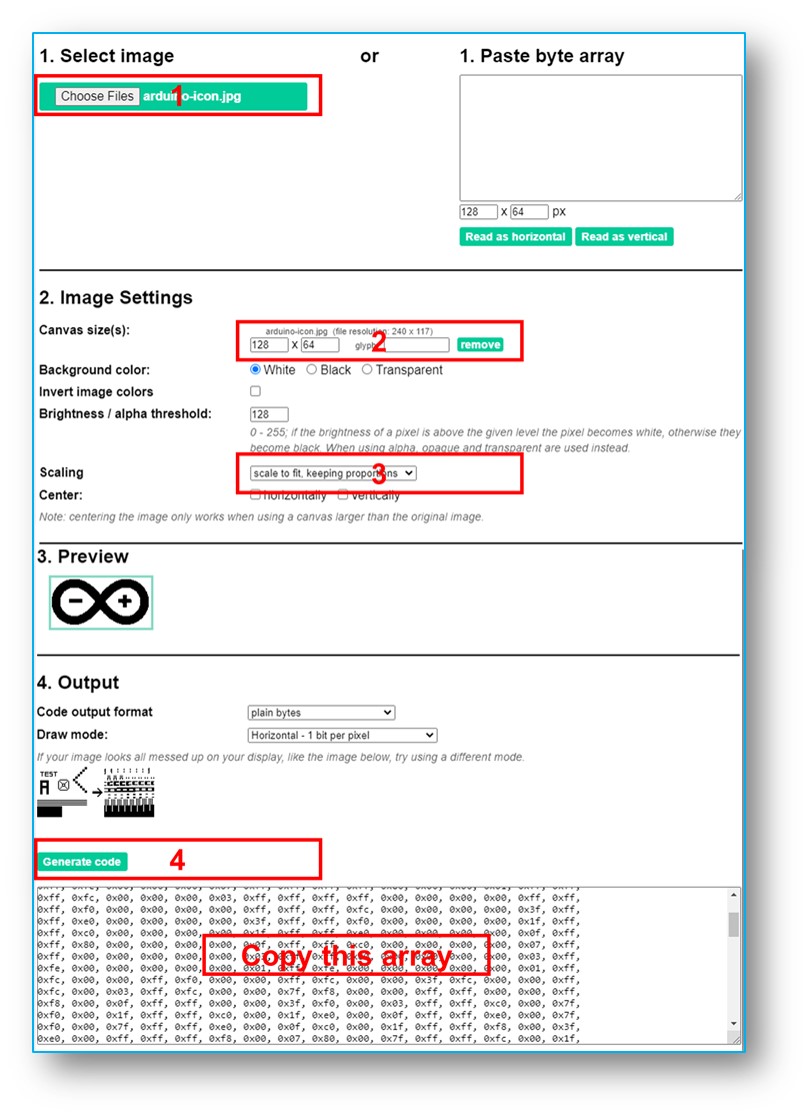
Después de la conversión, toma el código del arreglo y sustitúyelo en el lugar del arreglo ArduinoIcon en el código que se muestra a continuación.
※ Nota:
- El tamaño de la imagen no debe ser mayor que el tamaño de la pantalla.
- Si desea usar el código para un OLED de 128x32, debe redimensionar la imagen y ajustar los parámetros de ancho y alto en la función oled.drawBitmap();.
Solución de problemas de OLED
Verifique que el OLED esté funcionando correctamente haciendo lo siguiente:
- Asegúrate de que el cableado esté correcto.
- Confirma que tu OLED utilice el controlador SSD1306.
- Utiliza el código del escáner de direcciones I2C en Arduino Nano para verificar la dirección I2C de la pantalla OLED.
La salida mostrada en el Monitor Serial es la siguiente: