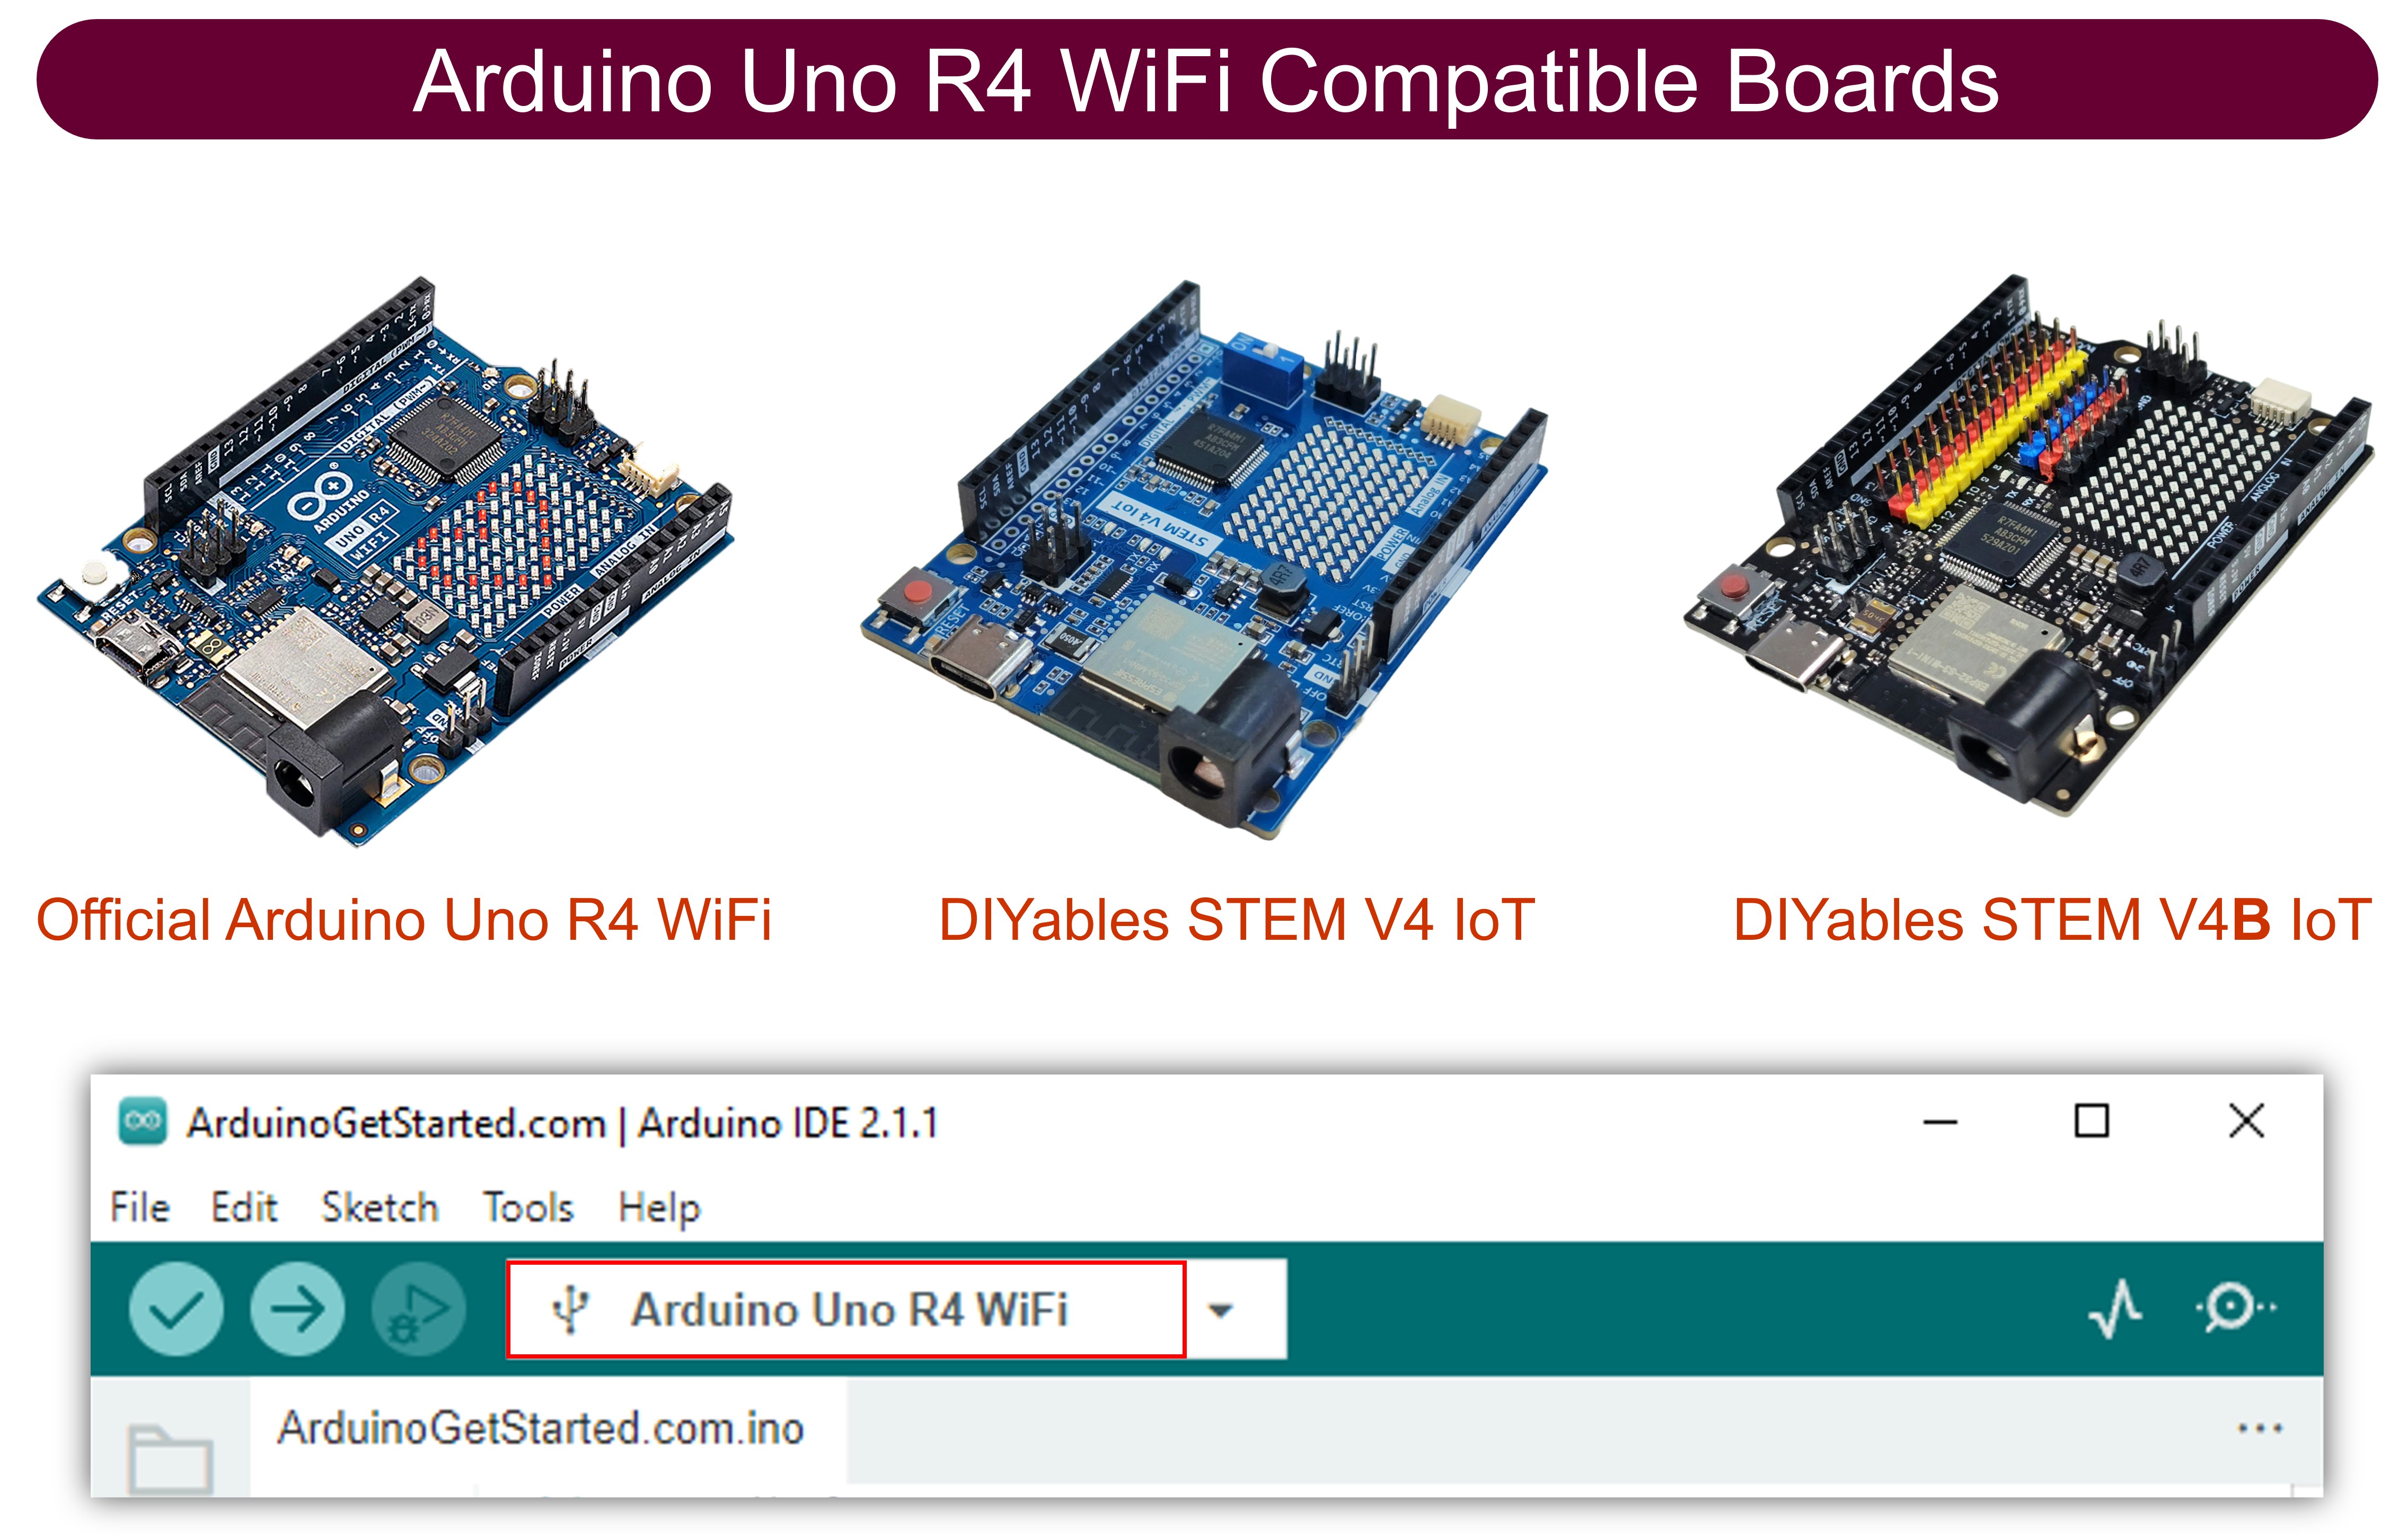
Arduino UNO R4 - sensor táctil

Un sensor táctil, también conocido como botón táctil o interruptor táctil, se utiliza comúnmente para accionar dispositivos como lámparas táctiles. Funciona exactamente como un botón normal. Muchos dispositivos nuevos utilizan sensores táctiles en lugar de botones tradicionales porque ayudan a que el producto luzca más elegante.

En esta guía, aprenderemos a usar el sensor de tacto con Arduino UNO R4.
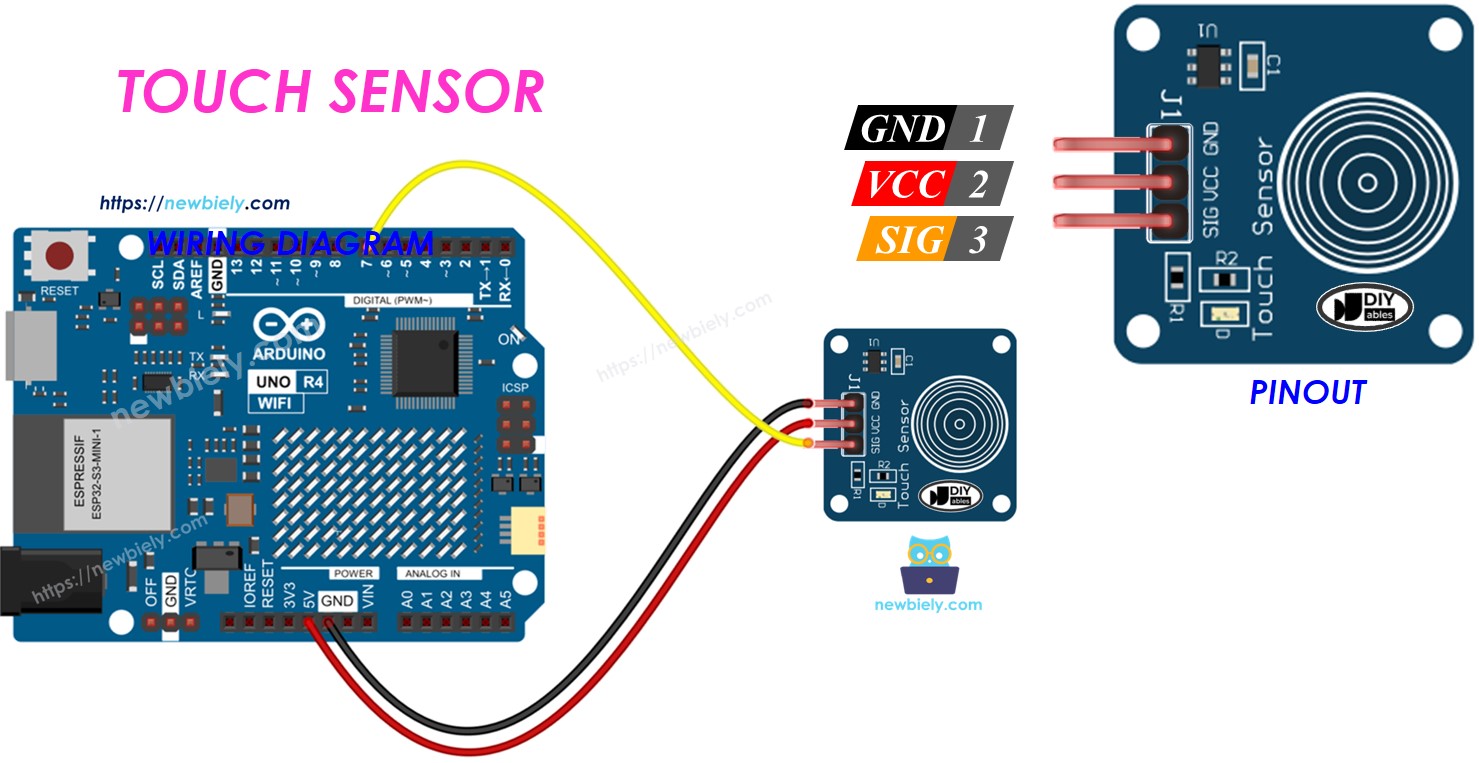
Sensor táctil Arduino UNO R4

Acerca del sensor táctil

Diagrama de pines

El sensor táctil tiene tres pines:

  • Pin GND: conéctalo a GND (0 V)
  • Pin VCC: conéctalo a VCC (5 V o 3.3 V)
  • Pin SIGNAL: emite: LOW si no se toca, HIGH si se toca. Conecta este pin al pin de entrada del Arduino UNO R4.
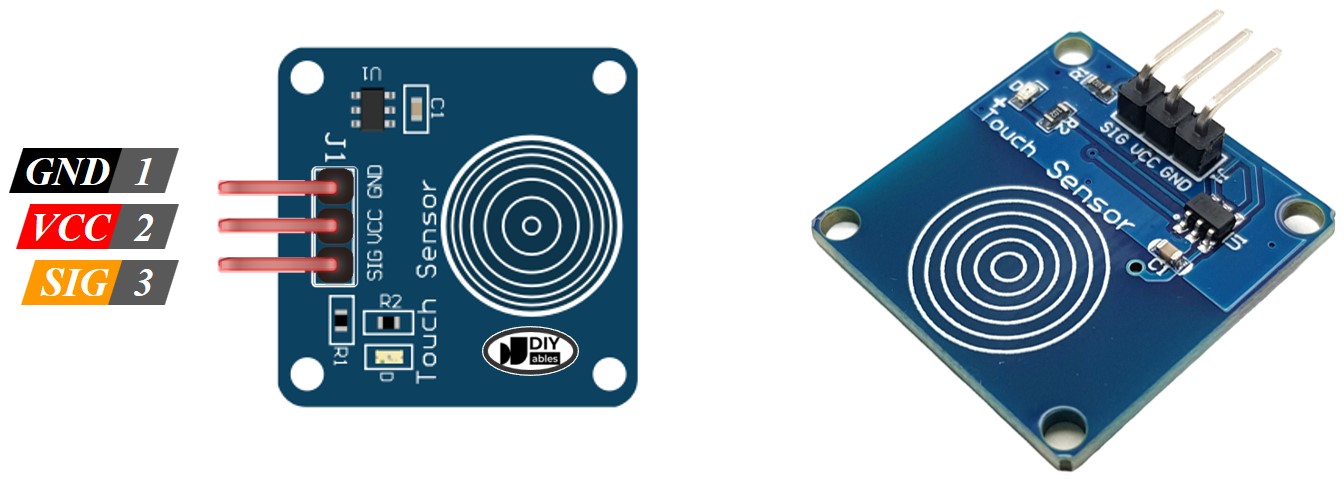
Esquema de pines del sensor táctil

Cómo funciona

  • Si el sensor no está siendo tocado, el pin de señal del sensor está a nivel bajo.
  • Si el sensor está siendo tocado, el pin de señal del sensor está a nivel alto.

Arduino UNO R4 - Sensor táctil

El pin SIGNAL del sensor de toque está conectado a un pin de entrada en el Arduino UNO R4.

Puedes saber si se está tocando el sensor táctil comprobando el estado de un pin en el Arduino UNO R4 que está configurado como pin de entrada.

Diagrama de Cableado
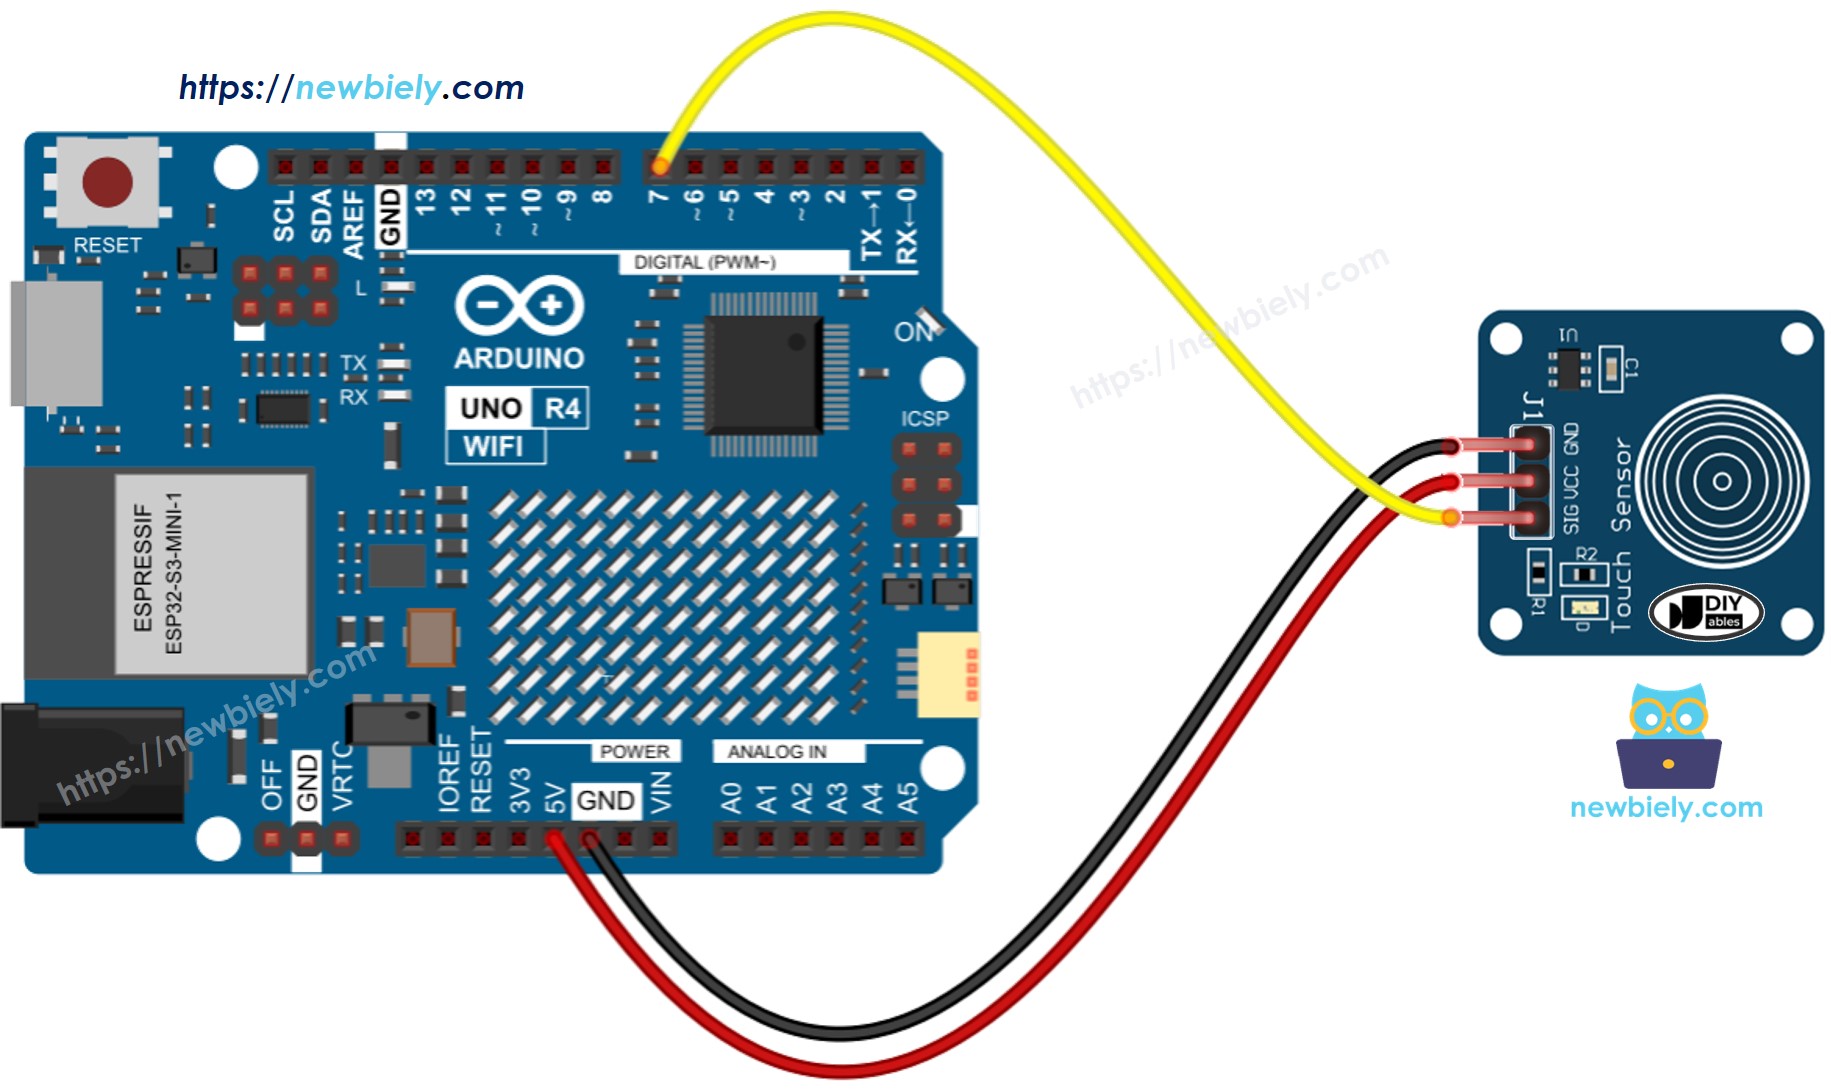
Diagrama de cableado del sensor táctil Arduino UNO R4

This image is created using Fritzing. Click to enlarge image

Ver La mejor forma de alimentar Arduino Uno R4 y otros componentes.

Cómo programar para el sensor táctil

  • Configura el pin del Arduino UNO R4 como entrada digital, utilizando la función pinSerial(). Por ejemplo, para el pin 7.
pinMode(7, INPUT_PULLUP);
  • Utiliza la función digitalRead() para comprobar el estado del pin del Arduino UNO R4.
int inputState = digitalRead(7);

※ Nota:

Hay dos escenarios comunes:

  • Primer escenario: Cuando la entrada está en ALTO, realizar una acción. Cuando la entrada está en BAJO, realizar la acción opuesta.
  • Segundo escenario: Cuando la entrada cambia de BAJO a ALTO (o ALTO a BAJO), realizar una acción.

Seleccionamos el escenario adecuado según lo que necesitemos. Por ejemplo, cuando se usa un sensor táctil para controlar un LED:

  • Para encender el LED cuando se toca el sensor y apagarlo cuando no se toca, el primer escenario es adecuado.
  • Para encender y apagar el LED cada vez que se toca el sensor, el segundo escenario es adecuado.

Sensor táctil - Código Arduino UNO R4

Lee el valor del sensor de tacto y lo imprime en el Monitor Serial

/* * Este código de Arduino UNO R4 fue desarrollado por es.newbiely.com * Este código de Arduino UNO R4 se proporciona al público sin ninguna restricción. * Para tutoriales completos y diagramas de cableado, visite: * https://es.newbiely.com/tutorials/arduino-uno-r4/arduino-uno-r4-touch-sensor */ #define SENSOR_PIN 7 // The Arduino UNO R4 pin connected to the touch sensor's SIGNAL pin void setup() { // initialize serial communication at 9600 bits per second: Serial.begin(9600); // initialize the Arduino's pin as aninput pinMode(SENSOR_PIN, INPUT); } void loop() { // read the state of the the input pin: int state = digitalRead(SENSOR_PIN); // print state to Serial Monitor Serial.println(state); }

Pasos R\u00e1pidos

Siga estas instrucciones paso a paso:

  • Si es la primera vez que usas el Arduino Uno R4 WiFi/Minima, consulta el tutorial sobre configuración del entorno para Arduino Uno R4 WiFi/Minima en el IDE de Arduino.
  • Conecta el sensor táctil al Arduino Uno R4 según el diagrama proporcionado.
  • Conecta la placa Arduino Uno R4 a tu computadora utilizando un cable USB.
  • Inicia el IDE de Arduino en tu computadora.
  • Selecciona la placa adecuada Arduino Uno R4 (p. ej., Arduino Uno R4 WiFi) y el puerto COM.
  • Copia el código anterior y ábrelo con el IDE de Arduino.
  • Haz clic en el botón Subir en el IDE de Arduino para enviar el código al Arduino UNO R4
  • Coloca el dedo sobre el sensor y luego retíralo.
  • Verifica el resultado en el Monitor Serial.
Newbiely | Arduino IDE 2.3.8
──
File
Edit
Sketch
Tools
Help
Arduino Uno R4 WiFi
Newbiely.ino
···
8 Serial.println("Hello World!");
Output
Serial Monitor
Message (Enter to send message to 'Arduino Uno R4 WiFi' on 'COM15')
New Line
9600 baud
0 0 1 1 1 1 1 0 0 0 0
Ln 11, Col 1
Arduino Uno R4 WiFi on COM15
2

Detecta cuando se toca o se suelta el sensor

/* * Este código de Arduino UNO R4 fue desarrollado por es.newbiely.com * Este código de Arduino UNO R4 se proporciona al público sin ninguna restricción. * Para tutoriales completos y diagramas de cableado, visite: * https://es.newbiely.com/tutorials/arduino-uno-r4/arduino-uno-r4-touch-sensor */ #define SENSOR_PIN 7 // The Arduino UNO R4 pin connected to the touch sensor's SIGNAL pin int touch_state; // the current reading from the input pin int prev_touch_state = LOW; // the previous state from the input pin void setup() { // initialize serial communication at 9600 bits per second: Serial.begin(9600); // initialize the Arduino's pin as aninput pinMode(SENSOR_PIN, INPUT); } void loop() { // read the state of the the input pin: touch_state = digitalRead(SENSOR_PIN); if(prev_touch_state == LOW && touch_state == HIGH) Serial.println("The sensor is touched"); else if(prev_touch_state == HIGH && touch_state == LOW) Serial.println("The sensor is is released"); // save the the last state prev_touch_state = touch_state; }

Pasos R\u00e1pidos

  • Copie el código y ábralo en el IDE de Arduino
  • Haga clic en el botón Upload en el IDE de Arduino para subir el código a Arduino UNO R4
  • Coloque su dedo sobre el sensor y manténgalo allí.
  • Verifique los resultados en el Monitor Serial.
Newbiely | Arduino IDE 2.3.8
──
File
Edit
Sketch
Tools
Help
Arduino Uno R4 WiFi
Newbiely.ino
···
8 Serial.println("Hello World!");
Output
Serial Monitor
Message (Enter to send message to 'Arduino Uno R4 WiFi' on 'COM15')
New Line
9600 baud
The sensor is touched
Ln 11, Col 1
Arduino Uno R4 WiFi on COM15
2
  • Retira el dedo del sensor.
  • Revisa el resultado en el Monitor Serial.
Newbiely | Arduino IDE 2.3.8
──
File
Edit
Sketch
Tools
Help
Arduino Uno R4 WiFi
Newbiely.ino
···
8 Serial.println("Hello World!");
Output
Serial Monitor
Message (Enter to send message to 'Arduino Uno R4 WiFi' on 'COM15')
New Line
9600 baud
The sensor is touched The sensor is is released
Ln 11, Col 1
Arduino Uno R4 WiFi on COM15
2

Video Tutorial

Estamos considerando crear tutoriales en video. Si considera que los tutoriales en video son importantes, suscríbase a nuestro canal de YouTube para motivarnos a crear los videos.

La demostración en video a continuación utiliza el siguiente código:

/* * Este código de Arduino UNO R4 fue desarrollado por es.newbiely.com * Este código de Arduino UNO R4 se proporciona al público sin ninguna restricción. * Para tutoriales completos y diagramas de cableado, visite: * https://es.newbiely.com/tutorials/arduino-uno-r4/arduino-uno-r4-touch-sensor */ // --- Hardware Pin Definitions --- #define BUZZER_PIN 8 #define TOUCH_1_PIN 2 // Happy Birthday trigger #define TOUCH_2_PIN 3 // Jingle Bells trigger #define LED_A_PIN 4 // First indicator LED (Active-Low) #define LED_B_PIN 5 // Second indicator LED (Active-Low) // --- Musical Note Frequencies (Hz) --- #define NOTE_C4 262 #define NOTE_D4 294 #define NOTE_E4 330 #define NOTE_F4 349 #define NOTE_G4 392 #define NOTE_A4 440 #define NOTE_A5 880 #define NOTE_B4 494 #define NOTE_C5 523 #define NOTE_D5 587 #define NOTE_E5 659 // --- Melody 1: Happy Birthday --- const int happyBirthdayMelody[] = { NOTE_C4, NOTE_C4, NOTE_D4, NOTE_C4, NOTE_F4, NOTE_E4, NOTE_C4, NOTE_C4, NOTE_D4, NOTE_C4, NOTE_G4, NOTE_F4, NOTE_C4, NOTE_C4, NOTE_C5, NOTE_A4, NOTE_F4, NOTE_E4, NOTE_D4, NOTE_B4, NOTE_B4, NOTE_A4, NOTE_F4, NOTE_G4, NOTE_F4 }; const int happyBirthdayDurations[] = { 8, 8, 4, 4, 4, 2, 8, 8, 4, 4, 4, 2, 8, 8, 4, 4, 4, 4, 4, 8, 8, 4, 4, 4, 2 }; const int happyBirthdayLength = sizeof(happyBirthdayMelody) / sizeof(happyBirthdayMelody[0]); // --- Melody 2: Jingle Bells --- const int jingleBellsMelody[] = { NOTE_E4, NOTE_E4, NOTE_E4, NOTE_E4, NOTE_E4, NOTE_E4, NOTE_E4, NOTE_G4, NOTE_C4, NOTE_D4, NOTE_E4, NOTE_F4, NOTE_F4, NOTE_F4, NOTE_F4, NOTE_F4, NOTE_E4, NOTE_E4, NOTE_E4, NOTE_E4, NOTE_D4, NOTE_D4, NOTE_E4, NOTE_D4, NOTE_G4 }; const int jingleBellsDurations[] = { 4, 4, 2, 4, 4, 2, 4, 4, 4, 4, 1, 4, 4, 4, 4, 4, 4, 4, 8, 8, 4, 4, 4, 4, 2 }; const int jingleBellsLength = sizeof(jingleBellsMelody) / sizeof(jingleBellsMelody[0]); // --- Function Prototypes --- void playSong(const int melody[], const int durations[], int songLength); void updateLeds(int noteIndex, bool isQuietNote); void turnOffBothLeds(); /** * @brief Initializes peripheral pins and system communication. */ void setup() { Serial.begin(115200); pinMode(TOUCH_1_PIN, INPUT); pinMode(TOUCH_2_PIN, INPUT); pinMode(BUZZER_PIN, OUTPUT); pinMode(LED_A_PIN, OUTPUT); pinMode(LED_B_PIN, OUTPUT); // For Active-Low LEDs, setting pins HIGH turns them OFF on startup turnOffBothLeds(); Serial.println(F("Active-Low LED Music Box Jukebox Ready.")); } /** * @brief Main execution loop checking for touch sensor triggers. */ void loop() { if (digitalRead(TOUCH_1_PIN) == HIGH) { Serial.println(F("Touch 1 detected: Playing Happy Birthday...")); playSong(happyBirthdayMelody, happyBirthdayDurations, happyBirthdayLength); } else if (digitalRead(TOUCH_2_PIN) == HIGH) { Serial.println(F("Touch 2 detected: Playing Jingle Bells...")); playSong(jingleBellsMelody, jingleBellsDurations, jingleBellsLength); } } /** * @brief Iterates through the provided melody arrays to play the full song with LED sync. * @param melody Array containing note frequencies. * @param durations Array containing corresponding note lengths. * @param songLength Total number of notes in the song. */ void playSong(const int melody[], const int durations[], int songLength) { for (int thisNote = 0; thisNote < songLength; thisNote++) { bool isQuietNote = (melody[thisNote] == 0); int noteDuration = 1000 / durations[thisNote]; // Trigger Active-Low LED effect updateLeds(thisNote, isQuietNote); tone(BUZZER_PIN, melody[thisNote], noteDuration); int pauseBetweenNotes = noteDuration * 1.30; delay(pauseBetweenNotes); noTone(BUZZER_PIN); turnOffBothLeds(); // Drive both pins HIGH to turn off the LEDs } Serial.println(F("Song finished. LEDs reset to standby (HIGH).")); } /** * @brief Logic switch designed for Active-Low configurations (LOW = ON, HIGH = OFF). * @param noteIndex Current position in the melody array. * @param isQuietNote Evaluation flag determining if the note produces no sound. */ void updateLeds(int noteIndex, bool isQuietNote) { if (isQuietNote) { turnOffBothLeds(); return; } // Alternating Active-Low pattern if (noteIndex % 2 == 0) { digitalWrite(LED_A_PIN, LOW); // LED A turns ON digitalWrite(LED_B_PIN, HIGH); // LED B turns OFF } else { digitalWrite(LED_A_PIN, HIGH); // LED A turns OFF digitalWrite(LED_B_PIN, LOW); // LED B turns ON } } /** * @brief Forces both LED control pins to HIGH, turning them OFF in Active-Low logic. */ void turnOffBothLeds() { digitalWrite(LED_A_PIN, HIGH); digitalWrite(LED_B_PIN, HIGH); }

Tutoriales Relacionados

※ NUESTROS MENSAJES

  • No dude en compartir el enlace de este tutorial. Sin embargo, por favor no use nuestro contenido en otros sitios web. Hemos invertido mucho esfuerzo y tiempo en crear el contenido, ¡por favor respete nuestro trabajo!