Arduino UNO R4 - LED - Parpadeo sin retardo

Imagina que el Arduino UNO R4 necesita hacer dos tareas: parpadear un LED y detectar cuándo se presiona un botón. Si usamos la función delay(), el Arduino UNO R4 podría perder algunas pulsaciones del botón. En este tutorial, aprenderemos a hacer parpadear un LED y a vigilar un botón para garantizar que detecte cada pulsación.

A continuación analizaremos tres ejemplos y compararemos sus diferencias.

Arduino UNO R4 Parpadeo de LED

※ Nota:

  • Este método hace más que simplemente hacer parpadear un LED y comprobar el estado de un botón.
  • Este tutorial ofrece información detallada para ayudarte a aprender cómo funciona. Para simplificar, puedes usar Arduino UNO R4 - LED library.

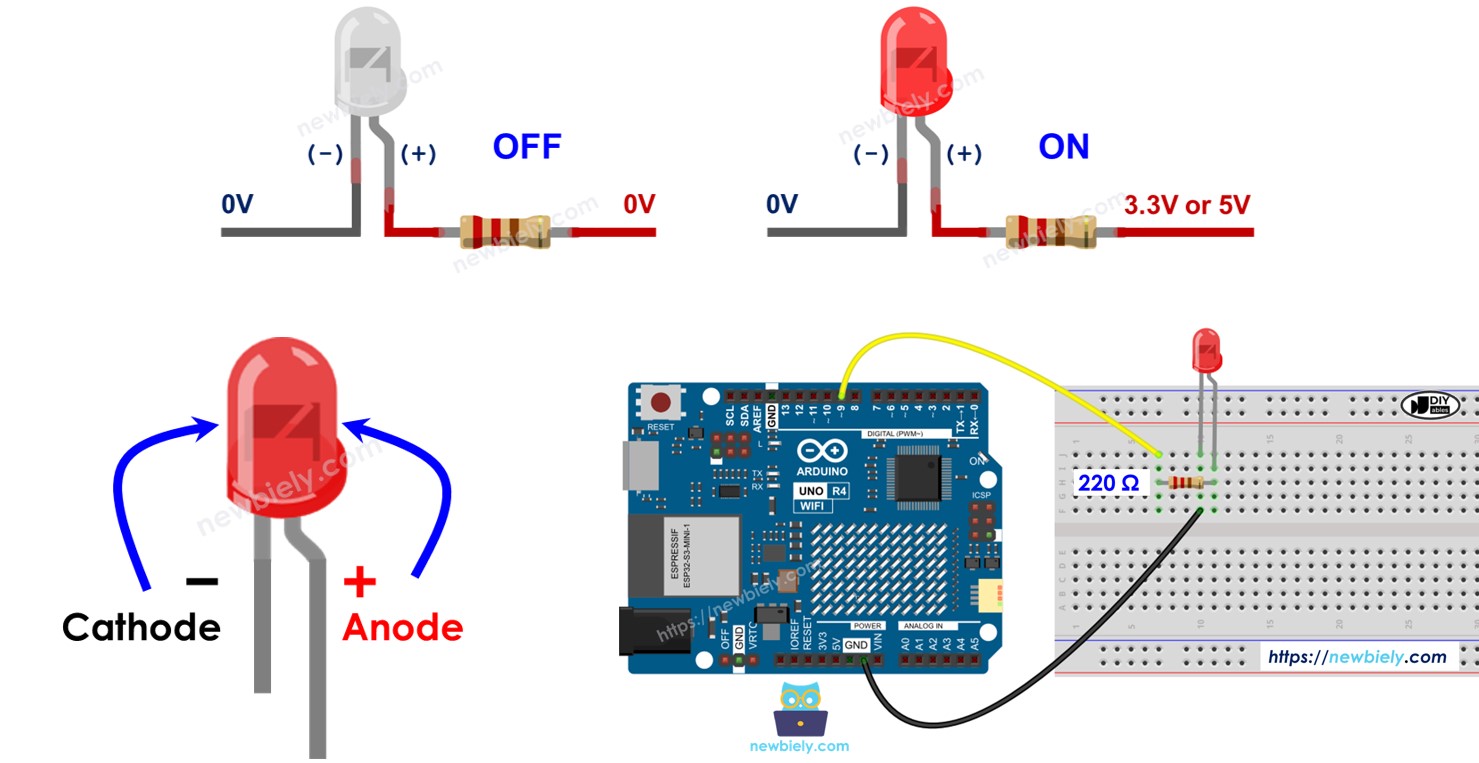
Acerca de LED y Botón

Aprende sobre LED y botón (disposición de pines, cómo funcionan, cómo programarlos, etc.) en estos tutoriales:

Diagrama de Cableado

Diagrama de cableado LED para Arduino UNO R4

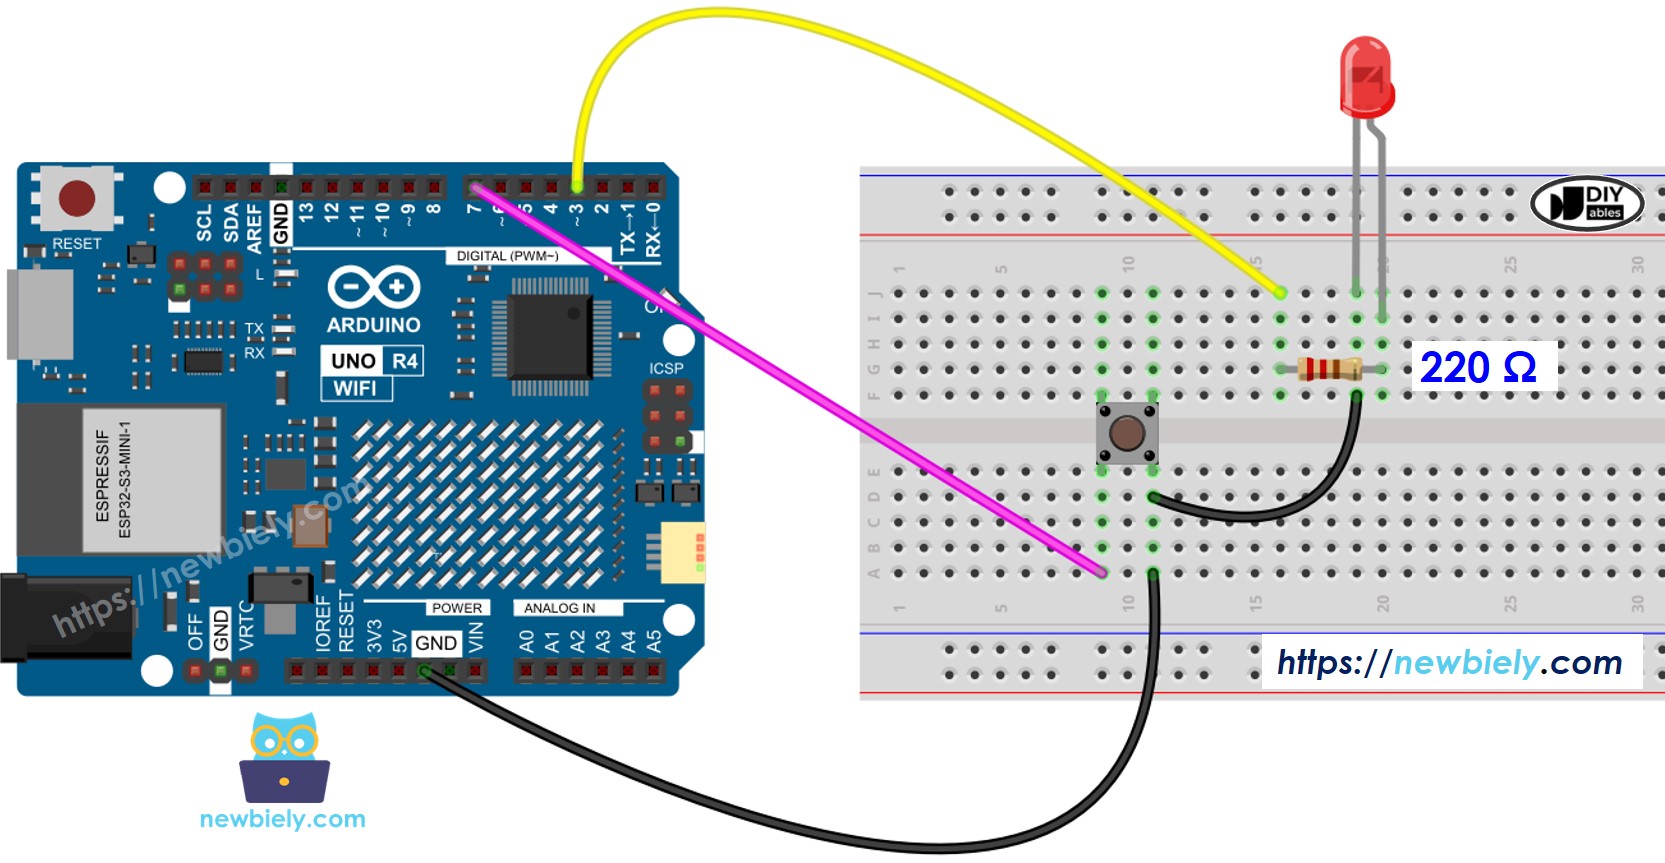
This image is created using Fritzing. Click to enlarge image

Ver La mejor forma de alimentar Arduino Uno R4 y otros componentes.

Código Arduino UNO R4 - Con Retardo

/* * Este código de Arduino UNO R4 fue desarrollado por es.newbiely.com * Este código de Arduino UNO R4 se proporciona al público sin ninguna restricción. * Para tutoriales completos y diagramas de cableado, visite: * https://es.newbiely.com/tutorials/arduino-uno-r4/arduino-uno-r4-blink-led-without-delay */ #define LED_PIN 3 // The Arduino UNO R4 pin connected to the LED #define BUTTON_PIN 7 // The Arduino UNO R4 pin connected to the button #define BLINK_INTERVAL 1000 // interval at which to blink LED (milliseconds) int led_state = LOW; // led_state used to set the LED int prev_button_state = LOW; // will store last time button was updated void setup() { Serial.begin(9600); // set the digital pin as output pinMode(LED_PIN, OUTPUT); // set the digital pin as an input pinMode(BUTTON_PIN, INPUT_PULLUP); } void loop() { // if the LED is off turn it on and vice-versa led_state = (led_state == LOW) ? HIGH : LOW; // set the LED with the led_state of the variable digitalWrite(LED_PIN, led_state); delay(BLINK_INTERVAL); // If button is pressed during this time, Arduino CANNOT detect int button_state = digitalRead(BUTTON_PIN); if (button_state != prev_button_state) { // print out the state of the button: Serial.println(button_state); // save the last state of button prev_button_state = button_state; } // DO OTHER WORKS HERE }

Pasos R\u00e1pidos

Siga estas instrucciones paso a paso:

  • Si es la primera vez que usas Arduino Uno R4 WiFi/Minima, consulta el tutorial sobre configurar el entorno para Arduino Uno R4 WiFi/Minima en el IDE de Arduino.
  • Conecta los componentes según el diagrama proporcionado.
  • Conecta la placa Arduino Uno R4 a tu ordenador usando un cable USB.
  • Inicia el IDE de Arduino en tu ordenador.
  • Selecciona la placa adecuada Arduino Uno R4 (p. ej., Arduino Uno R4 WiFi) y el puerto COM.
  • Copia el código proporcionado y pégalo en el IDE de Arduino.
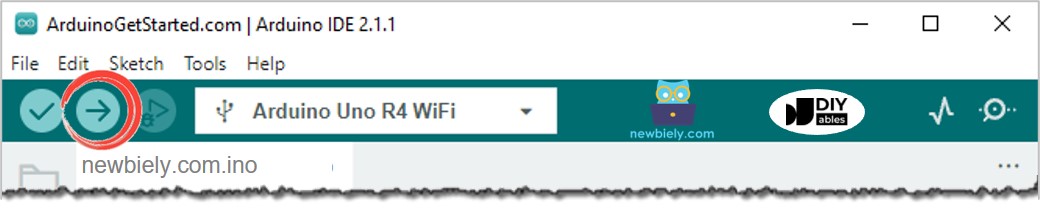
  • Haz clic en el botón Subir en el IDE de Arduino para transferir el código al Arduino UNR R4.
Arduino IDE - Cómo subir código
  • Abre el Monitor Serial.
  • Pulsa el botón cuatro veces.
  • Observa el LED: se enciende y apaga cada segundo.
  • Comprueba la salida en el Monitor Serial.
COM6
Send
1 0
Autoscroll Show timestamp
Clear output
9600 baud  
Newline  
  • Algunas pulsaciones de botones no se mostraron en el Monitor Serial porque el Arduino UNO R4 no puede realizar ninguna tarea durante un retardo. Como resultado, no detecta esas pulsaciones.

Arduino UNO R4 Código - Sin Retraso

/* * Este código de Arduino UNO R4 fue desarrollado por es.newbiely.com * Este código de Arduino UNO R4 se proporciona al público sin ninguna restricción. * Para tutoriales completos y diagramas de cableado, visite: * https://es.newbiely.com/tutorials/arduino-uno-r4/arduino-uno-r4-blink-led-without-delay */ #define LED_PIN 3 // The Arduino UNO R4 pin connected to the LED #define BUTTON_PIN 7 // The Arduino UNO R4 pin connected to the button #define BLINK_INTERVAL 1000 // interval at which to blink LED (milliseconds) int led_state = LOW; // led_state used to set the LED int prev_button_state = LOW; // will store last time button was updated unsigned long prev_millis = 0; // will store last time LED 1 was updated void setup() { Serial.begin(9600); // set the digital pin as output: pinMode(LED_PIN, OUTPUT); // set the digital pin as an input: pinMode(BUTTON_PIN, INPUT_PULLUP); } void loop() { unsigned long current_millis = millis(); // check to see if it's time to blink the LED 1 if (current_millis - prev_millis >= BLINK_INTERVAL) { // if the LED is off turn it on and vice-versa: led_state = (led_state == LOW) ? HIGH : LOW; // set the LED with the led_state of the variable: digitalWrite(LED_PIN, led_state); // save the last time you blinked the LED prev_millis = current_millis; } // check button state's change int button_state = digitalRead(BUTTON_PIN); if (button_state != prev_button_state) { // print out the state of the button: Serial.println(button_state); // save the last state of button prev_button_state = button_state; } // DO OTHER WORKS HERE }

Pasos R\u00e1pidos

Sigue estas instrucciones paso a paso:

  • Carga el código proporcionado en Arduino Uno R4
  • Presiona el botón cuatro veces.
  • Observa el LED: cambia entre ENCENDIDO y APAGADO cada segundo.
  • Revisa la salida en el Monitor Serial.
COM6
Send
1 0 1 0 1 0 1 0
Autoscroll Show timestamp
Clear output
9600 baud  
Newline  
  • Se detectaron todas las pulsaciones de los botones.

Explicación del código

La explicación está en la sección de comentarios del código de Arduino anterior.

Añadir más tareas

Este código hace parpadear dos LEDs en diferentes momentos y también verifica si se pulsa un botón.

/* * Este código de Arduino UNO R4 fue desarrollado por es.newbiely.com * Este código de Arduino UNO R4 se proporciona al público sin ninguna restricción. * Para tutoriales completos y diagramas de cableado, visite: * https://es.newbiely.com/tutorials/arduino-uno-r4/arduino-uno-r4-blink-led-without-delay */ #define LED_PIN_1 3 // The Arduino UNO R4 pin connected to the LED 1 #define LED_PIN_2 4 // The Arduino UNO R4 pin connected to the LED 2 #define BUTTON_PIN 7 // The Arduino UNO R4 pin connected to the button #define BLINK_INTERVAL_1 1000 // interval at which to blink LED 1 (milliseconds) #define BLINK_INTERVAL_2 500 // interval at which to blink LED 2 (milliseconds) int led_state_1 = LOW; // led_state used to set the LED 1 int led_state_2 = LOW; // led_state used to set the LED 2 int prev_button_state = LOW; // will store last time button was updated unsigned long prev_millis_1 = 0; // will store last time LED 1 was updated unsigned long prev_millis_2 = 0; // will store last time LED 2 was updated void setup() { Serial.begin(9600); // set the digital pin as output: pinMode(LED_PIN_1, OUTPUT); pinMode(LED_PIN_2, OUTPUT); // set the digital pin as an input: pinMode(BUTTON_PIN, INPUT_PULLUP); } void loop() { unsigned long current_millis = millis(); // check to see if it's time to blink the LED 1 if (current_millis - prev_millis_1 >= BLINK_INTERVAL_1) { // if the LED is off turn it on and vice-versa: led_state_1 = (led_state_1 == LOW) ? HIGH : LOW; // set the LED with the led_state of the variable: digitalWrite(LED_PIN_1, led_state_1); // save the last time you blinked the LED prev_millis_1 = current_millis; } // check to see if it's time to blink the LED 2 if (current_millis - prev_millis_2 >= BLINK_INTERVAL_2) { // if the LED is off turn it on and vice-versa: led_state_2 = (led_state_2 == LOW) ? HIGH : LOW; // set the LED with the led_state of the variable: digitalWrite(LED_PIN_2, led_state_2); // save the last time you blinked the LED prev_millis_2 = current_millis; } // check button state's change int button_state = digitalRead(BUTTON_PIN); if (button_state != prev_button_state) { // print out the state of the button: Serial.println(button_state); // save the last state of button prev_button_state = button_state; } // DO OTHER WORKS HERE }

Video Tutorial

Estamos considerando crear tutoriales en video. Si considera que los tutoriales en video son importantes, suscríbase a nuestro canal de YouTube para motivarnos a crear los videos.

※ NUESTROS MENSAJES

  • No dude en compartir el enlace de este tutorial. Sin embargo, por favor no use nuestro contenido en otros sitios web. Hemos invertido mucho esfuerzo y tiempo en crear el contenido, ¡por favor respete nuestro trabajo!