Arduino Nano ESP32 - Botón - Antirrebote
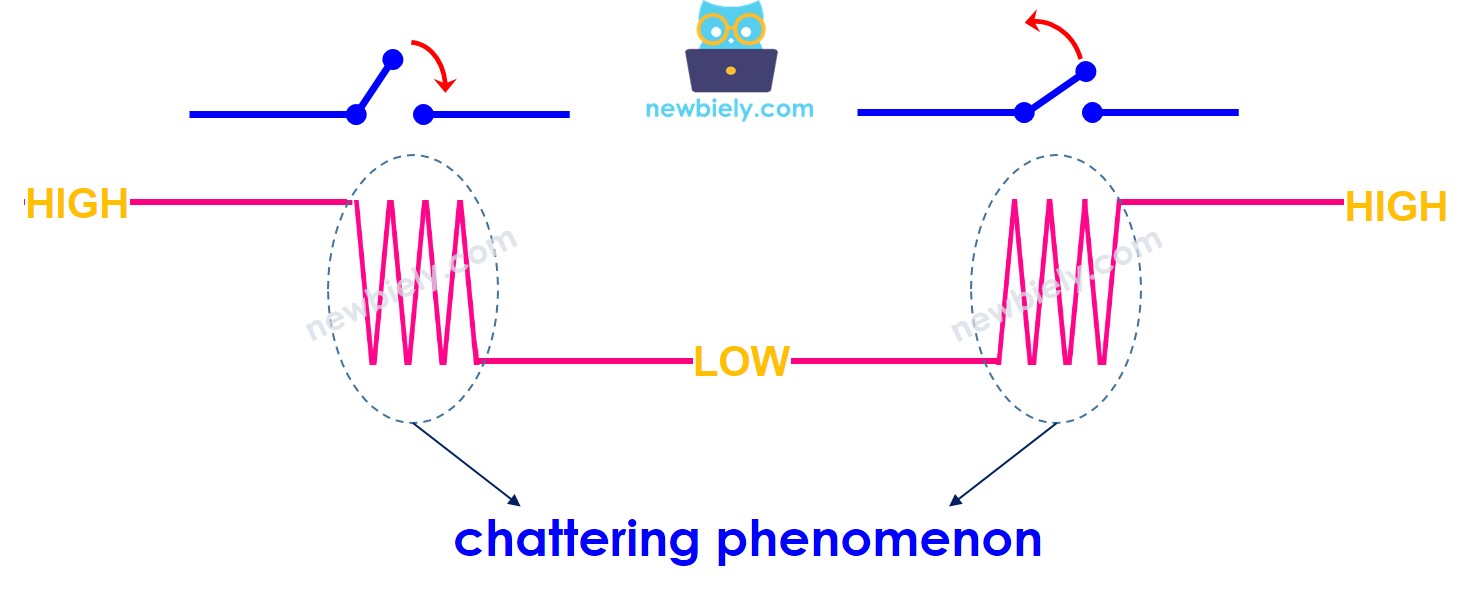
Al pulsar o soltar un botón, o cuando un interruptor se cambia entre ON y OFF, su estado cambia de LOW a HIGH (o de HIGH a LOW) una vez. ¿Es correcto?
⇒ No, no lo es. Eso se debe a que, en el mundo físico, cuando haces una única pulsación sobre un botón, el estado del botón se alterna rápidamente entre LOW y HIGH varias veces en lugar de una vez. Esta es la característica mecánica y física. Este fenómeno recibe el nombre de: chattering. El fenómeno de chattering hace que el MCU (p. ej. ESP32) lea múltiples pulsaciones de botón en respuesta a una única pulsación real. Esto provoca un mal funcionamiento. El proceso para eliminar este fenómeno se llama debounce. Este tutorial muestra cómo hacerlo.
Este tutorial proporciona:
- Cómo implementar el antirrebote para un botón en el código de Arduino Nano ESP32
- Cómo implementar el antirrebote para un botón en el código de Arduino Nano ESP32 usando la librería
- Cómo implementar el antirrebote para varios botones en el código de Arduino Nano ESP32 usando la librería
Hardware Requerido
Or you can buy the following kits:
| 1 | × | DIYables Sensor Kit (30 sensors/displays) | |
| 1 | × | DIYables Sensor Kit (18 sensors/displays) |
Acerca de Botón
Tenemos tutoriales específicos sobre el botón. El tutorial contiene información detallada y instrucciones paso a paso sobre el pinout de hardware, el principio de funcionamiento, el cableado hacia el ESP32 y el código para Arduino Nano ESP32. Obtenga más información sobre ellos en los siguientes enlaces:
Diagrama de Cableado
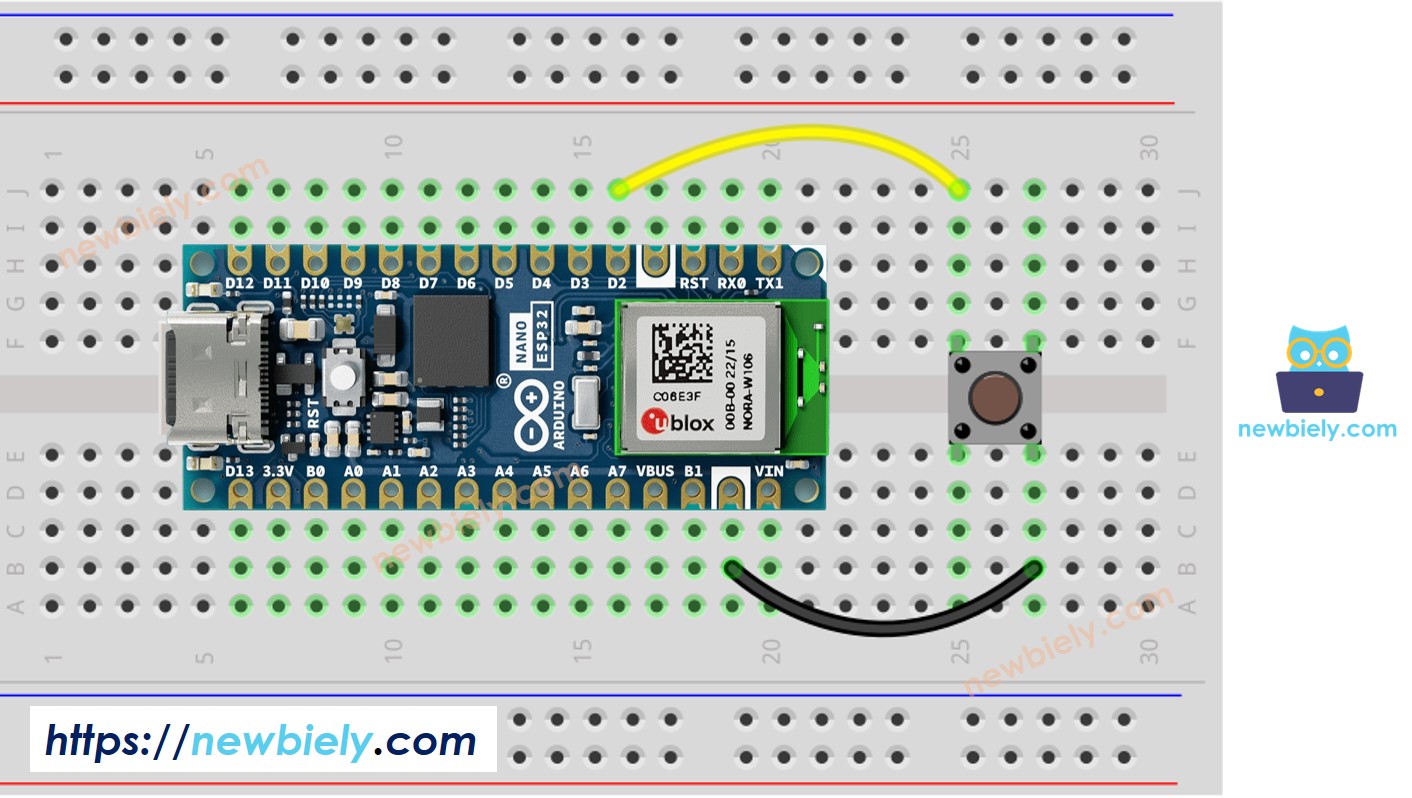
This image is created using Fritzing. Click to enlarge image
Para dejarlo claro, ejecutemos el código de Arduino Nano ESP32 SIN y CON debounce, y comparemos sus resultados
Lectura de un botón sin antirrebote
Pasos R\u00e1pidos
Para empezar con Arduino Nano ESP32, siga estos pasos:
- Si eres nuevo en Arduino Nano ESP32, consulta el tutorial sobre cómo configurar el entorno para Arduino Nano ESP32 en el IDE de Arduino.
- Conecte los componentes según el diagrama proporcionado.
- Conecte la placa Arduino Nano ESP32 a su computadora con un cable USB.
- Inicie el IDE de Arduino en su computadora.
- Seleccione la placa Arduino Nano ESP32 y su puerto COM correspondiente.
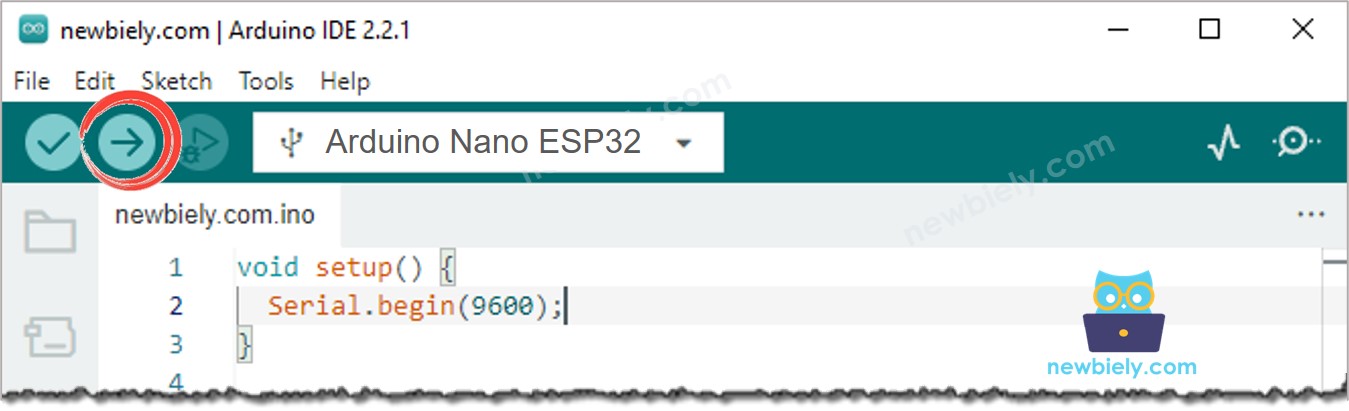
- Copie el código que aparece a continuación y péguelo en el IDE de Arduino.
- Compilar y subir código a la placa Arduino Nano ESP32 haciendo clic en Subir botón en el IDE de Arduino
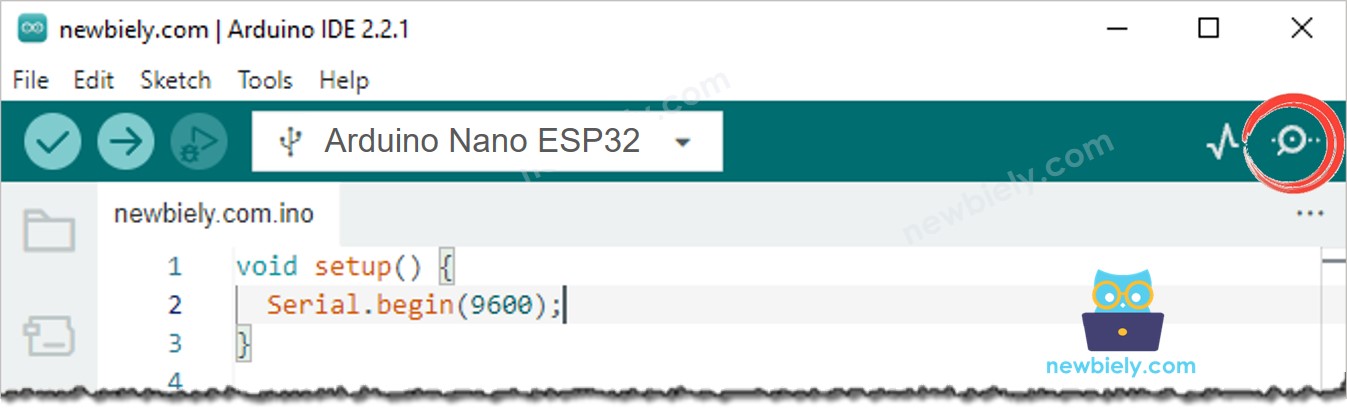
- Abrir el monitor serial en el IDE de Arduino
- Presione el botón una vez, manténgalo presionado durante varios segundos y luego suéltelo.
- Revise el resultado en el Monitor Serial. Se muestra a continuación:
⇒ Como puedes ver, solo hiciste una única pulsación y liberación, pero Arduino Nano ESP32 lee varias pulsaciones y liberaciones.
※ Nota:
El fenómeno de chattering no ocurre todo el tiempo. Si no ocurre, por favor pruebe la prueba anterior varias veces.
Lectura de botón con anti-rebote
Pasos R\u00e1pidos
- Si es la primera vez que utilizas Arduino Nano ESP32, consulta cómo configurar el entorno para Arduino Nano ESP32 en Arduino IDE.
- Copia el código de abajo y pégalo en el Arduino IDE.
- Compilar y subir código a la placa Arduino Nano ESP32 haciendo clic en Subir botón en el IDE de Arduino
- Abrir el Monitor Serial en el IDE de Arduino
- Mantén pulsado el botón durante varios segundos y luego suéltalo.
- Consulta el resultado en el Monitor Serial. Se ve como lo siguiente:
⇒ Como se puede ver, hiciste una pulsación y liberación, y Arduino Nano ESP32 leyó una pulsación y liberación. El rebote ha sido eliminado.
Lo Hicimos Fácil - Código de Antirrebote de Botón para Arduino Nano ESP32 con Biblioteca
Para facilitar a los principiantes, especialmente al gestionar el antirrebote de varios botones, hemos creado una biblioteca de botones llamada ezButton. Puedes informarte sobre la biblioteca ezButton aquí.
Código de antirrebote de botón para Arduino Nano ESP32 para un solo botón
Código de antirrebote de botones para Arduino Nano ESP32 con varios botones
Escribamos código de anti-rebote para tres botones.
El diagrama de cableado
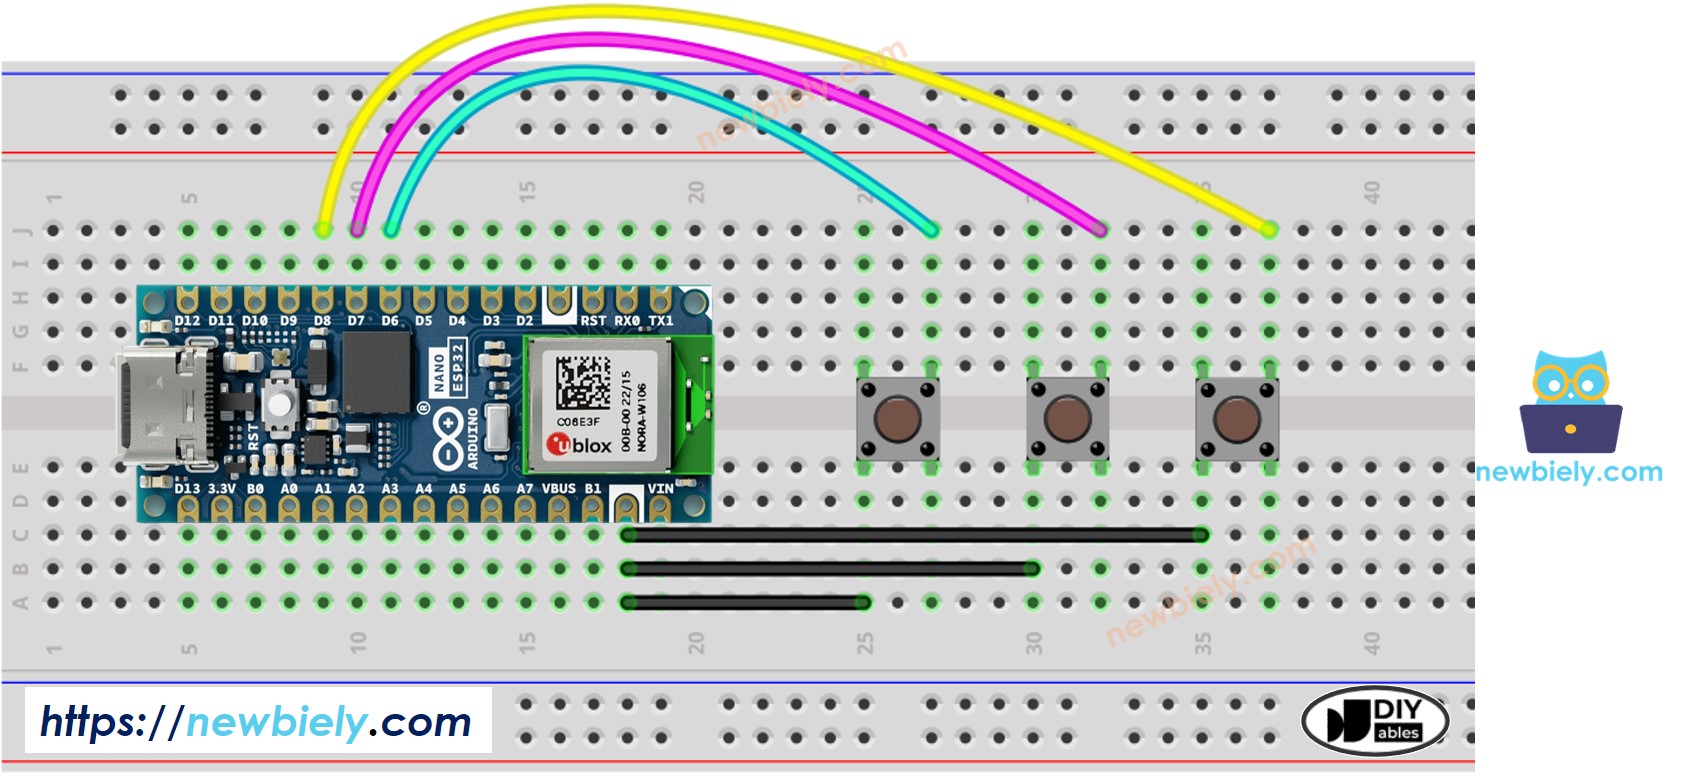
This image is created using Fritzing. Click to enlarge image
Video Tutorial
Estamos considerando crear tutoriales en video. Si considera que los tutoriales en video son importantes, suscríbase a nuestro canal de YouTube para motivarnos a crear los videos.
Conocimientos Adicionales
- DEBOUNCE_TIME depende del hardware. Diferentes dispositivos de hardware pueden usar valores diferentes.
- El rebote también debe aplicarse para interruptor de encendido/apagado, interruptor de límite, interruptor de láminas y sensor táctil ...